This Is Sparta! Enermax Hoplite System Case Review

A hoplite was a heavily armed citizen-soldier of the Ancient Greek city-states. Enermax claims that their new system case is also heavily armed. Let’s find out if this is indeed so.
Enermax has been struggling to enter the market of computer cases. Despite the company’s vast experience in developing power supplies and fans, its system cases have been deficient in design and ergonomics, even though they have generally been eye-catching. Can the new Hoplite model change the company’s fortune or is it just yet another original mediocrity?
Closer Look at Enermax Hoplite
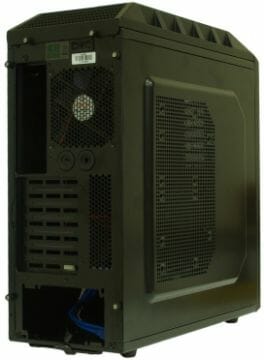
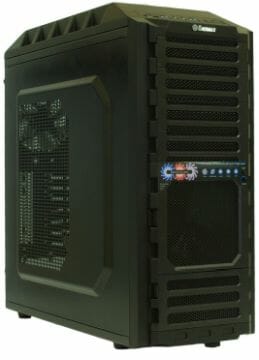
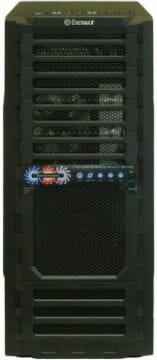
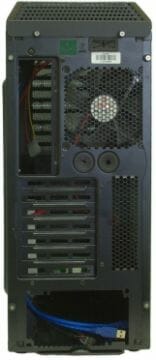
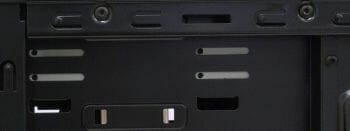
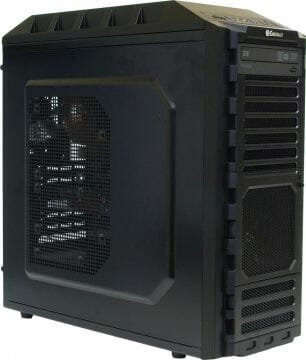
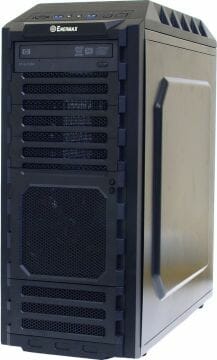
People at Enermax compare the front panel of their Hoplite with scale armor but I think it’s rather a strained simile. The Hoplite’s got a rather conventional meshed front without any distinguishing features except that the fan is placed somewhat higher than usual (the bottom part of the chassis is the location of hot-swap disk bays, hidden behind a decorative faceplate). The Hoplite shares its key traits with those of many other midrange products. It is a medium size, it’s black inside and outside, and its front panel is trimmed with metallic mesh with foam-rubber padding. It has a bottom PSU bay and a lot of fan seats. If you take a look at system cases selling for $100-150, you’ll find twelve such models in each dozen.
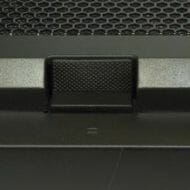
Although not eye-catching, the Hoplite features a nice-looking exterior with straight lines, high quality of manufacture and conveniently placed buttons and connectors. I like the manufacturer’s attention to small details such as the rubber inserts on the front-panel covers for opening them easily.
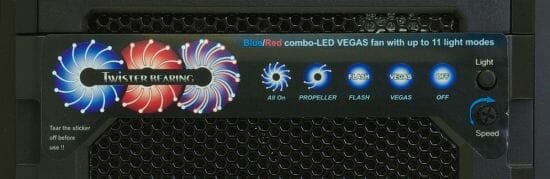
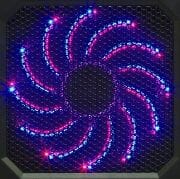
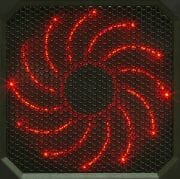
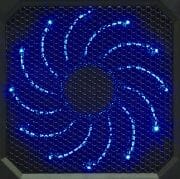
The lack of originality is somewhat made up for by the opportunity to customize the fan’s highlighting. There are a dozen blue and a dozen red LEDs here capable of working in ten different modes. You can also turn the highlighting off altogether. I guess that the first three modes are the most practical. It’s when either the blue or red LEDs or both are glowing constantly. The rest of the modes involve some blinking or rotating, which is rather distracting. If you’ve got fed up with that illumination, you can disable it by switching through the modes until you find the Off one or by keeping the highlight switch pressed for three seconds.
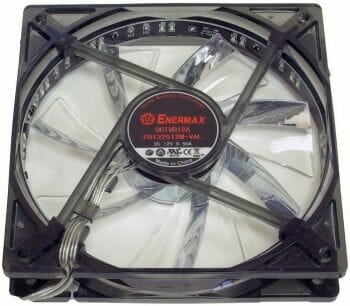
The fan, like the system case itself, bears an Enermax logo. The speed controller can set the fan’s voltage at 6 to 12 volts, the resulting minimum and maximum speeds being 900 and 1800 RPM. The fan is perfectly inaudible until 1300 RPM but becomes rather uncomfortable at the maximum speed.
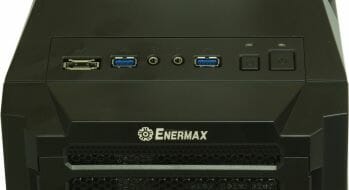
The Hoplite can offer something that most competing products lack. It supports USB 3.0, being in fact the most affordable system case that I know of to do that. It also offers a couple of hot-swap bays and allows to quickly connect an external 2.5- or 3.5-inch SATA disk via a connector on the top panel.
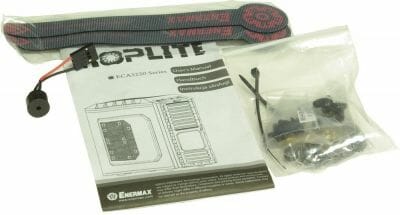
There is a box with accessories and user manual inside the Hoplite. Besides various fasteners, the box contains a pair of plastic single-use straps, a couple of reusable straps with Enermax logo, and a PC speaker.
My first impression about the chassis was rather favorable. Despite the thin metal (0.6 to 0.8 millimeters), the chassis and the side panels are robust. The details of the system case do not wobble when you touch them.
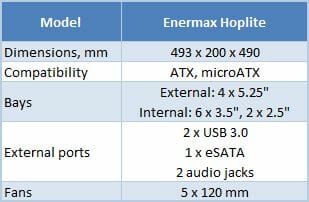
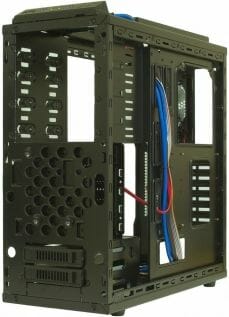
The sufficient rigidity of the side panels is ensured by their having extrusions. The extrusion in the panel behind the mainboard provides more room for cables whereas the one in the other panel is in fact a vent grid and has mounting holes for optional system fans. It can be a single 200mm fan or a pair of 120mm ones.
Another pair of 120 or 140mm fans can be installed in the top part of the case after removing the decorative cover. The installation procedure is easier than, for example, with the Cooler Master 690 II, because you only have to unfasten a couple of thumbscrews and push the cover backwards.
There are also signs of stinginess on the manufacturer’s part. The Hoplite stands on primitive feet made from hard plastic and has single-use expansion-slot brackets (but they do have vent slits). These cheap things look odd considering the lack of such stinginess in the rest of the product.
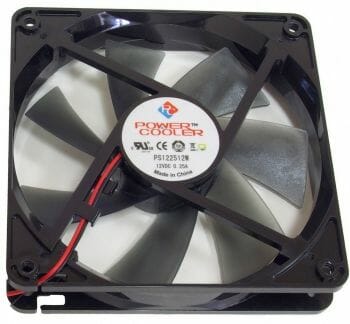
Besides the mentioned expansion-slot brackets, the back panel features a couple of holes for the pipes of a liquid cooling system, an opening for USB 3.0 cables, and an exhaust fan. Oddly enough, the fan is manufactured by Power Cooler rather than by Enermax itself. It is connected to a PATA power plug and rotates at a speed of 1270 RPM. Although not really silent, it does not cause any discomfort.
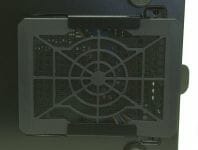
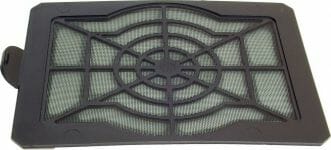
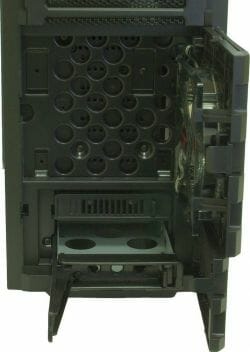
As is typical of today’s system cases, the power supply bay is at the bottom. The PSU is installed with its fan facing down, so the bottom panel is perforated. There is a removable dust filter with a plastic frame there.
System Assembly Inside Enermax Hoplite
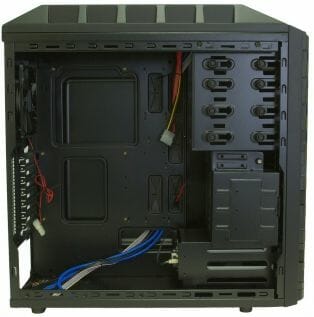
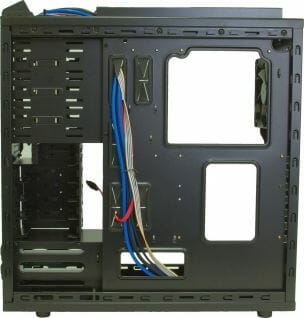
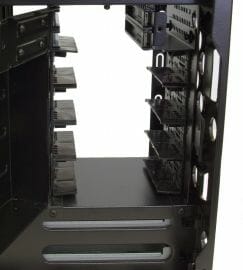
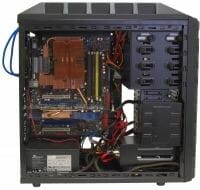
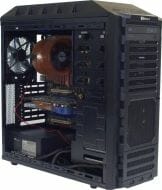
It is easy to assemble a computer in this system case. The fastening mechanisms are effective and handy whereas the numerous openings for putting the cables out of the main compartment help reduce the clutter above the mainboard. The Hoplite is compatible with expansion cards that are up to 315 millimeters long (any modern graphics card, excepting the Radeon HD 5970, is going to fit in). The cable compartment isn’t wide, so the side panel may bulge out a little. On the other hand, the main compartment can accommodate CPU coolers up to 178 millimeters tall (if there are no fans installed on the side panel).
The fastening mechanism for 5.25-inch devices is close to ideal. It doesn’t require a screwdriver but is not exactly screwless. There are slim steel springy plates on one side of each bay that fix the device firmly in its place. On the other side of the bay, there are screws with large plastic heads. The fastening is as secure as if you used screws (you can actually fasten your device with screws from both sides but this is hardly necessary), yet you don’t need any tools. In fact, I only needed my screwdriver three times: to install the mainboard, to fix the graphics card at the back panel and to install a HDD into the hot-swap bay.
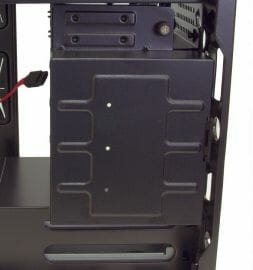
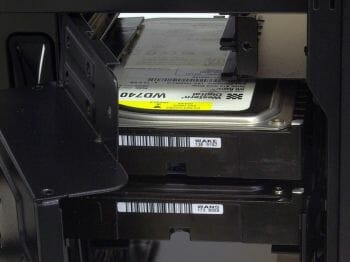
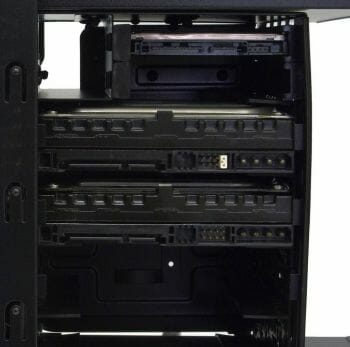
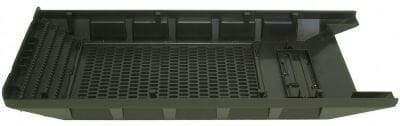
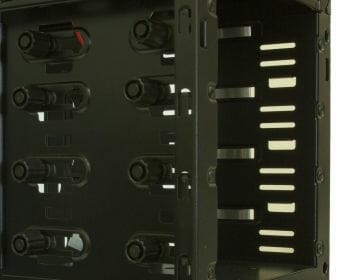
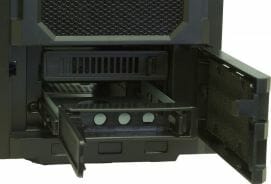
The main disk rack doesn’t call for any tools to be filled with HDDs. There is a thumbscrew holding the rack cover. After you unfasten it and open the rack, you can insert your HDDs or SSDs (there are two bays for 2.5-inch devices above the 3.5-inch bays). Then you just close the cover and fasten the screw. This installation mechanism is easy and fixes the devices properly, but the traditional screw-based fixation is more secure, especially when it comes to HDDs which are squeezed in between two others.
The downside to this solution is that your drives will be very close to each other in the rack, so you may want to avoid filling the rack full in order to ensure proper cooling. There is no protection against noise and vibrations. The metallic cases of HDDs have direct contact with the metal of the bays, so their noise is not suppressed in any way.
Yet it is the cooling of hard disks that’s the most serious problem. There are but a few small vent holes in the HDD rack where it faces the front-panel fan. And there is also a detail of the front panel in between them that blocks a large portion of the air flow, up to one half of it.
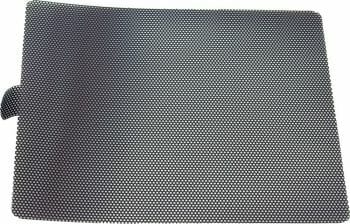
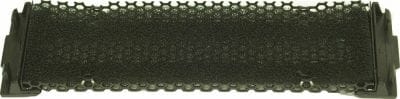
The fan is equipped with a primitive dust filter (a perforated sheet of plastic) which weakens the air flow much more than a woven fine mesh would. This is odd, considering that the power supply bay is equipped with a much better filter. The plastic filter is very easy to take out for cleaning, though.
With so many obstacles on the way of the air from the front fan, it is easy to predict that HDDs are going to be cooled poorly in this system case, especially if the fan speed is set low.
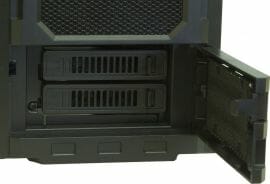
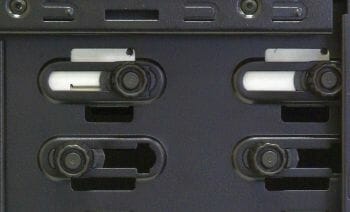
The hot-swap bays are even worse in terms of cooling. They lack any active cooling and can only hope for an occasional gulp of fresh air from the front-panel fan.
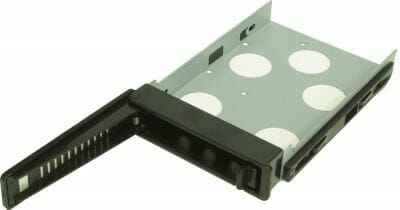
Besides ventilation, the plastic rails in the hot-swap bays are designed poorly. They allow fastening an HDD with only two screws at the sides. The heads of a second pair of screws just won’t fit into the guides inside the bay.
On the other hand, you can use the bottom mounting holes of your HDDs. This method works for both 3.5-inch and 2.5-inch devices.
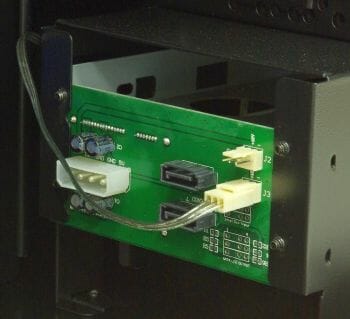
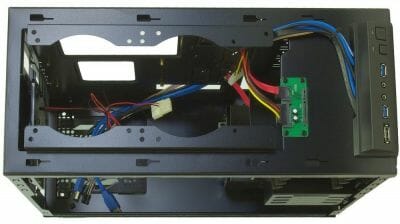
The hot-swap bays have a special card with a 4-pin PATA power connector, a connector for the front-panel fan and a 3-pin connector for some other fan.
The Hoplite’s exhaust fan has a PATA connector but you can power it via this card, too. This seems to be the most reasonable solution, especially if you lack PATA power plugs on your PSU (another PATA plug is necessary for the disk connector on the top panel of the case whereas modern PSUs usually come with only one PATA power cable).
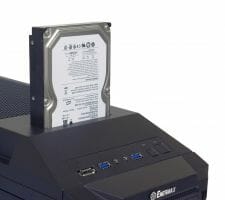
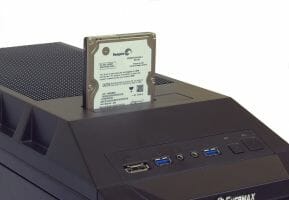
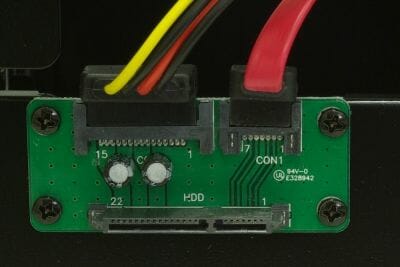
Besides the hot-swap bays, the Hoplite features a quick-connect plug for 2.5- and 3.5-inch disks on its top panel. Unfortunately, there are no guides or anything there, so you have to find the correct position of the disk by touch and may damage the connectors while doing so.
Now, what about the problem of HDD cooling? If I were to modify the Hoplite design, I’d make the vent grid in the front panel larger, like the fan grid in the back panel, and replace the front filter with a woven one like the dust filter in the PSU bay. I’d also make the vent holes in the disk bays larger as well, retaining the required rigidity by making their side panels thicker (these panels bulge out noticeably when HDDs are installed, by the way). I would also replace the top hot-swap bay with a fan for cooling the bottom one. It’s better to have one disk which is cooled properly rather than two which lack cooling.
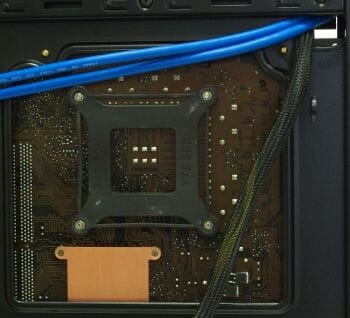
The cutout opposite the CPU socket in the mainboard mounting plate is so large that you can replace your CPU cooler with a back-plate without taking the mainboard out of the system case whatever the mainboard model is. Besides, there is a handy opening for a CPU power cable in the corner.
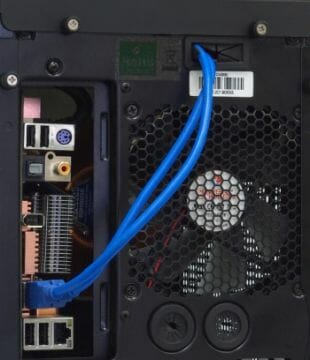
This opening is also necessary for connecting the front-panel USB 3.0 ports. You can use it to route the cables to the mainboard’s back-panel USB ports without cluttering the main compartment of the system case. The USB cables have to be separated from the bunch of cables they are originally attached to. Otherwise, they will prove to be too short.

Testbed and Testing Methodology
We test assembled system cases at a constant ambient temperature of 23°C maintained by an air conditioner. As we assume that most users prefer low-noise computers, we set the speed of the CPU and system fans (those connected to the mainboard’s 3-pin connectors) into Silent mode (the quietest mode in the mainboard’s BIOS). If a system case has its own speed controller, we switch it to minimum speed, too. We do not change the default configuration of air flows determined by system case design.
The following components are installed into the tested system case:
- Intel Core 2 Duo E6850 processor at 3.00 GHz
- Zalman CNPS9500 AT cooler
- ASUS P5E Socket 775 mainboard
- Western Digital Raptor WD740GD hard disk (10,000 RPM, SATA)
- Western Digital Raptor WD740ADFD hard disk (10,000 RPM, SATA)
- Western Digital Raptor WD1500ADFD hard disk (10,000 RPM, SATA)
- Western Digital Raptor WD1500AHFD hard disk (10,000 RPM, SATA)
- 2GB DDR2-800 SDRAM Patriot PDC24G6400LLK
- HIS HD 3870 IceQ3 Turbo H387Q512NP graphics card (Radeon HD 3870)
- Seasonic M12D SS-850EM power supply (850 W)
- Microsoft Windows 7 Home Premium 32-bit SP1
The CPU temperature is read with Core Temp 0.99.8. The temperatures of the HDDs, GPU and mainboard are measured with CPUID Hardware Monitor. The speed of the fans is measured with an optical tachometer Velleman DTO2234. There are the following test modes:
- Idle
- IOMeter (IOMeter’s Access Time test running on all the HDDs to load them fully)
- Linpack (Linpack-based IntelBurnTest 2.5 runs in the hardest stress mode, loading both CPU cores; we measure the peak temperature of the hottest core throughout the duration of the test)
- MSI Kombustor (full-screen mode, DirectX 9 rendering, 1280×1024 with 8x MSAA, Xtreme burn-in)
Every temperature is read after the system has worked for half an hour in the current test mode.
The following table shows the temperatures of the components if the system is assembled without an enclosure (“open testbed”).

The noise level is evaluated subjectively.
Test Results
I used four Raptors for this test but they were all different models. The 150GB HDDs proved to be hotter than their 74GB predecessors on the open testbed.
The HDDs were installed in the following way: three of them occupied the three top seats in the main HDD rack (from top to bottom: Raptor WD740GD (the system disk), Raptor WD740ADFD and Raptor WD1500ADFD). The Raptor WD1500AHFD with a window in its case took its place in the top hot-swap bay.
Considering that the default configuration of the Hoplite leaves a lot of room for improvements in terms of cooling, I performed an additional test after such improvements. In its default configuration the Hoplite passed the tests at the minimum speed of its fans (“min” in the diagrams), but for the additional test I switched the front-panel fan to its full speed and installed a couple of 120mm fans (connected to the mainboard in Silent mode).
To be specific, I put an intake fan Thermalright TR-FDB-12-1300 (about 850 RPM in Silent mode) on the top seat on the side panel and an exhaust fan ExeGate 12025M12B/Blue LED (about 1400 RPM in Silent mode) on the top panel above the CPU socket (“max” in the diagrams).


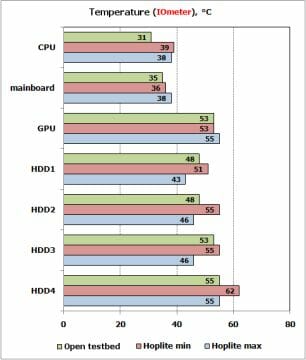
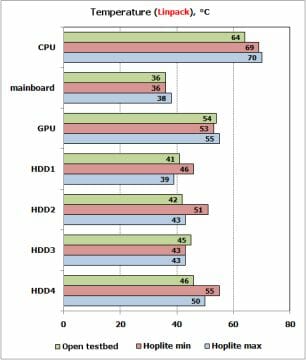
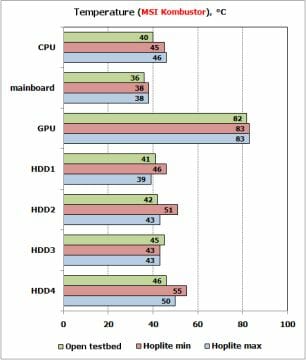
You can note that the additional fans did not improve the cooling of the components. Their temperatures even increased by 1 or 2 degrees (this may be due to the inflow of hot air from the better-cooled HDD bay). So, you shouldn’t bother about installing extra fans into this system case if you’ve got a PC configuration similar to mine.
It’s different with the HDDs. When the front-panel fan is switched from its minimum to maximum speed, the temperature of the HDDs in the main HDD rack declined from a dangerous to a more acceptable level (the temperature is going to be even lower if your HDDs are not as hot as my Raptors). The problem is that the fan is far from comfortable in terms of noisiness at its maximum speed (by the way, the ExeGate fan was much quieter at a similar speed).
Conclusion
The Hoplite from Enermax is an interesting product for reasonable money. Its closest rivals in terms of price are inferior in terms of functionality whereas products with the same functionality cost considerably more.
The downside of this model is its poor cooling of HDDs. At a low speed of the front-panel fan, when the system case is rather quiet (although not exactly silent), this cooling is downright insufficient. When the fan accelerates to its maximum, the temperature of the HDDs lowers to a satisfactory level, but the fan becomes too loud.
So, the Hoplite can be recommended to users who are building a gaming PC around a mainboard with USB 3.0 and do not intend to use too many or too hot HDDs. If used this way, this system case will offer all of its benefits whereas its most serious drawback will be minimized.
Highs:
- Wide expansion opportunities for its dimensions
- Eye-catching highlighting of the front fan with flexible setup options
- Speed control of the two system fans
- Two hot-swap disk bays
- Top-panel connector for 2.5-inch and 3.5-inch disks
- 2.5-inch disk bays available
- Handy fastening mechanisms that do not call for a screwdriver
- Removable dust filters
- CPU cooler with a back-plate can be uninstalled without taking the mainboard out of the system case
- USB 3.0 support
Lows:
- Poor cooling of HDDs in the internal bays
- Rather poor noise insulation
- Cheap elements such as primitive feet and single-use expansion-slot brackets
- Narrow compartment for cables behind the mainboard’s mounting plate
- Does not support USB headers on mainboards
- Does not have open bays for 3.5-inch devices