Asus Sabertooth X79 Mainboard Review

A mainboard with rich accessories bundle, convenient layout, extensive functionality and 5-year warranty cannot be bad by definition. However, it is only a few small steps away from being named an absolute ideal.
We have almost completed our series of reviews of mainboards with the Intel X79 Express chipset and we are going to focus on newer LGA1155 products in the near future. There are still a few LGA2011 mainboards we’d like to tell you about, though. ASUS being the indisputable leader among mainboard makers, we tested their flagship Asus P9X79 Deluxe when the LGA2011 platform had just been released and were pleased with its broad functionality. Later on, the ASUS Rampage IV Formula from the enthusiast-targeted Republic of Gamers series helped us reach our highest overclocking results. Another special mainboard series from ASUS comes under the name of The Ultimate Force or just TUF and features, besides a characteristic appearance, components of such a high quality that ASUS offers an unprecedented 5-year warranty for it. Of course, we couldn’t help checking out ASUS Sabertooth X79.
Packaging and Accessories
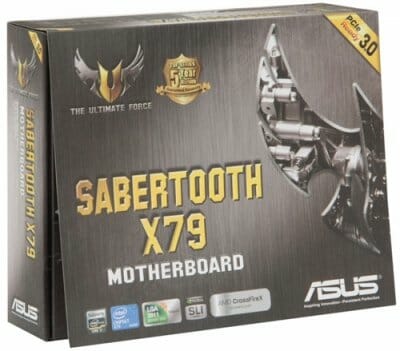
The TUF series is special in many ways, starting from its packaging. Like the rest of the TUF models, the Sabertooth X79 is shipped in a box that looks like metallic. You can find the product’s picture and specs on the back of the box. A brief review of its key features can be seen behind the flip-back cover.
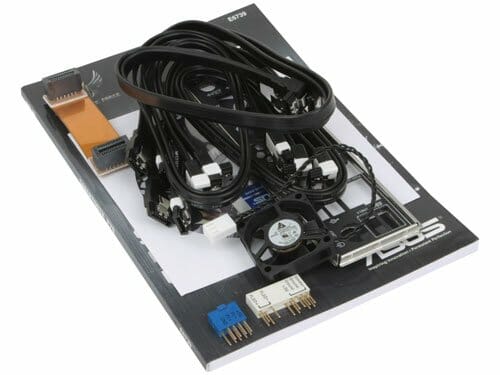
The mainboard is additionally packed into a sturdy box with a plastic cover, the two bottom compartments containing its accessories:
- Six SATA cables with L-shaped metal connector locks. Two pairs designed for SATA 6 Gbps devices (with white inserts in the connectors);
- A flexible bridge for two-way Nvidia SLI graphics configurations;
- “Asus Q-Connector Kit” including adapters for easy connection of the system case front panel buttons and indicators and a USB 2.0 port;
- Additional 35x35x10 mm fan;
- I/O Shield for the back panel;
- User manual;
- Reliability certificate indicating the components testing procedures;
- 5-year warranty information sheet in multiple languages;
- DVD disk with software and drivers;
- “Powered by Asus” and “TUF Inside” sticker.
Design and Features
The ASUS Sabertooth X79 looks highly promising at first sight. Its capabilities are obvious right away thanks to the color coding of the connectors. You don’t have to look up the purpose of each connector in the user manual, on the mainboard’s PCB or at the manufacturer’s website. For example, the mainboard’s expansion capabilities include one PCI, two PCI Express 2.0 x1 and three PCI Express 3.0/2.0 x16 slots. Two of the PCIe 3.0/2.0 x16 slots can work in full-speed mode whereas the third one, at x8 speed. You won’t have any doubts about where to install your graphics cards because the full-speed PCIe x16 slots are beige and the x8 slot is dark-brown.
It is also easy to plug in your disks. The Intel X79 Express chipset provides four SATA 3 Gbit/s ports, so these are obviously the four black-colored connectors. Two pairs of light-gray and brown connectors are placed on both sides of them, but the gray ones have an ASUS SSD Caching sticker. This is the name of a technology similar to Intel Smart Response. It allows using a fast SSD as a cache for a conventional hard disk drive. Thus, it is clear that the two brown connectors are the chipset’s SATA 6 Gbit/s ports whereas the gray SATA 6 Gbit/s connectors are based on the additional Marvell 88SE9128 controller. So, we just plug our disk to one of the brown connectors without further thinking.
One of the advantages of the LGA2011 platform is its support for large amounts of memory. The ASUS Sabertooth X79 puts this advantage at your disposal by offering as many as eight memory slots. The product specs inform us that the mainboard supports up to 64 gigabytes of DDR3 SDRAM in quad-channel mode at frequencies of 1066 to 1866 MHz but the actual range of available frequencies is larger since the mainboard’s BIOS allows setting the memory clock rate in a range of 800 to 2666 MHz. The digital power system DIGI+ includes, among other things, two separate voltage regulators for memory modules, providing flexible setup options for both the CPU and memory.
We’ve mentioned about that the TUF series features high-quality components. However, the 5-year warranty could hardly be ensured without proper cooling. Many mainboards come with but a small heatsink on the CPU voltage regulator which can get very hot at high loads. On the ASUS Sabertooth X79 this heatsink is connected with a heat pipe to an auxiliary heatsink located near the mainboard’s back-panel connectors. You can even equip it with a fan included into the product box. The auxiliary heatsink is close to the mainboard’s I/O shield and the latter has vent holes for the hot air to go outside.
The photo below shows that the back section of the auxiliary heatsink is covered with a red sticker which must be removed prior to using it. There’s a small fan right above it.
The back panel of Asus Sabertooth X79 has the following ports and connectors:
- PS/2 connector for keyboard or mouse;
- Four USB 3.0 ports (blue connectors) implemented via two ASMedia ASM1042, the third controller like that provides an additional internal pin-connector for two more USB 3.0 ports;
- Six USB 2.0 ports, six more are laid out as four onboard pin-connectors;
- IEEE1394 (Firewire) port implemented through VIA VT6315N controller, the second port like that is available as onboard pin-connector;
- eSATA and Power eSATA 6 Gbps ports (green connectors) implemented via ASMedia ASM1061 controller;
- Optical S/PDIF and six analogue audio-jacks provided by eight-channel Realtek ALC892 codec;
- “USB BIOS Flashback” button;
- A local network port (network adapter is built on Gigabit Intel 82579V network controller).
Now we want to once again praise the extremely helpful firmware update feature called USB BIOS Flashback. All you need to do is connect a USB flash drive with a new BIOS version to the dedicated USB port at the back panel (it’s colored white), press a dedicated button and wait. You don’t even have to assemble your PC completely because this technology should work even if you don’t have a CPU or memory installed. All it needs is power for the mainboard. You can check out the official website for details on this USB BIOS Flashback feature.
Like other ASUS mainboards, the new Sabertooth X79 uses conveniently wide Q-Slot latches on the graphics card slots and one-sided Q-DIMM latches on the memory slots. Besides the USB BIOS Flashback button on the back panel, there is a MemOK! button there that allows the mainboard to successfully boot up in case of memory-related problems. The Q-LED indicators will help you quickly determine at what stage the boot-up process has stalled. The availability of two connectors for CPU cooler fans is an advantage, although only 4-pin fans can be regulated. For example, ASRock mainboards can regulate any fans as one of these connectors is 3-pin on them.
We liked that our large CPU cooler Noctua NH-D14 didn’t prevent us from installing our graphics card into the top PCI Express 3.0/2.0 x16 slot. We had to use the farthest slot on every mainboard from ASRock and Gigabyte we’ve tested because the CPU socket and the first graphics slot were too close to each other on them. So, the Sabertooth X79 seems to be perfect from every side. Indeed, we like everything about it, except for the fans in its cooling system.
We mean the Intel X79 Express chipset doesn’t really need that much cooling. So when we noticed this kind of active cooling in our review of the ASRock X79 Extreme6/GB mainboard, we wanted to put it down as a downside but then we found out that the fan was a mere decoration there. The mainboard’s aggressive speed regulation system didn’t even allow that fan to start up under normal conditions. There was no noise and no wear, so this downside was eventually struck off of our list of that mainboard’s lows.
As for the Sabertooth X79, its fan starts out at 3200 RPM and accelerates to 4000-4300 RPM when the CPU is under load, although the chipset’s temperature only increases from 37 to 38°C. The speed of the chipset fan seems to depend on the CPU temperature rather than on the temperature of the chipset itself. Well, the mainboard has one more advantage we haven’t yet mentioned. It’s TUF Thermal Radar technology.
As opposed to ordinary mainboards which can only monitor system and CPU temperatures, the Sabertooth X79 has extra sensors in different spots of its PCB. The TUF Thermal Radar technology lets you set the speed of any fan basing on a particular sensor or manually. It means we can probably change the speed of the chipset fan to reduce its noise and wear. The small fan wasn’t very loud, actually, because the mainboard cannot regulate the speed of 3-pin CPU fans and the two fans of our Noctua NH-D14 cooler, 120 and 140 millimeters in diameter, drowned out every other noise source when working at their full speed. But rotating at 3000-4000 RPM, the chipset fan is going to wear down eventually and it can’t be replaced easily due to its nonstandard form-factor.
It seems that we can solve this problem by disabling or halting the chipset fan. It didn’t rotate on the ASRock mainboards which had a normal temperature of the chipset, so why can’t we do the same with our Sabertooth X79? Well, because it uses one more exclusive technology.
We first discussed the TUF Thermal Armor technology in our Sabertooth X67 review. That mainboard was wrapped into a plastic case which was supposed to separate mainboard components from such hot devices as a graphics card or CPU. We had some doubts about its efficiency then and we still have them now. For example, the ASUS P9X79 Deluxe uses an additional heatsink connected to the main one with a heat pipe in order to cool the hot components of the CPU voltage regulator. Both heatsinks are open and cooled by the system and CPU fans. This doesn’t work on the Sabertooth X79 because the additional heatsink is separated from the air flow by the Thermal Armor casing. It can only be cooled by its dedicated small fan.
We don’t have any doubts about the efficiency of the TUF Thermal Armor technology when it comes to cooling the Intel X79 Express chipset. The mainboard’s chipset heatsink is not just a piece of aluminum with a fan on top, but a rather sophisticated composite thing. The heatsink itself is small. It is in fact a heat-spreader with a plastic cap that directs the air flow from the fan. This design is efficient but only meant for active cooling. If the fan is turned off, the small heatsink covered with a cap will not be able to keep the temperature low and the chipset will overheat.
So, we can’t disable the chipset fan. We have to wait for it to get noisy or even fail altogether. There’s no doubt that’s going to happen sooner or later, considering its high rotation speed. What to do then? Will ASUS send fans to users at their request or will they have to bring the whole mainboard to a service center?
As for the fan on the CPU voltage regulator, it has a higher start speed of 4000-4300 RPM and accelerated to 7000-7200 RPM during our CPU stability tests. Yes, the CPU cooler’s fans are louder than everything else inside the system case at full speed, but this little monster of a fan just makes itself heard anyway. As opposed to the chipset fan, we have no complaints about this one. The heatsinks get very hot and they do need proper cooling, so we can put up with that. And when this fan eventually gets noisier than usual or fails, we can easily replace it…
Well, we thought it could be replaced easily, but that’s not really so. The fan has a rare form-factor of 35x35x10 millimeters. It’s hard to tell why ASUS didn’t install a standard 40mm fan which could be replaced easily.
We’ve discussed the cooling system of the ASUS Sabertooth X79 at such length not only to clarify our point of view but also because it’s virtually the only noticeable downside of the whole mainboard. The sophisticated chipset heatsink is surely efficient and it makes the active cooling redundant, especially as replacing the fan is going to be problematic. And the cooling system of the CPU voltage regulator would be perfect if it were not for yet another nonstandard fan which can’t be replaced easily, either.
We guess the Sabertooth X79 would be ideal if it used a conventional aluminum heatsink for the chipset and a standard 40x40x10mm fan to cool the auxiliary heatsink on the CPU voltage regulator.
All the technical specifications of the Asus Sabertooth X79 mainboard are summed up in the following table:
BIOS Functionality
We’ve already seen ASUS EFI BIOS, a very successful implementation of the UEFI standard (Unified Extensible Firmware Interface), in our previous reviews of ASUS mainboards. By default the BIOS opens up in EZ Mode which gives you a lot of information but offers almost no user-defined options. You can only learn some basic system specs and monitor a few parameters, choose between high-performance and energy-saving operation modes, and define the boot device order by dragging the icons with your mouse.
Recently the option of quickly leaving the limited EZ Mode has been added: you can press F3 and select the BIOS section you need from the list.
You can press F3 every time you enter the BIOS (by the way, the hot button works in the other BIOS sections as well), yet it may be easier to make the BIOS open in Advanced Mode. In this case you will see the familiar Main section where you can see basic system information, change the interface language and set up date and time.
Most of the overclocking-related options are collected in the Ai Tweaker section. In the main screen you can change frequencies, multipliers and voltages. You don’t have to move to the monitoring section to check out the current levels of voltages as they are shown right next to each voltage-affecting parameter.
Some of the setup options are available in individual subsections in order not to clutter the main section. One such subsection contains memory timings, for example. The OCTuner parameter looks like a subsection but is actually used to overclock the computer automatically. If you want to quickly overclock your CPU, you can just press F6 to evoke the ASUS Ratio Boost feature. It increases the CPU frequency multiplier to the maximum value permitted by the Intel Turbo Boost technology while keeping all the power-saving technologies up and running. There is a separate page for memory timings. There are a lot of options here, yet they are quite easy to use. You can see all the timings set up by the mainboard for each of the four memory channels. You can adjust some of them, leaving the others at their defaults.
There are a lot of new options which are mostly related to power supply and the new digital power system called DIGI+. You can control ASUS’s exclusive power-saving technologies right here. One of them allows changing the number of active phases in the CPU voltage regulator depending on load. CPU Load Line Calibration can now be not only enabled or disabled but also set to a certain level (it helps counteract the voltage drop occurring on the CPU under load).
The CPU Performance Settings help you fine-tune the Turbo technology but the mainboard sets them correctly by default depending on CPU parameters you have selected.
The options of the Advanced section should be familiar to you and their names are self-descriptive.
The CPU Configuration subsection reports you basic information about the CPU and allows to control some CPU-related technologies.
Power-saving technologies can be managed on the CPU Power Management Configuration page.
The Monitor section is where you can check out the current temperatures, voltages and fan speeds. You can select the speed regulation mode for any of the eight fans supported by the mainboard: Standard, Silent or Turbo. You can also set them up manually.
System startup options can be found in the Boot section. It’s here that you can change the start mode from EZ to Advanced.
Next goes the Tools section with four subsections.
The integrated BIOS update tool called EZ Flash 2 is perhaps the handiest and most functional among the utilities of its kind. It has changed with the transition to EFI BIOS. For example, the current firmware version is saved into the root directory of the connected drive by default. It could be saved into any folder previously.
Like on mainboards from many other brands, we can now see the information written into the memory modules’ SPD unit.
ASUS mainboards allow you to store and load up to eight profiles with full BIOS settings. Each profile can be given a descriptive name.
The Drive Xpert section can help you quickly and easily build a RAID array out of two disks connected to the onboard controller Marvell 88SE9128.
The Exit section goes last. It allows you to save your changes, load default BIOS settings, or switch back to EZ Mode.
The new Asus EFI BIOS is an excellent example of how it is possible to extend the functionality of the old BIOS without losing any of the existing convenience. In our case the new BIOS’ main advantage may be considered a sort of a drawback: too many adjustable parameters and settings could be quite overwhelming in the beginning. However, the settings in default mode are mostly optimal, so you will get a perfectly operational system without really changing anything. We were very pleased to see that the functionality was expanded. Namely, we like the new F3 hotkey and the options for individual configuring of cooling fans. Unfortunately, some minor issues, which we already pointed out a few months ago during our first encounter with ASUS’s EFI BIOS haven’t been corrected yet. The disabling of the startup image cannot be saved in a profile, the EZ Flash 2 utility saves the current BIOS version only in the root directory of the drive instead of any location of your choice. In case of excessive overclocking when the mainboard cannot start, you don’t need to reset all the parameters, because the board will automatically reboot in safe mode, which is extremely convenient. In this case all settings remain intact, except for EPU Power Saving Mode, which gets disabled if you have enabled it previously. However, these are not problems but more of minor issues that pose minimal inconvenience and do not interfere with the system configuring or overclocking.
Testbed Configuration
We carried out our tests on a testbed that included the following components:
- Asus Sabertooth X79 mainboard (BIOS version 0906);
- Intel Core i7-3930K CPU (3.2-3.8 GHz, Sandy Bridge-E rev.C2, 32nm, 130 W, LGA 2011);
- 4 x 4 GB DDR3 SDRAM Corsair Vengeance CMZ16GX3M4X1866C9R (16 GB, 1866 MHz, 9-10-9-27 timings, 1.5 V voltage);
- MSI N570GTX-M2D12D5/OC graphics card (Nvidia GeForce GTX 570, GF110, 40 nm, 786/4200 MHz, 320-bit GDDR5 1280 MB);
- Crucial m4 SSD (CT256M4SSD2, 256 GB, SATA 6 Gbps);
- Noctua NH-D14 CPU cooler;
- ARCTIC MX-2 thermal interface;
- CoolerMaster RealPower M850 PSU (RS-850-ESBA);
- Open testbed built using Antec Skeleton system case.
We used Microsoft Windows 7 Ultimate SP1 64 bit (Microsoft Windows, Version 6.1, Build 7601: Service Pack 1) operating system, Intel Chipset Software Installation Utility version 9.3.0.1019, Nvidia GeForce Driver 285.62 graphics card driver.
Operational and Overclocking Specifics
We’ve mentioned the handy color coding of the mainboard’s connectors in the description above. And we’ve also noticed that the user-friendly PCB design allows installing even such a large cooler as Noctua NH-D14 without any conflicts with graphics cards. That’s why we had no problems assembling our test configuration on the Sabertooth X79. The mainboard worked correctly at its default settings. When starting up, it shows a welcome picture that reminds you about pressing Del for entering UEFI BIOS but there are no tips about the other hotkeys.
There’s no point in turning the startup picture off because, unlike many other mainboards, including ASUS’s Republic of Gamers series, the Sabertooth X79 cannot correctly report the current CPU clock rate but only shows the base clock rate without counting Intel Turbo Boost in.
Having made sure the mainboard had no problems in the default mode, we tried to overclock it. Unfortunately, it couldn’t repeat the highest overclocking result of 4.7 GHz we previously reached with the ASUS Rampage IV Formula. The Sabertooth X79 should be given credit, however, for being able to work at such settings for a while and even pass some tests, as opposed to most other mainboards which couldn’t even boost the OS. It wasn’t absolutely stable, so we lowered the CPU clock rate to 4.6 GHz and enjoyed stability in every application. This is a mere 100 MHz lower than our highest result and higher than the results of most other LGA2011 mainboards we’ve tested so far. The memory frequency could be increased to 1866 MHz.
By the way, we noticed one more error with the BIOS profiles. We’ve mentioned in our earlier reviews that ASUS mainboards do not save your disabling the startup picture in them. Now we’ve found another setting which is not saved in this manner. Overclocking memory modules, we use their XMP data but replace the timings of 9-10-9-27-2T that most mainboards select by default with 9-10-9-27-1T. However, it turned out that the XMP parameters have higher priority than those that you save into BIOS profiles. After restoring a profile, we had memory timings of 9-10-9-27-2T rather than 9-10-9-27-1T.
We always overclock mainboards in such a way that they could be used for a prolonged period of time in this mode. We do not try to make our life easier by disabling any of the mainboard features, such as onboard controllers, for example. We also try to keep the CPU’s power-saving technologies up and running normally to the best of our ability. And this time all power-saving technologies remained up and running even in overclocked mode lowering the CPU voltage and frequency multiplier in idle mode.
Performance Comparison
As usual, we are going to compare the mainboards speeds in two different modes: in nominal mode and during CPU and memory overclocking. The first mode is interesting because it shows how well the mainboards work with their default settings. It is a known fact that most users do not fine-tune their systems, they simply choose the optimal BIOS settings and do nothing else. That is why we run a round of tests almost without interfering in any way with the default mainboard settings. For comparison purposes we will also include the results of the previously reviewed ASRock Fatal1ty X79 Professional, ASRock X79 Extreme6/GB, Asus Rampage IV Formula, Gigabyte GA-X79-UD3 and MSI Big Bang-XPower II mainboards. The results on the diagrams are sorted out in descending order and Asus Sabertooth X79 is marked with a darker color for your convenience.
We used Cinebench 11.5. All tests were run five times and the average result of the five runs was taken for the performance charts. We have been using Fritz Chess Benchmark utility for a long time already and it proved very illustrative. It generated repeated results, the performance in it is scales perfectly depending on the number of involved computational threads.
A small video in x264 HD Benchmark 4.0 is encoded in two passes and then the entire process is repeated four times. The average results of the second pass are displayed on the following diagram:
We measured the performance in Adobe Photoshop using our own benchmark made from Retouch Artists Photoshop Speed Test that has been creatively modified. It includes typical editing of four 10-megapixel images from a digital photo camera.
In the archiving test a 1 GB file is compressed using LZMA2 algorithms, while other compression settings remain at defaults.
Like in the data compression test, the faster 16 million of Pi digits are calculated, the better. This is the only benchmark where the number of processor cores doesn’t really matter, because it creates single-threaded load.
Since we do not overclock graphics in our mainboard reviews, the next diagram shows only CPU tests from the 3DMark11 – Physics Score. This score is obtained in a special physics test that emulates the behavior of a complex gaming system working with numerous objects
We use FC2 Benchmark Tool to go over Ranch Small map ten times in 1920×1080 resolution with high image quality settings in DirectX 10.
Resident Evil 5 game also has a built-in performance test. Its peculiarity is that it can really take advantage of multi-core processor architecture. The tests were run in DirectX 10 in 1920×1080 resolution with high image quality settings. The average of five test runs was taken for further analysis:
We see a great illustration of the known fact that related mainboards working in identical testing conditions demonstrate about the same performance. Only in Resident Evil 5 Asus Sabertooth X79 mainboard demonstrated lower results than what we had expected.
The performance results in overclocked mode are summed up in the following table:
In overclocked mode Asus Sabertooth X79 quite expectedly takes the second place, right after Asus Rampage IV Formula, which fully corresponds to the CPU overclocking results. In fact, Intel DX79SI mainboard could be the next best candidate for this place, as it also overclocked our test processor to 4.6 GHz, but it is almost always behind Asus.
Power Consumption
We performed our power consumption measurements using an Extech Power Analyzer 380803. This device is connected before the PSU and measures the power draw of the entire system (without the monitor), including the power loss that occurs in the PSU itself. In the idle mode we start the system up and wait until it stops accessing the hard disk. Then we use LinX to load the CPU. For a more illustrative picture there are graphs that show how the computer power consumption grows up depending on the number of active execution threads in LinX (both at the default and overclocked system settings). The mainboards on the diagrams are sorted out in alphabetical order.
We often point out that on many mainboards certain power-saving technologies are disabled by default. Therefore, besides power consumption in nominal mode with all default settings, we also measured the power consumption of test systems with all power-saving technologies (including the proprietary ones) manually enabled. The difference between these two tests is usually quite obvious, and naturally, this measure does lower the power consumption. The same was true this time, too: the board became more energy-efficient under any operational load. However, the paradox is that in idle mode the power consumption has slightly increased! It seems like one of the power-saving settings doesn’t work correctly after all.
As a result, if we compare the power consumption readings taken off tested mainboards in nominal mode, Asus Sabertooth X79 board doesn’t really stand out against the others’ background demonstrating average power consumption level (without taking into account the indisputable winner – the Intel board).
However, if we enable all existing power-saving technologies then the power consumption of most mainboards will drop. However, Intel mainboard is so incredibly energy-efficient right from the start that it remains an unattainable winner, and the most energy-hungry product under maximum operational load will be the Gigabyte one, which proprietary power-saving technologies do not work. However, as for the power consumption in idle mode, Asus Sabertooth X79 seems to be consuming more energy than the others: its power consumption didn’t go down, but, on the contrary, increased.
During overclocking the most energy-efficient solution will be MSI Big Bang-XPower II, because it overclocked the processor without increasing its core voltage. The resulting CPU frequency on this mainboard is the lowest of all that is why it is not surprising that its power consumption in overclocked mode is also the lowest. As for Asus Sabertooth X79, its power consumption in idle mode is again standing out, although this time the difference from other testing participants is minimal.
Conclusion
Summing up our experience with the ASUS Sabertooth X79 mainboard, we don’t want to recall the few minor shortcomings of this product we’ve noticed. They are mostly limited to BIOS options and are typical of many other ASUS mainboards. The overall impression from this mainboard is highly positive, so we want to talk about its highs rather than lows: the high-quality packaging, rich accessories, user-friendly design, broad functionality, and the special 5-year warranty of the TUF series. We didn’t have any problems running this mainboard and it turned out to be good for CPU and memory overclocking.
In fact, the single serious downside we can find about it is that its cooling system employs nonstandard fans. It’s going to be difficult to replace them if you need to. On the other hand, these small fans may last the whole service life of the Sabertooth X79 – the full five years or more – without giving you any hard time.