How to Export, Import, Rename or Delete Power Plans

Power plans are a big part of latency and FPS tweaking and most custom Windows ISOs come with unique power plans. Unlike more advanced tweaks importing a power plan and using it is quite simple and does not take special technical know-how.
If you are going to test multiple power plans to see which one results in the best FPS and latency on your machine, knowing how to import, export, rename, and delete them will make your job much easier.
Importing a Power Plan
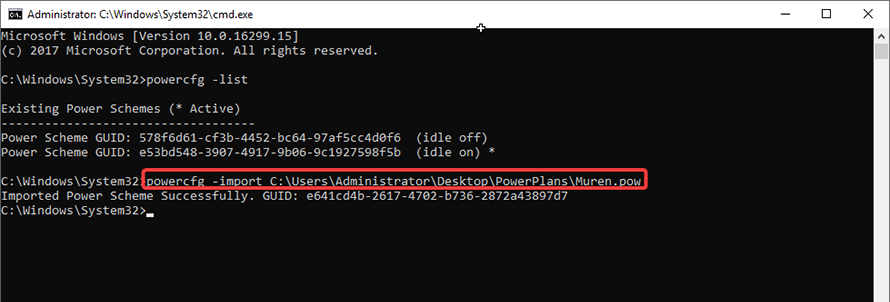
The easiest way to import a power plan is to simply double click the .pow file and it will automatically show up in your power settings menu. If you however want to be a bit more technical you can also use CMD to import any power plan you have downloaded to your machine.
- Open CMD in Admin mode by right-clicking it
- Type in powercfg -import and then the full file path and name
- Ex: powercfg -import C:\Users\Administrator\Desktop\PowerPlans\Muren.pow
Exporting a Power Plan
To export a power plan in case you want to share it with someone else you have to follow similar steps.
- Open CMD in Admin mode
- Use the powercfg -list command to see all available power plans on your machine
- Use powercfg -export and the full path of where you want it to go\filename.pow and the file GUID
- Ex: powercfg -export C:\Users\Administrator\Desktop\power\backup.pow 578f6d61-cf3b-4452-bc64-97af5cc4d0f6
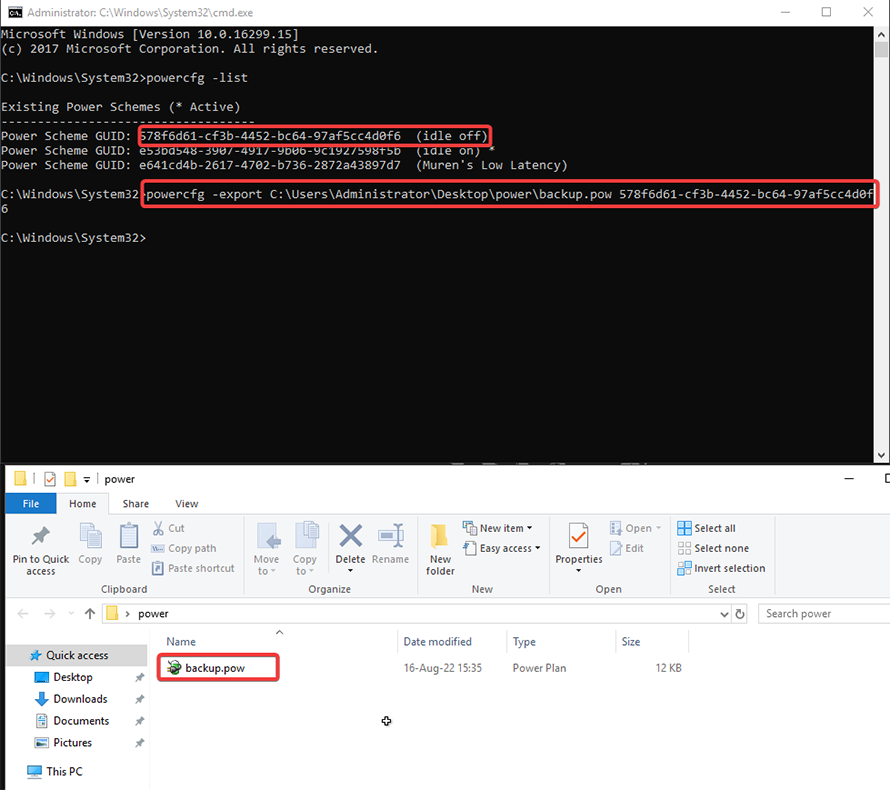
With this, I have exported and created a backup of my power plan that forces the idle state of the CPU off in a folder on my desktop.
Renaming a Power Plan
When dealing with a bunch of power plans it is sometimes hard to keep track of all of their names so it is easier to rename them to something simple like “1, 2, 3, etc”. To do this you need to follow a couple of steps.
- Open CMD in Admin mode
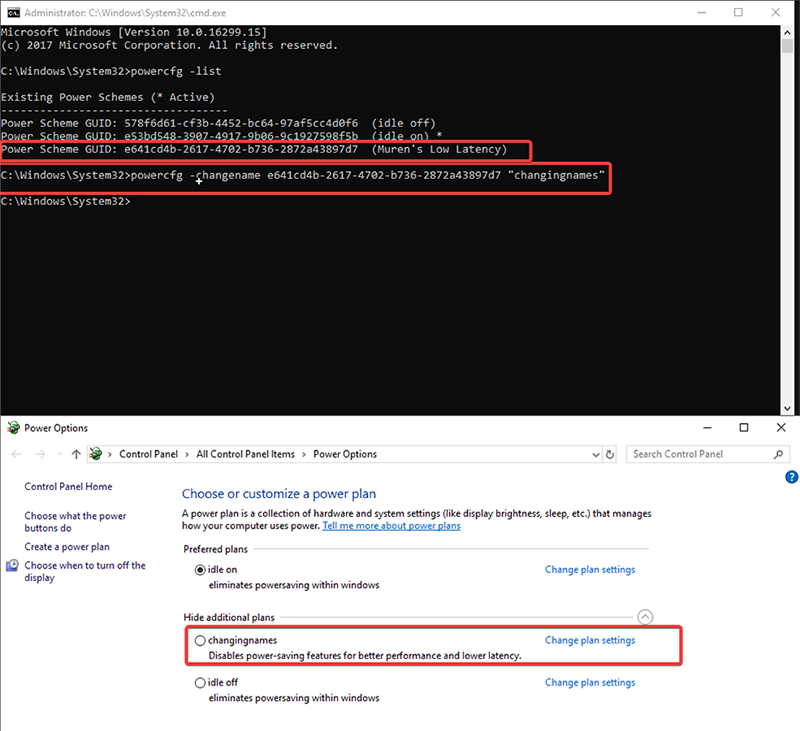
- Type in powercfg -list
- Then type powercfg -changename followed by the GUID of the power plan and in quotes your new name
- Ex: powercfg -changename 3e8bc07e-483e-440e-92b8-925cab5c3e7e “changingnames”
Deleting a Power Plan
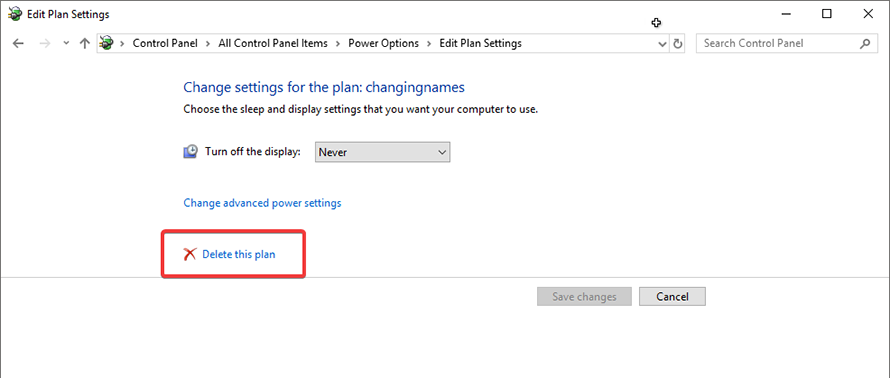
Once you have selected the power plan that you like the most it is time to get rid of the other power plans you will not be using. To do so you can simply head to your power options, click on the power plan, and click delete this plan.
To use CMD to delete power plans you need to:
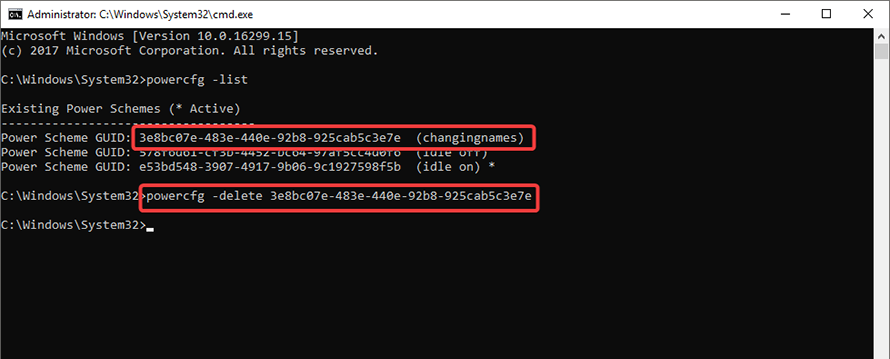
- Open CMD in Admin mode
- Type in powercfg -list
- Then type powercfg -delete and the GUID of the plan you want to get rid of
- Ex: powercfg -delete e53bd548-3907-4917-9b06-9c1927598f5b
Nice! Here’s a few slightly more advanced powerplan tools as well as a link on how they operate. Power Settings Explorer: Advanced options power plan settings utility. (Best power plan manager I’ve found except for the Power Plan Manager included with QuickCPU) – If you want deep customization with a decent interface and do not want to install QuickCPU I recommend this. QuickCPU: The included Power Plan Manager in QuickCPU is by a large margin the BEST power plan related utility I have ever come across. Unfortunately it is not available as an individual download, but you can install QuickCPU,… Read more »