GPU De-shrouding Mod – A Great Mod for Lower GPU Temperatures
GPU temperature is an extremely important factor since this specific metric dictates the lifespan of your part and also how well it will perform in all sorts of tasks. This dynamic is true for most GPUs where the higher the temperature is the lower the clock speed will be, resulting in lower FPS.
The easiest way to lower your GPU temperature a little bit is by cleaning the heatsink/fans and changing the thermal paste inside of your GPU. This step is important because the additional dust and junk stuck in the heatsink will not allow it to properly dissipate heat and the crusty old thermal paste will not conduct the heat from the GPU dye to the heatsink.
If you have already cleaned and re-pasted your GPU but are still not satisfied with your thermals you really have only 2 choices left. The first choice is the expensive one where you buy a water block and watercool your GPU. This process is quite cumbersome if you do not know what you are doing and playing around with liquids around your PC parts is not exactly ideal.
The cheaper and more DIY solution is the de-shrouding mod. This mod will give you significantly lower temperatures effectively increasing the lifespan of your GPU and allowing it to boost higher in terms of clock speed.
What Is the De-Shrouding Mod?
As the name suggests the de-shrouding mod refers to taking off the GPU shroud and the included fans and swapping them for full 120mm case fans for better cooling. This means that more air circulates around the heatsink since the plastic shroud is gone and the much bigger and better fans push a lot more air around.
This can also be a nice solution if your GPU fans died and you have a couple of 120mm case fans sitting around.
This mod originated in the mini-ITX case fanbase since cooling solutions are limited in those cases and modern GPUs are running quite hot under load. This mod can be however done in any case size, as long as you have time to tinker around with your GPU.
Requirements for a De-Shrouding Mod
The only severe limitation of the de-shrouding mod is the fact that it requires a flat heat sink surface upon which you can place the new 120mm fans. Many GPU manufacturers have different little hooks and tabs on top of their heatsinks that might get in the way of your bigger 120mm fans laying flat on the heatsink creating gaps.
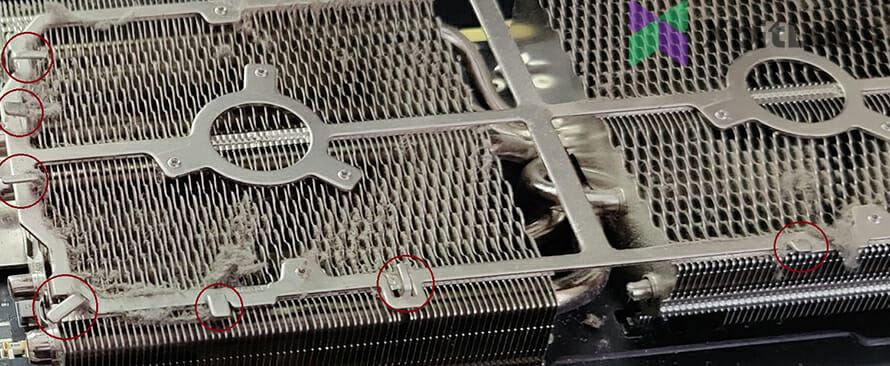
These gaps are not ideal and will lead to a lot less air actually entering the heatsink rendering the mod virtually useless. These tabs and hooks can obviously be cut off with some tools but if you plan on reselling the GPU then such a permanent change is not welcome.
The other requirements are very simple: a tool kit with screwdrivers to take off the GPU shroud, 2x 120mm case fans, a 4-pin CRJ adapter, or alternatively an open fan header on your motherboard.
De-Shrouding Mod: Main Steps
Take Off the Shroud and Fans
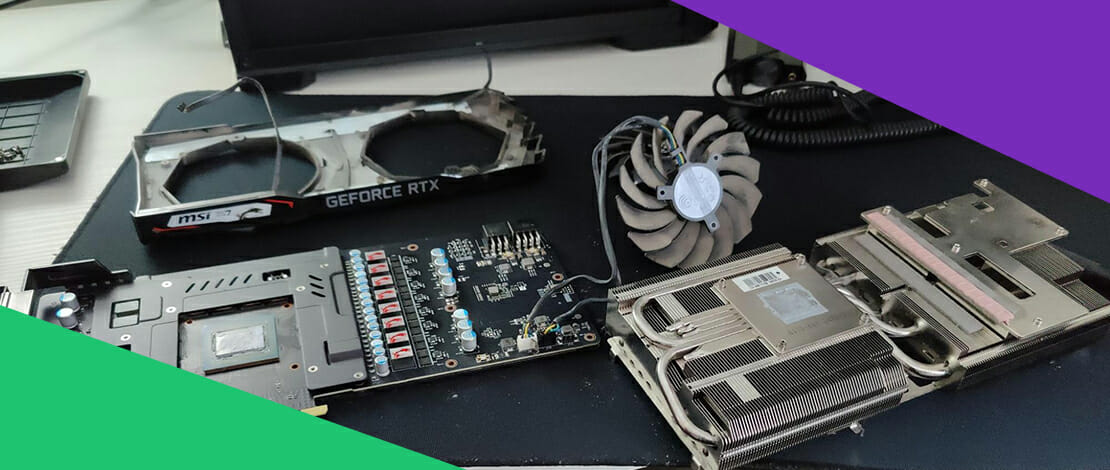
The first step is of course to take off the shroud and original fans from your GPU. All GPU fans and shrouds are installed differently therefore you will not find a unified guide on how to take them off. The main rule of thumb is to look around for screws around the GPU shroud or behind the GPU fans.
In the case of my RTX 2070, the shroud screws and the fan screws were all behind the fan blades so I slowly moved the fan around and removed the screws releasing the shroud and fans at the same time.
In my case unfortunately the GPU fan connectors were sandwiched between the heatsink and the PCB so I also had to remove the backplate to take out the fans. At the same time, this gave me time to also repaste my GPU with new thermal paste so the cooling effect will be 100% guaranteed.
Check Compatibility With the New Fans
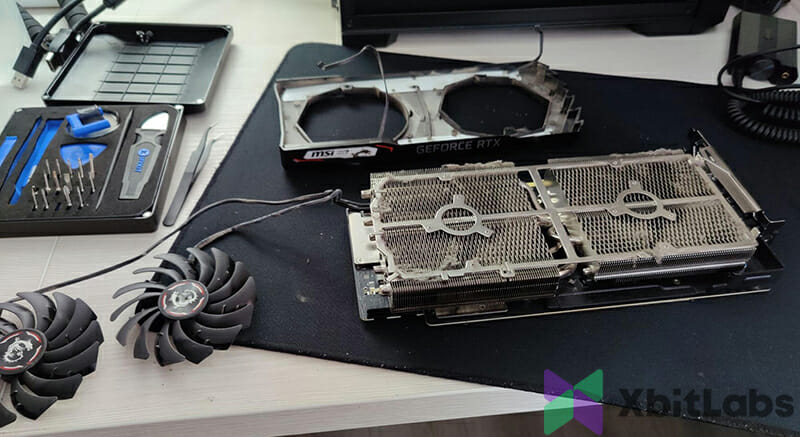
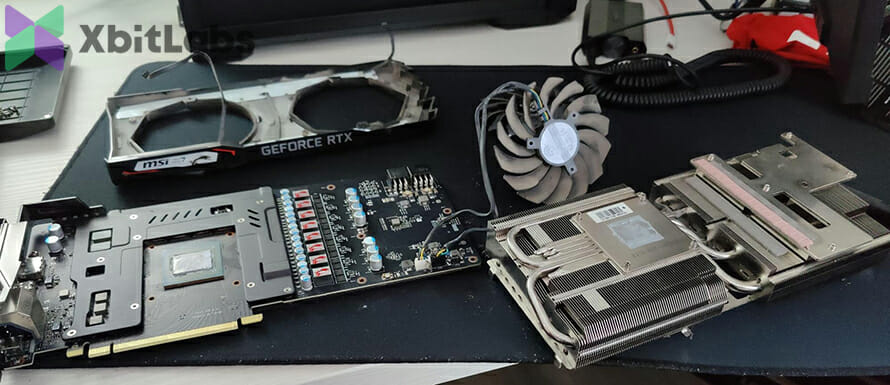
After assembling back the backplate and the heatsink and putting aside the shroud and the old GPU fans you need to make sure that your new 120mm fans are compatible with your GPU heatsink.
As we have said the main thing is to make sure the new fans sit flush with the heatsink and are not hindered by tabs and hooks on the heatsink. Although these are present on my RTX 2070 heatsink I can still place my fans flush with the heatsink by angling them just a little bit.
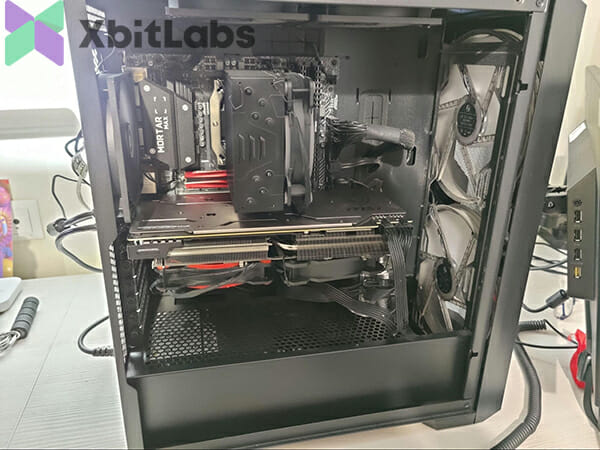
Once you have figured out the optimal position for your fans you can tie them down with zip-ties. Make sure that you do a couple of test runs before tying the fans down for good since there might be bits of the motherboard getting in the way of the fans or vice-versa.
In my case, everything worked fine and was ready for assembly.
CRJ Adapter or Motherboard Fan Header
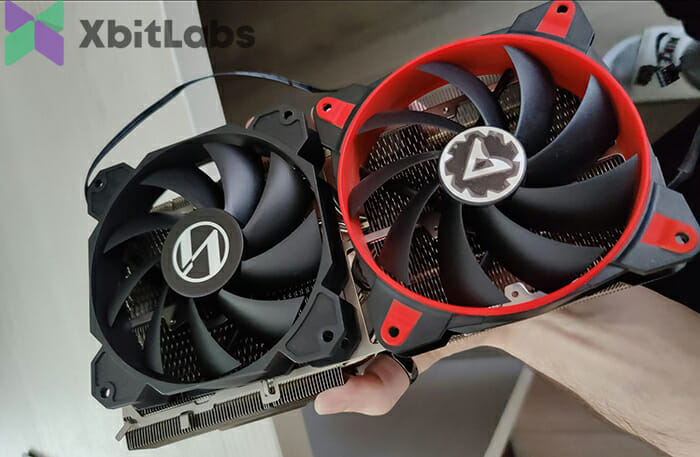
As you have seen in the picture I am just using 2 random leftover 120mm case fans I have. If you are to do this mod properly you would have to buy 2 identical fans and then use a CRJ adapter to connect them to the GPU so you can have fan control using MSI afterburner or other fan control utilities.
I could not get my hands on said CRJ 4-pin connector therefore I have decided to simply use my Arctic BioniX CPU fan with the daisy chain connector it has to plug in a random Lian Li case fan and then simply plug those 2 into a motherboard fan header for speed control.
There is no issue using 2 different fans connected together, all you have to know is that the fan speed will be dictated by the slower fan therefore the faster fan might be a little bit slower than under normal use.
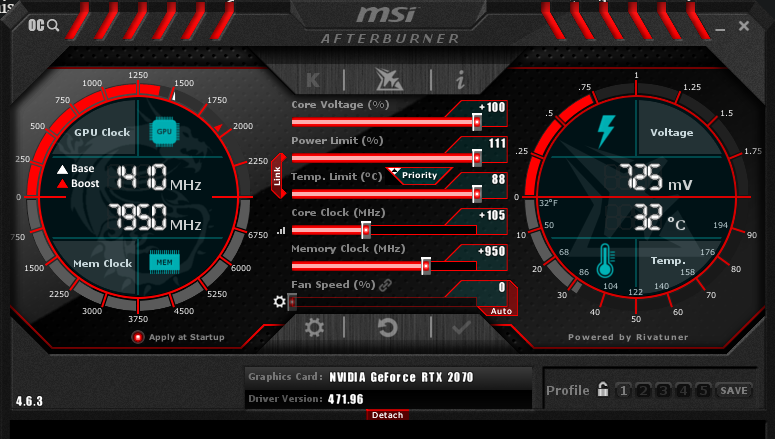
The fans being connected to the motherboard is also not ideal because you cannot run a GPU fan curve for quiet operation but since all I care about is maximum thermal efficiency I have just set the fans to 85% speed at all times through the motherboard BIOS.
This will of course make your GPU a lot louder in terms of fan noise but it will be ideal in terms of temperatures since the 2x 120mm fans running at 85% fan speed at all times will keep your GPU extremely well cooled.
If you do care about noise then a 4-pin adapter is a must so you can control the fan speed according to GPU temperatures.
De-Shrouding Mod: Results
After you have finished connecting your fans either to the GPU with an adapter or to the motherboard (like in my case) it is time to reap your rewards.
To test how much cooler my RTX 2070 is I have decided to run the Unigine Superposition Benchmark with the 8K preset which will stress my GPU a lot. My 2070 is also running a heavy overclock therefore the results were quite interesting to me.
Surprisingly the de-shrouding mod worked extremely well for me even though I used 2 random fans and ran them with a static fan speed from the motherboard. In the 8K benchmark, my GPU sat at around 55 degrees which is insanely cool considering what kind of load and voltage it was pushing around.
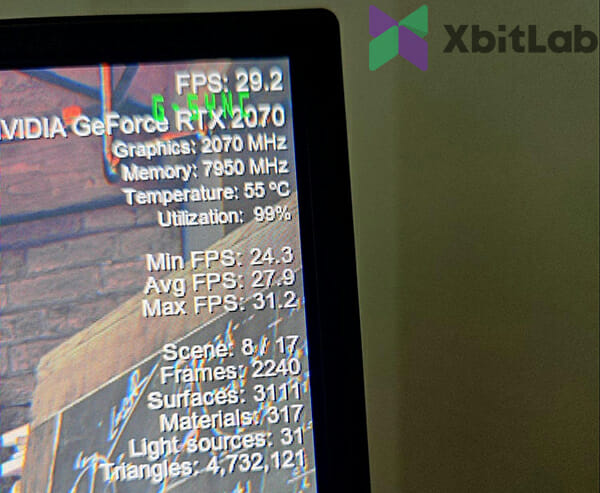
This type of temperature also obviously meant it can boost higher so the clock speed of the GPU sat at around 2070MHz. This is once again very impressive since the GPU is overclocked and was able to maintain speeds above 2000MHz easily.
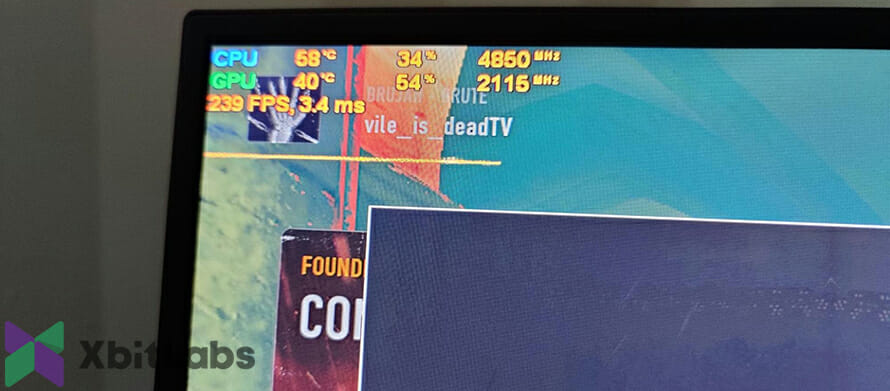
In games, the situation gets even more ridiculous since the GPU can now push 2115 MHz with the GPU load being a lot more realistic for my usage. These are extremely high clock speeds for a 2070 but considering it is running at 40 degrees with a heavy OC this situation does make sense.
Overall even my very DIY version of the de-shrouding mod resulted in very good temperatures that allowed my GPU to boost to high clock speeds. This mod works extremely well with overclocking since the GPU is not constrained by thermal barriers anymore. A resounding success for everyone interested in heavy OCing and keeping their GPUs cool!