How to Apply Thermal Paste to GPU
Your gaming experience is heavily dependent on how well your GPU is performing under load which is in turn dependent on how well the GPU is cooled. Based on how GPU architecture works, the cooler the GPU is, the higher it boosts resulting in more FPS being pushed out.
This is the main reason that dedicated GPUs are growing in size – higher computational capability requires compatible heatsinks and fans to cool it down.
If you also like to overclock your GPUs you might have noticed that your temperatures grew over time without you changing your voltage settings. This is a normal process that happens even without pushing your GPU to the limit and is simply because it is time to clean your PC part.
Besides just dusting your GPU it is also important to change the thermal paste applied between the GPU dye and the heatsink and we will explain why.
Why Should You Change Your Thermal Paste?
Like we have mentioned in the introduction, GPUs just like CPUs over time produce a lot of heat which in turn makes the thermal paste that is conducting the heat from the dye itself to the heatsink crusty and thick therefore losing its capability to effectively cool your part.
This process is accelerated by manual tuning like overclocking because you are effectively pushing more power to the GPU and therefore creating more heat.
If you are to ignore the GPU thermal paste refresh in time you will notice that no matter how thoroughly you clean the heatsink and fans from dust and gunk or do extra work like underclocking, the temperature of the GPU will not go down. This is a tell-tale sign that it is time to change the thermal paste.
Ignoring this degradation in thermal conductivity will soon lead to your GPU clocks boosting lower and keeping those frequencies for lower periods of time resulting in unstable performance.
In short, not refreshing your GPU thermal paste will lead to higher temperatures and lower FPS – simple as that.
How to Change the Thermal Paste on Your GPU
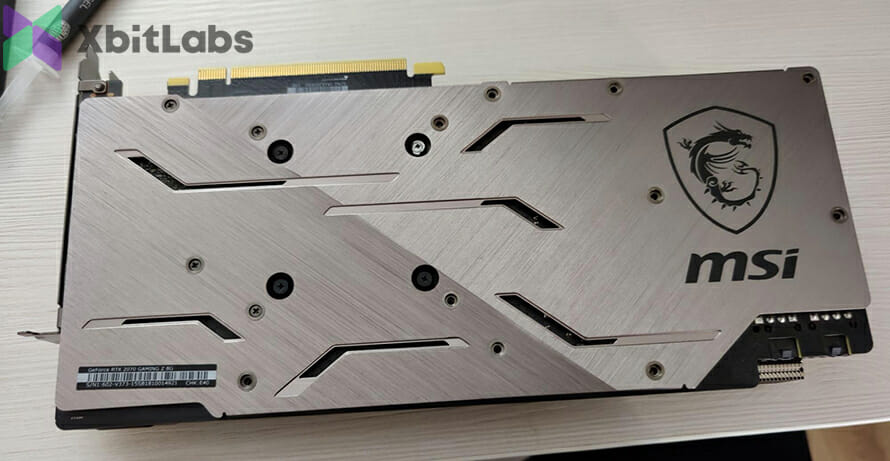
Changing the thermal paste on your GPU is as simple as doing it for your CPU. First of all, remove the GPU from your computer and prepare the necessary tools.
You will need some new thermal paste, some alcohol wipes to clean the old thermal paste, and a set of screwdrivers to take off the heatsink from your GPU dye. Turn the GPU with the fans facing downwards and remove all of the screws that you can see.
Be sure to remove all of the visible screws and to look around thoroughly because you do not want to pull hard while trying to remove the backplate from the heatsink and break something.
If you have visually confirmed there is nothing holding the GPU heatsink and the backplate together slowly pull the two apart. This might take some relative force since besides the GPU thermal paste there are also heat pads in there that are quite sticky.
You should see the GPU backplate coming apart pretty easily though and if you have to apply a considerable amount of force then you should stop and check again for extra screws or glue. Googling your specific GPU model might give you insight into why the heatsink won’t come off.
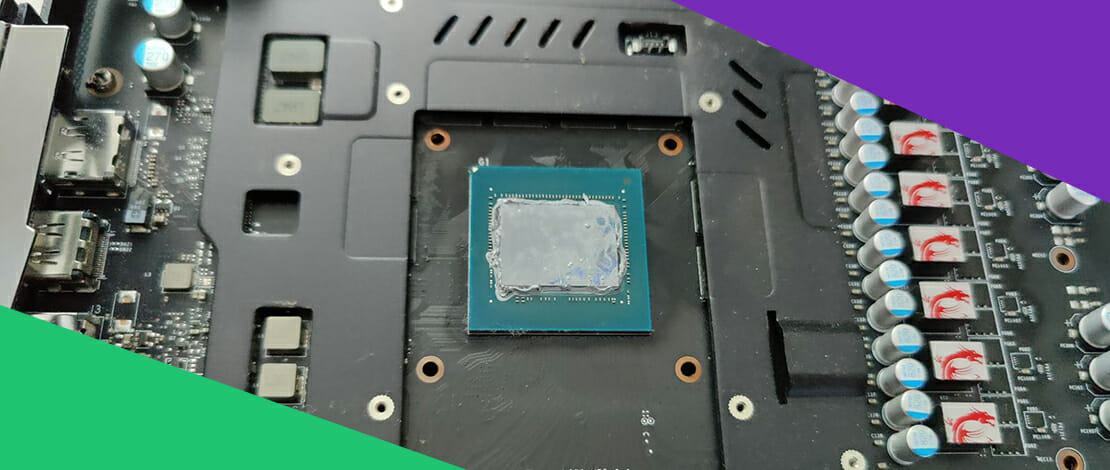
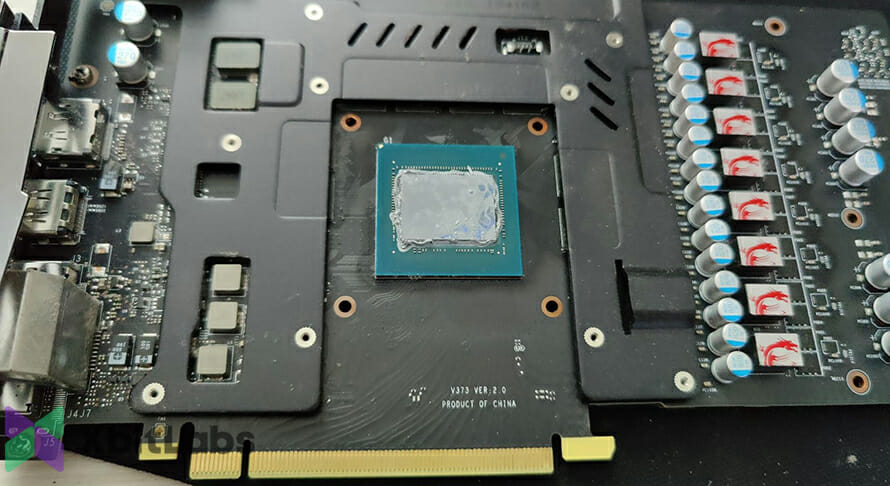
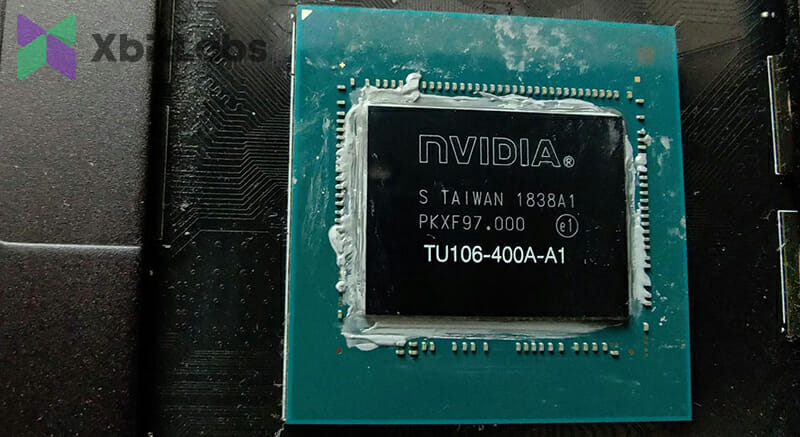
Once the two pieces are apart use the alcohol pads to clean the thermal paste off the heatsink and the GPU dye.
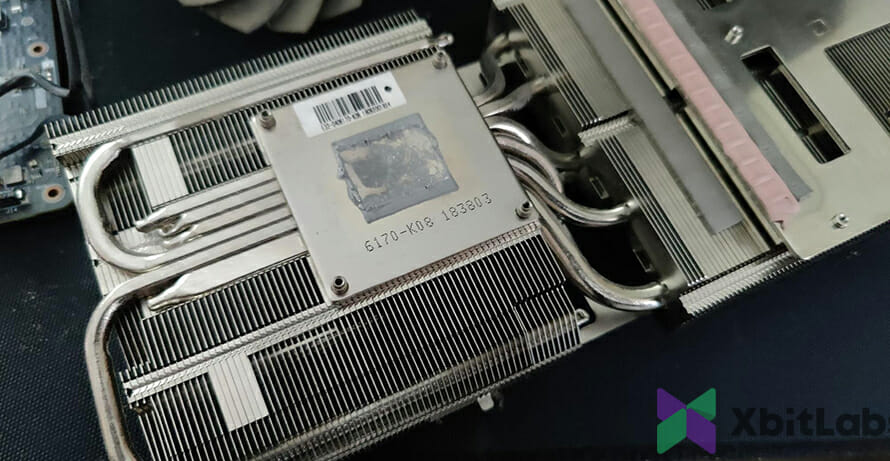
With the heatsink, you do not have to worry about anything and can just rub it off as hard as you need to. DO NOT remove the heat pads unless you have replacements. These will stick back once you apply the new thermal paste!
With the GPU dye though you need to be gentle since this is an exposed processor and there are tiny pins and connectors sticking out. Gently pat and rub the thermal paste off the dye without applying much pressure. If you mess up here you might break your GPU so be very careful.
As long as you get the old thermal paste off the dye you should be good to go.
Apply your new thermal paste (a bit more than your usual CPU application) and align it back with the heatsink. Once both are connected screw in the main 4 screws that hold the dye to the heatsink. Do not apply too much force, just screw them in until you feel like you would need considerably more force for another rotation. A gentle hand always helps.
This advice applies to all of the other screws on the backplate – do not overtighten the screws. When it comes to PC parts you should be gentle and you should always be careful with over-tightening screws in your PC.
With this, your GPU has fresh thermal paste and is assembled once again. You can now plug it into your PC and enjoy the new lower thermals and higher boost clocks!