Gaming Cases from NZXT: Phantom and Vulcan

Our today’s review will talk about two NZXT gaming system cases of totally different size and appearance: a powerful and unique-looking Phantom and its younger brother – solid black Vulcan.
It’s no secret that most users prefer to assemble their computers in midi-tower system cases which are the most versatile and easy to deal with. We tested one such product from the American NZXT before but that was the rather unassuming Beta EVO. This time around we’ve got two completely new system cases that belong to the company’s more exciting Crafted series: the eye-catching Phantom and the less flashy Vulcan. The former is meant for computer enthusiasts, judging by its size and exterior, whereas the latter, being a micro-ATX product, is supposed to serve as a portable gaming station. Let’s see if these products are really as good as they claim to be.
Closer Look at NZXT Phantom
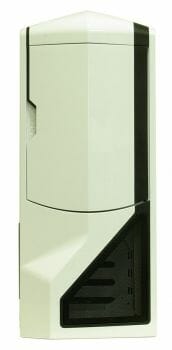
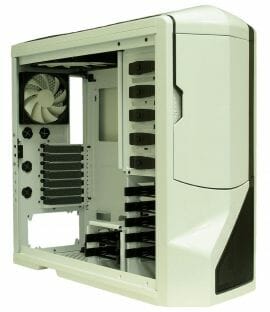
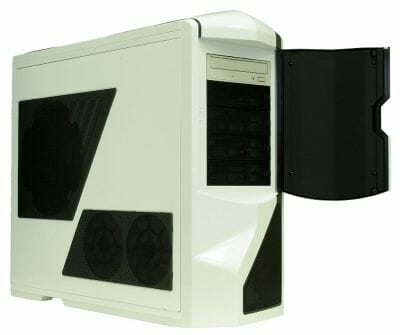
The designers have done a very good job on the Phantom. This system case looks just gorgeous, provoking associations with the Star Wars movies. The angular, asymmetric shape of the front and top panels makes it different from regular system cases. Its size and weight are remarkable as well. The Phantom is big and heavy. It can easily accommodate Extended-ATX mainboards and longest graphics cards, but you won’t find it easy to move it around.
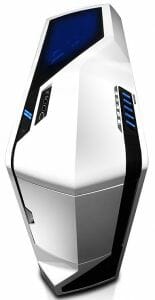
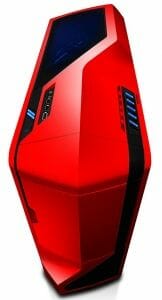
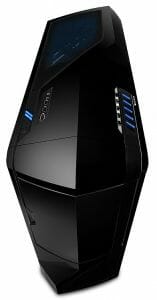
We’ve got a white Phantom but it is also available in red and black versions. However, some details are black even in the white version, producing a contrasting and somewhat aggressive effect.
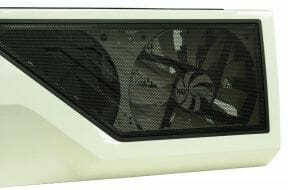
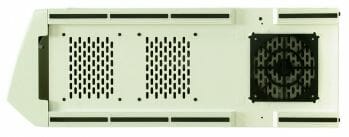
Let’s first take a look at the top panel some of which is in fact a metallic black mesh. All the control buttons and I/O connectors can be found in its front part.
The buttons are placed on the left. On the right there is a 5-channel fan controller. Each of its channels is labeled with an icon. Its fan cables are also labeled with such icons. Some of the cables can be used to connect either one or two fans to one controller channel. This makes it easy to control any fans since you can always see which exactly fan you are dealing with.
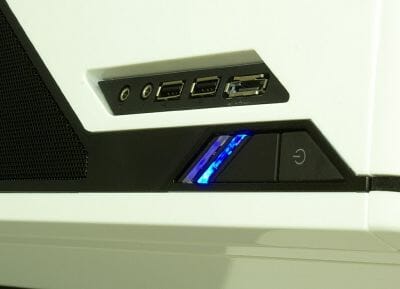
The Power and Reset buttons have a short travel distance and respond with a click. They are made from soft plastic which feels nice to the touch. There are two indicators behind the buttons: power and disk activity. To the right of them, there is a kind of a black islet with I/O connectors which include one eSATA, two USB 2.0 and two audio connectors (microphone and headphones). In the back part of the top panel, below the metallic mesh, there are two fan seats.

If you take the top panel off (which is rather easy as you only have to pull its protruding front piece up after removing the front panel), you can find one preinstalled 200mm fan (DF2003012SEMN model, 0.42 A, 5.04 W, 800 RPM, 3-pin connector) for exhaust and a seat for another such fan covered with a dust filter.
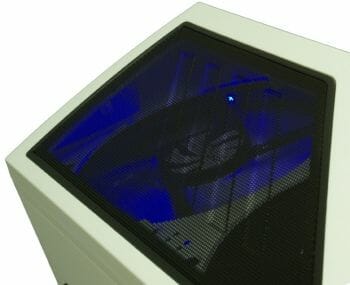
The fan has soft blue highlighting which can be easily switched off with a button on the back panel. You can also remove the fan and install a radiator of a liquid cooling system instead. There are two mounting plates for it included with the Phantom. You’ll have to fasten 120mm fans above the radiator then as there will be no place left below.
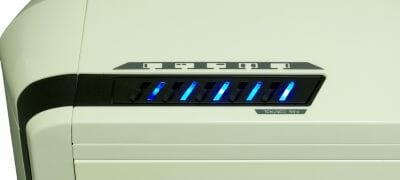
The integrated fan controller is a small card with five sliders that adjust the voltage within a range of 6 to 12 volts. The operation of each fan is indicated by a blue LED.
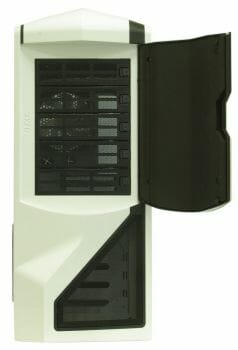
For the faceplates of 5.25-inch bays not to spoil the stylish appearance of the Phantom, there is a plastic door on the front panel which is held with a magnet when closed. The manufacturer put its logo in the cutout of the door but no branding can be seen elsewhere. The door opens up to the right. It covers five perforated black faceplates which can be easily removed using their spring-loaded plastic locks.
The whole front panel can also be taken off easily by pulling at its bottom. The panel and the door are all plastic. The Phantom has five 5.25-inch bays but does not allow installing 3.5-inch devices into them. You can install a 120 or 140mm fan at the bottom of the front panel and we used this opportunity in our tests by putting a 120mm fan there although there was no dust filter for it in the Phantom kit. The vent grid between the front fan and the HDD rack is rather too small, by the way.
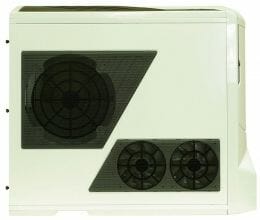
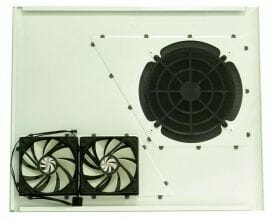
On the left panel, behind a black metallic mesh and a dust filter, there are two 120mm fans (DF1202512RFLN, 0.16 A, 1.92 W, 1300 RPM, 3-pin connection) that are meant to cool the HDD racks. The fan cables are 51 centimeters long; there is a plastic holder for them on the side panel. Here you can also see a place for a 200 or 230mm fan that can cool the mainboard and CPU cooler. The manufacturer proposes that you install NZXT’s own FN-200RB or FS-200LED fan here.
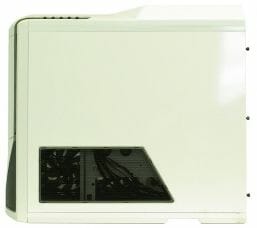
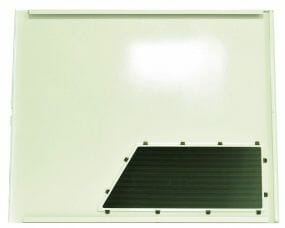
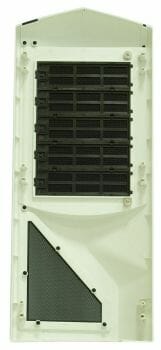
The right panel has a trapezoid vent grid for cooling the HDD racks. That’s all we can tell you about it, so let’s move on.
The side panels are fixed in place with three thumbscrews. The central screw is special. You can just push it down without actually unfastening it.
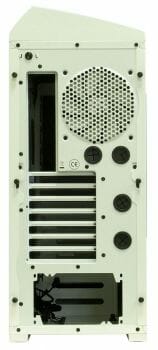
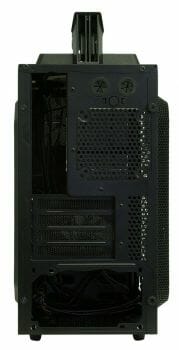
A button for turning on the top fan’s highlighting can be found at the top of the back panel. Below it there is an exhaust 120mm fan like those on the side panel. It’s placed behind a honeycomb vent grid which is not actually very transparent for the air flow. There are as many as four openings for the pipes of a liquid cooling system. They are rubberized and large, over 2 centimeters in diameter. Next go seven expansion-card brackets made from a fine metallic black mesh. Like in most of today’s system cases, the PSU bay is at the very bottom. The mounting holes allow positioning the PSU in either way: with its fan facing up or down.
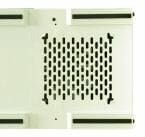
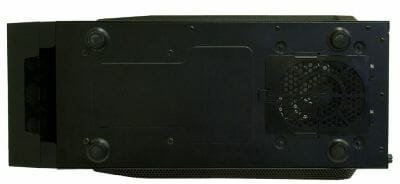
So, we’ve finally got to the bottom of the Phantom. The bottom panel is perforated below the HDD racks. There is some perforation below the PSU bay, too, which is covered with a removable dust filter. The filter isn’t fastened properly, though. It’s easy to take the filter out, but there is a rather large gap between it and the bottom panel. The perforation area is small. It is made to match a 120mm fan, although today’s PSUs often come with 140mm fans. Besides, even a 120mm fan is likely to be not exactly in the middle of a PSU case.
The Phantom stands on long 2cm skids that have rubber strips glued to them from below.
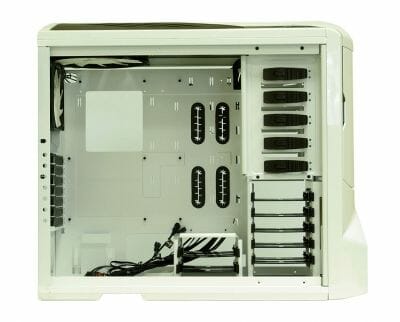
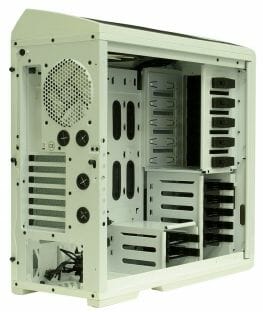
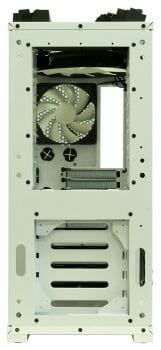
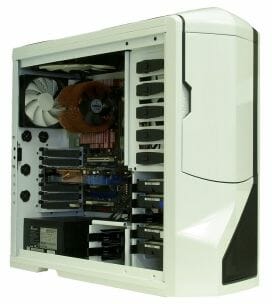
The interior of this system case is huge. You can see two rows of rubberized cutouts in the mainboard’s mounting plate to hide cables behind it. The mainboard is installed on standard posts but there are only nine of them included into the kit. The Phantom can accommodate mainboards of many different form-factors: ATX, Extended ATX, Flex ATX, Micro ATX, and Mini-ITX. Every mounting hole is labeled and there is a description of the labels in the middle of the mainboard’s mounting plate.
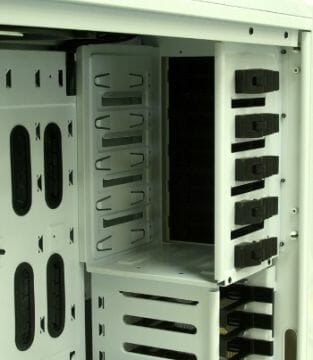
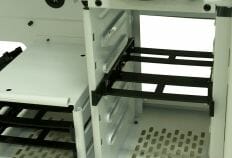
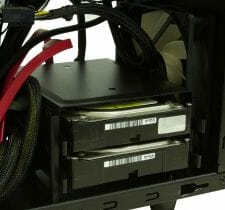
This huge interior allows you to have not one but two HDD racks. The main one is for five devices while the other one can take in only two HDDs. The second rack is removable, so you can easily take it off altogether. There are also five 5.25-inch bays in the top right corner of the chassis.
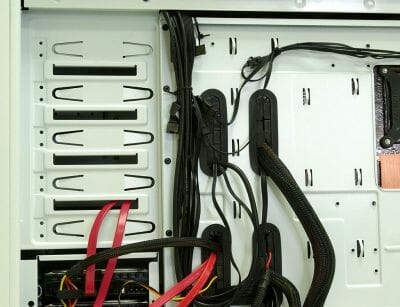
There is a compartment for hiding cables behind the mainboard. It is less than 2 centimeters wide, but that’s enough.
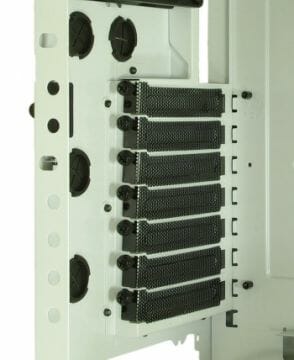
The expansion-card slots are covered with black brackets fastened with thumbscrews. There are holes in the folded part of the back panel for accessing them.
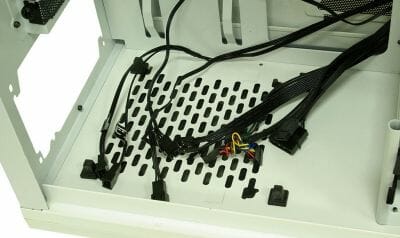
Here you can see four rubber feet your PSU will stand upon. The two outermost feet have two positions that correspond to short (below 17 centimeters) and long (19 centimeter and more) PSUs.
Take note of the neat black cables from the Phantom’s buttons and controls. They are combined into a single cable and labeled.
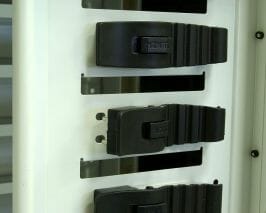
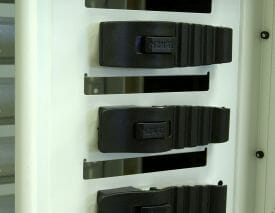
Each 5.25-inch device is fastened with a plastic lock without using any screws. Although the device gets fixed from one side only, the fastening mechanism is quite secure and handy. There are also holes on both sides of the 5.25-inch bays for ordinary screws. The plastic locks can be taken off altogether if you don’t need them.
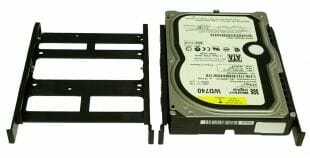
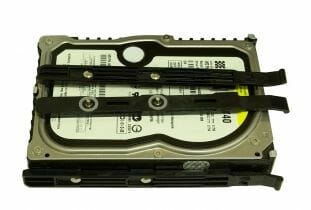
HDDs are also installed without screws, using special guides with four prongs on a rubber frame. You just put your HDD onto a guide and insert it into its bay but it’s rather easy to scratch your HDD because the plastic is stiff. The vibration absorbing properties of the guides are also rather questionable.
You can install up to seven HDDs in total (five into the main rack and two into the additional rack). Both 3.5-inch and 2.5-inch HDDs are supported. There are appropriate mounting holes in the bottom of the guides for 2.5-inch devices. The second HDD rack is removable. You can take it out by unfastening a few screws.
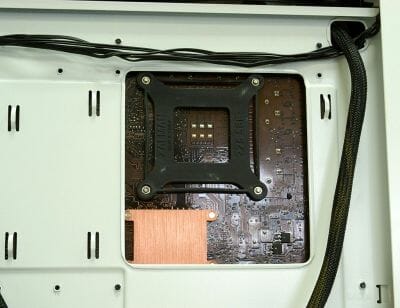
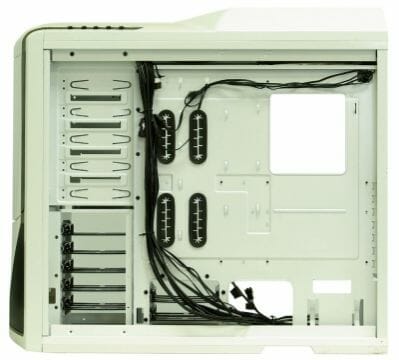
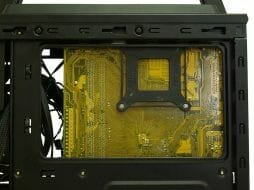
The back-plate cutout in the mainboard’s mounting plate allows installing and uninstalling a CPU cooler without taking the mainboard out of the system case, yet it is not very large and may not match the CPU location on some other mainboards. There is a hole in the top right corner of the mounting plate for a CPU power cable.
There are actually a lot of holes in that plate for hiding cables behind the mainboard. The rims of the largest holes are rubberized, and the others are just rolled in. There should be no problems with laying out all the cables in this system case.
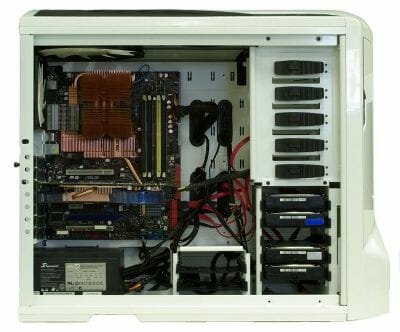
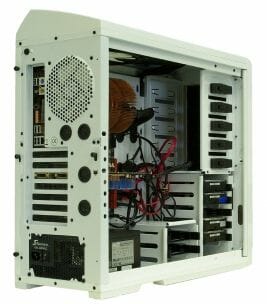
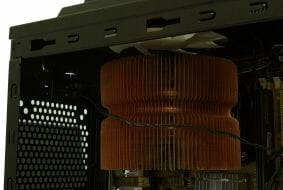
It was easy to assemble our testbed configuration in this system case as it is very roomy. The CPU cooler size limit is 180 millimeters. The PSU can be as long as 245 millimeters and expansion cards, up to 370 millimeters! Any graphics card will fit in here. And if you take out the additional HDD rack, you will be able to install a 370mm PSU, too. The HDDs are packed rather densely, about 5 millimeters apart from each other, in their rack, so the side fans may find it difficult to cool them.
The chassis of the Phantom is made from 0.8mm steel and is very rigid. The quality of manufacture and painting is very high. Every edge is properly finished.
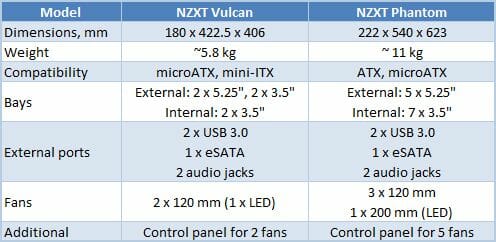
Closer Look at NZXT Vulcan
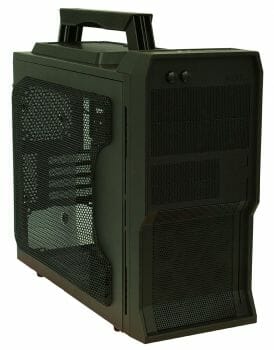
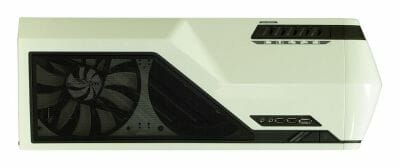
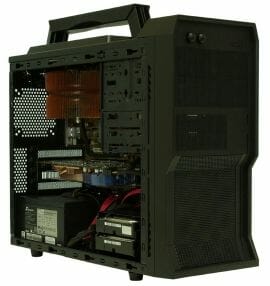
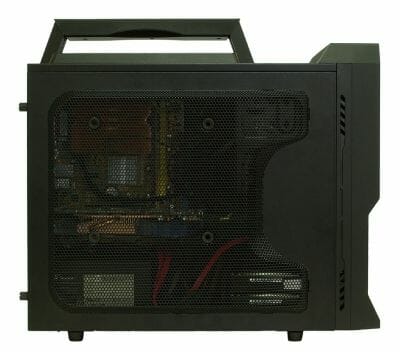
This system case doesn’t impress as much as the previous model. Although both belong to the gaming series Crafted, the Vulcan has a very modest exterior compared to the Phantom. The Vulcan has a handle and you can indeed easily carry it with you as it allows that with its size and weight.
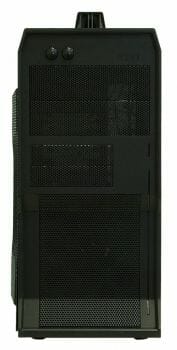
The exterior design makes it clear that the Vulcan is a gaming system case. There are a lot of vent grids, straight lines and angular shapes, and a plastic trim. It is completely black.

To emphasize the gaming positioning of this product, its manufacturer shows us how good its ventilation system is, how it can accommodate long graphics cards and how smaller it is compared to standard full-size system cases.
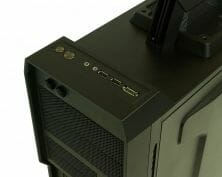
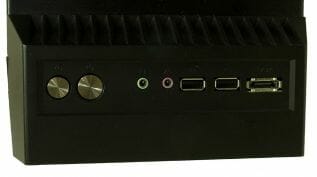
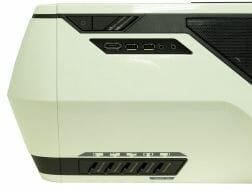
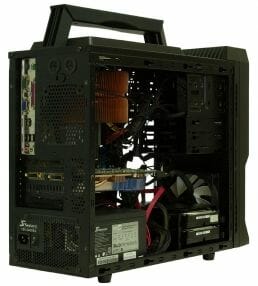
In the front part of its top panel we can see (from left to right) two buttons (Reset and Power), two color-coded audio connectors, two USB 2.0 ports and one eSATA connector.
There are two fan controller knobs on the front panel labeled as I and II. The same labels can be seen on the fan connectors. Each controller channel can be connected to two fans but only one fan is connected to each channel by default.
The entire front panel is in fact a fine mesh with a dust filter, including the front-fan grid and the faceplates of the 5.25 and 3.5-inch bays. You can also see the front 120mm fan here. It is the same model as the fans preinstalled in the Phantom.
The straight lines to the right of the 3.5-inch faceplates are Power and HDD activity indicators.
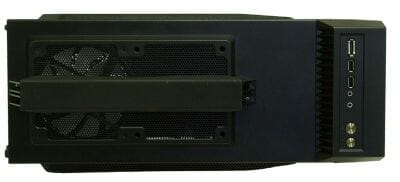
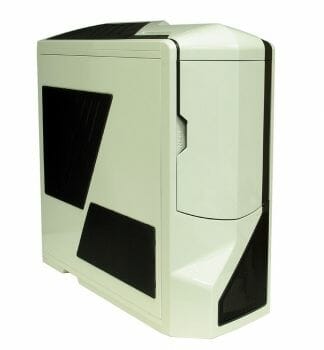
A robust handle is attached to the top of the system case by means of four small screws. It is quite handy. Below the handle, there is a large vent grid where you can install two 120mm fans. The Vulcan comes with only one fan preinstalled there. It is the same model as the front-panel fan but features orange highlighting that can be turned off.
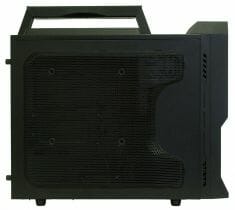
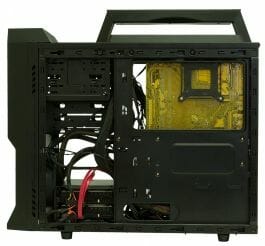
The left panel is mostly a vent grid, too. The grid is fitted into the panel and allows installing additional 200mm fans to blow at the computer’s internals. Like with the Phantom, the manufacturer suggests that you install NZXT’s own FN-200RB.
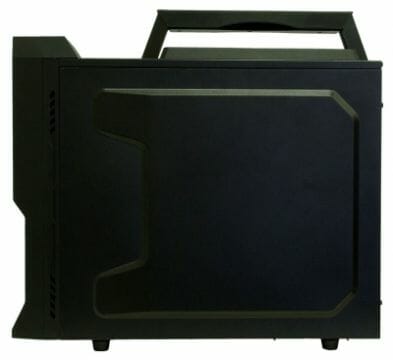
The right panel isn’t that interesting. You can only see the protruding part that provides some space for hiding cables behind the mainboard’s mounting plate.
The side panels can be taken off by pulling them backwards. They are secured with two thumbscrews.
At the top of the back panel there are two rubberized openings for the pipes of a liquid cooling system. Right below them you can see a button that turns on the highlighting of the top fan. Lower yet, there is a place for an exhaust 80 or 92mm fan which is not included by default. The microATX form-factor limits the number of expansion slots to four. So, there are four removable meshed back-panel brackets which are fastened with handy thumbscrews. A power supply can be installed into the bottom compartment in two positions.
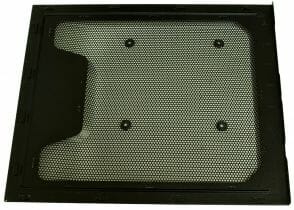
The Vulcan stands on four small plastic feet. There is a removable dust filter below the PSU bay, the single filter of this kind in this system case. Take note of the gap behind the front panel and below the intake fan.
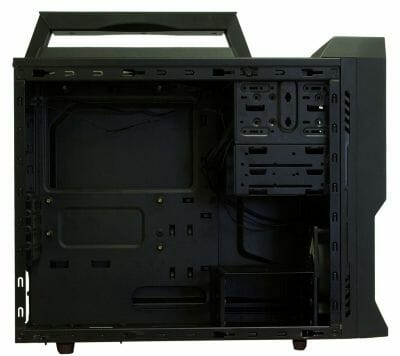
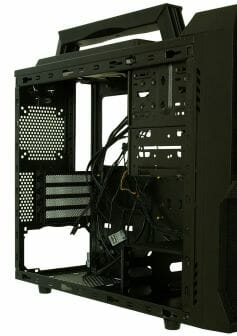
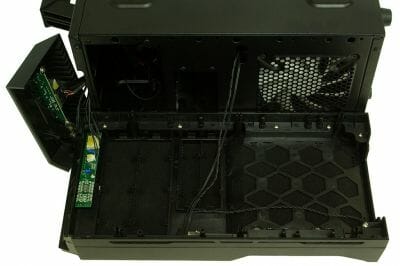
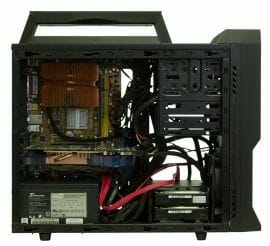
Although the interior isn’t roomy, you can easily place all your components in there. Six or eight posts are used for installing a mainboard into the Vulcan.
There are two 5.25-inch bays in the top right of the chassis. Two 3.5-inch bays are below them. Devices are fastened in these bays with thumbscrews, so you don’t have to use any tools.
The rack for two HDDs is at the bottom of the chassis, so there is enough of free room in the center for long graphics cards (up to 360 millimeters), for example two AMD Radeon 5970s. The HDD rack can even be removed altogether. Its bottom panel is fastened to the chassis with four self-tipping screws.
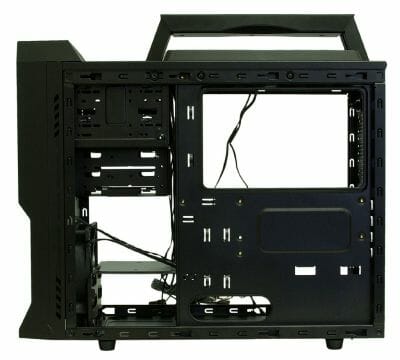
On the other side we can see a large window in the mainboard’s mounting plate for installing a CPU cooler with back-plate without taking the mainboard itself out of the system case. There is a cutout nearby for power cables. You can also see a number of loops for fixing every cable in place.
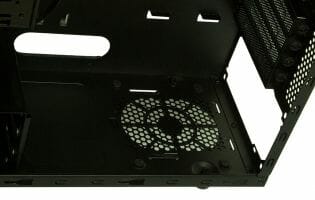
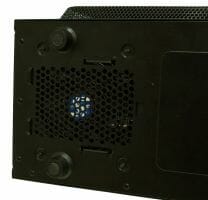
The PSU bay is at the bottom of the chassis. You can install your PSU in two standard positions. There is a vent grid in the bottom panel, covered with a removable dust filter. If you take the filter off, you can see that the vent grid is smaller than a standard 120mm PSU fan. The Vulcan can accommodate PSUs up to 250 millimeters long. There’s a cutout in the mainboard’s mounting plate near the PSU for the power cables. You can also see four small rubber feet for the PSU to stand on.
The Vulcan has only one HDD rack which can accommodate two 3.5-inch HDDs. Each HDD is installed using two plastic guides. Each guide has two metallic prongs with rubber vibration-absorbing rings. You just insert the HDD into a bay until a click. The HDDs are very close to each other in the rack, but we will see how the front 120mm fan copes with them later on.
The cutout in the mainboard’s mounting plate for the CPU back-plate is large but does not match our mainboard. The Vulcan allows installing CPU coolers up to 160 millimeters tall.
It is rather easy to assemble a computer in this system case. You don’t have to use any tools. The only thing you should know is that the PSU should be installed after the mainboard. Otherwise, you’ll find it difficult to install the latter.
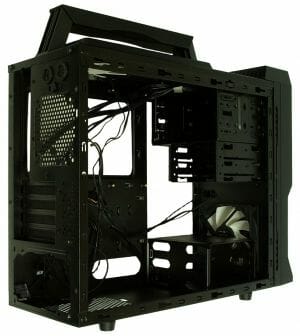
The Vulcan’s internals can be easily seen through the large side vent grid.
Testbed and Testing Methodology
We test assembled system cases at a constant ambient temperature of 23°C maintained by an air conditioner. As we assume that most users prefer low-noise computers, we set the speed of the CPU and system fans (those connected to the mainboard’s 3-pin connectors) into Silent mode (the quietest mode in the mainboard’s BIOS). If a system case has its own speed controller, we switch it to minimum and maximum speed to check out both modes. We do not change the default configuration of air flows determined by system case design.
The following components are installed into the tested system case:
- Intel Core 2 Duo E6850 processor at 3.00 GHz
- Zalman CNPS9500 AT cooler
- ASUS P5E Socket 775 mainboard (iX38, ATX, for the Phantom)
- ASUS P5GC-MX/1333 mainboard (i945GC, mATX, for the Vulcan)
- Western Digital Raptor WD740GD hard disk (10,000 RPM, SATA; four such HDDs for the Phantom and two for the Vulcan)
- 2GB DDR2-800 SDRAM Patriot PDC24G6400LLK
- HIS HD 3870 IceQ3 Turbo H387Q512NP graphics card (Radeon HD 3870)
- Seasonic M12D SS-850EM power supply (850 W)
- 120mm fan for the Phantom (GlacialTech SilentBlade II GT12025-EDLA1)
- Microsoft Windows 7 Home Premium 32-bit SP1
The temperature of the CPU, HDDs, GPU and mainboard is measured with CPUID Hardware Monitor 1.17. The speed of the fans is measured with an optical tachometer Velleman DTO2234. There are the following test modes:
- Idle
- IOMeter (IOMeter’s Access Time test running on all the HDDs to load them fully)
- Prime95 (Prime95 running in the In-Place Large FFTs mode to load both CPU cores fully)
- 3DMark06 (1280×1024 with maximum graphics quality settings)
Every temperature is read after the system has worked for half an hour in the current test mode.
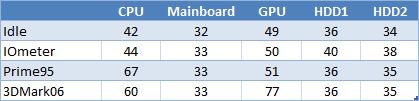
The following table shows the temperatures of the components if the system is assembled without an enclosure (“open testbed”).

The noise level is evaluated subjectively.
Test Results
First let’s see the results of each system case, particularly in terms of HDD cooling and noisiness. The HDDs are numbered from top to bottom.


The Phantom cools the component s well, especially at the maximum speed of its four fans. The large 200mm fan on the top panel was not audible at 300 RPM but could be heard quite distinctly at its maximum 800 RPM. The same goes for the remaining three 120mm fans. Their min and max speeds were 620 and 1300 RPM. The HDDs could also be heard (but we use very noisy 10,000RPM Raptors).
The system case was also tested with a GlacialTech SilentBlade II GT12025-EDLA1 installed at its front panel.


The additional 120mm fan at the front panel doesn’t do much good at the minimum speed of 300 RPM but it definitely helps cool the HDDs better at the maximum 1000 RPM without rising above the overall noise.
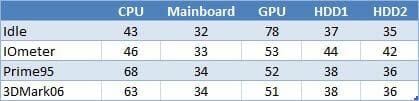
The small Vulcan has good results, too, as it has the same 120mm fans as the Phantom. The only difference is that the minimum speed of the fans is somewhat higher here at 750 RPM.
The CPU cooler was working at a constant speed of 1450 RPM. The graphics card’s fan was controlled automatically.
Now let’s compare the two products with each other and with the open testbed.
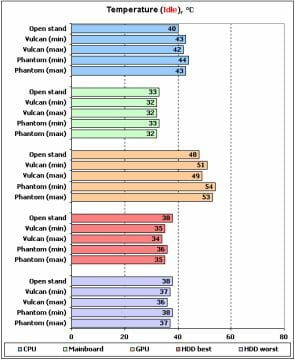
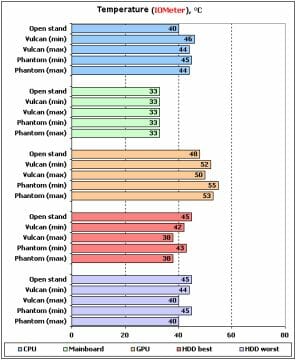
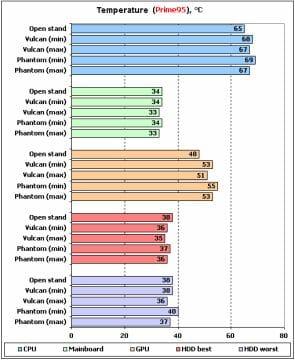
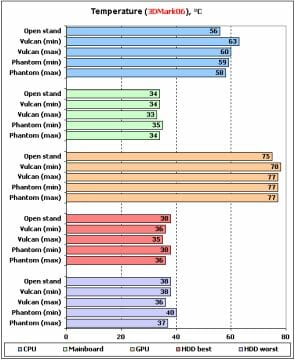
The system cases are both very good in every test mode. The Vulcan cools some components better, particularly the HDDs, but the difference is negligible really. We can note that even very advanced configurations are going to be cooled well in these system cases while the speed of the system fans can be set to the minimum or a little higher.