Synology Disk Station DS209+ NAS Review

Synology DS209+ with its 800MHz CPU and 512MB RAM is expected to deliver impressive performance, bring forth the concept of energy saving with Power On/Off design, and offer variable RAID management. It also features 3-speed smart fan control that should ensure a cool and quiet NAS server in the office environments. Let’s find out if it is really so!
Not long ago we tested a dual-disk Network Attached Storage device DS207+ developed by Synology and found it to be the best we had ever dealt with in our labs. Boasting superb performance, widest functionality and beautiful design, it has remained unrivalled till today and we have not really expected it to get a worthy opponent any time soon. However, it is Synology itself that has released a new dual-disk NAS that claims to be such. The DS209+ is now the top model in the dual-disk NAS series from the company. This model is an improvement over the DS207+ in such key parameters as processor performance and the amount of system memory.
So, we do expect to have a new performance leader in this class. Besides updating its product range, Synology has recently revised its Disk Station Manager, introducing a number of innovations we are going to cover in this review.
Specifications and Accessories Bundle
| Parameter | Specification |
|---|---|
| CPU | 800MHz |
| RAM | 512MB DDR2 |
| WAN | 1 RJ-45 port (10/100/1000 BaseT) GigabitEthernet with Auto-MDIX |
| Other interfaces | 2 SATAII ports (internal HDD) 1 eSATA port 3 USB 2.0 ports |
| Maximum internal HDD capacity | 1.5TB (each) |
| Supported file systems | EXT3 FAT (external drives) NTFS (Read Only, external drives) |
| Cooling | 70 x 70 mm fan |
| Power consumption | 32.4 (max)-18 (min) W (2 x Seagate 750GB ST3750640NS HDDs) |
| Temperature | 5-35ºC |
| Dimensions | 160 x 218 x 88 mm |
| Power supply | External PSU |
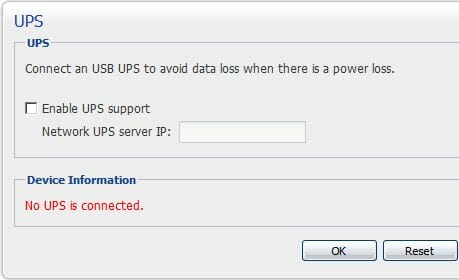
| Additional features | File Station Audio Station Photo Station 3 + video Web Station PHP/MySQL Download Station Surveillance Station iTunes Server Mail Station UPS support Print-server NFS |
The box contains:
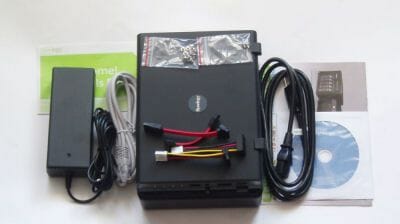
- DS209+ NAS
- Quick Installation Guide
- Marketing materials
- CD with software
- Fasteners
- 12V/5.83A power adapter
- Power cord for the power adapter
- LAN cable (RJ-45)
Design and Configuration
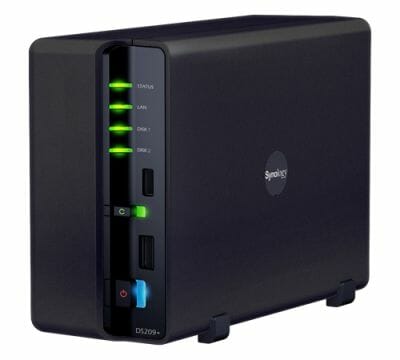
Every product from Synology is ready to impress you with its splendid design but all of Synology’s products, save for the RS series, follow the same style and do not offer much variegation. This consistency can be viewed as a manufacturer’s visiting card, but regular revisions of the design concept are necessary, anyway. So, the DS209+ is not exactly new in terms of exterior design, yet different from the previous dual-disk NASes from this brand. The difference is in the color and surface of the case. The rest is the same as in the older models. The DS209+ has become more practical because accumulated dust is less visible on the black case. And having acquired a rough and matte surface (the older models had a glossy surface of the case), the DS209+ is more resistant to scratches, and greasy fingerprints are inconspicuous on it. It is just even more pleasant to touch.
The black and glossy plastic front panel is curved in, and the device’s buttons and indicators are placed in the resulting depression. We like this solution because the front panel matches the overall style of the case and is also very ergonomic.
The DS209+ can be positioned upright as is indicated by the rubber feet on the sides of the case. Thanks to them the device can stand firmly on any surface, especially with HDDs installed.
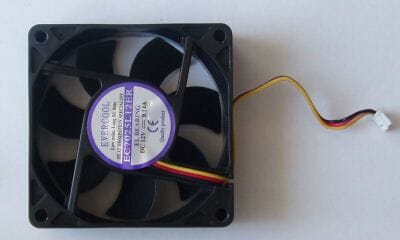
The case is ventilated with a 70mm fan located at the back panel. This is a minor improvement over the DS207+ which used to be cooled with a 60mm fan from the same manufacturer.
The cool air is coming in through the vent holes in the bottom of the case. There is no other way into. Although there are not many holes in the bottom, the temperature within the case, and the temperature of the internal HDD, remains acceptable even when the NAS is being accessed actively. We can see that from the data reported by the integrated thermo-sensors of the processor and HDDs. For example, the processor temperature varied from 49 to 54°C even under long and heavy load on the NAS while the HDDs were only as hot as 38-42°C. Both values are perfectly normal.
You should also appreciate the HDD hibernation mode offered by the DS209+ for silent operation. When the DS209+ is not accessed for some time (you can specify this period in its settings), the HDDs are halted until the next access. Thus, when the HDDs are idle, you can only hear the fan, which is almost inaudible itself.
Before we take a look into the DS209+, let’s see how it communicates with the outside world. Here is what it has on the front panel (from top to bottom):
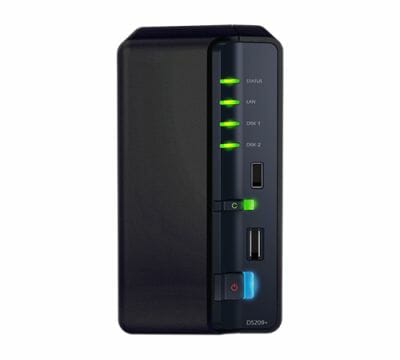
- Status indicator (blinking in orange in case of an error)
- LAN indicator (indicates the activity of the Ethernet port)
- Disk1 and Disk2 indicators (indicate the activity of the internal HDDs)
- USB 2.0 port
- C button with indicator. If you plug a supported drive into the USB port, the indicator near the button will light up. Then you can press the C button to copy all data from the external drive into a special folder on the internal HDD. An appropriate service must be set up for this feature to work.
- eSATA port
- Power button with indicator
The indication system is good. The indicators do not form an incomprehensible solid line as in many other devices. Two out of the six indicators are located near the buttons they refer to. The indicators differ in color and size (but all of them are sufficiently large). And finally, they are bright enough to be visible even at daylight but not as bright as to blind you. All of this makes working with the DS209+ a pleasure.
The back panel carries the following (from top to bottom):
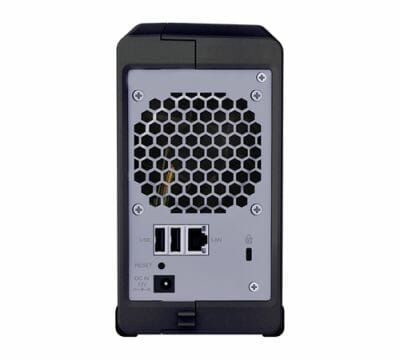
- 70x70mm fan
- Two USB 2.0 ports
- Gigabit Ethernet port
- Reset button
- Power connector
Besides that, the back panel offers a cable holder for the power adapter and a Kensington security slot.
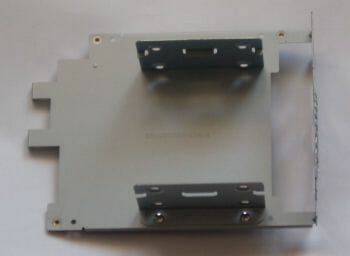
You have to dismantle the DS209+ in order to install hard disks into it. It is easy: you only have to unfasten two screws at the back panel and shift one of the side panels. You can see a steel partition here that covers almost the entire PCB. It is on this partition that the fasteners for the internal HDDs are to be found. The DS209+ can accommodate almost any 3.5” HDDs with SATA or SATA-II interface and a capacity up to 1.5 terabytes inclusive. The HDDs are secured on the steel partition with four screws and connected to the PCB with two short cables. The screws and cables are included with the NAS.
The quality of the case is very high, by the way. All of its details are fitted together perfectly without gaps or anything.
You’ll need more effort to access the PCB than to install the HDDs – the partition and the large number of screws should cool a casual user’s interest in the device’s internals. So we had to unfasten the four screws that secure the PCB with partition to the remaining half of the case and then the four screws that attach the partition to the PCB. After that we could take the PCB of the DS209+ into our hands.
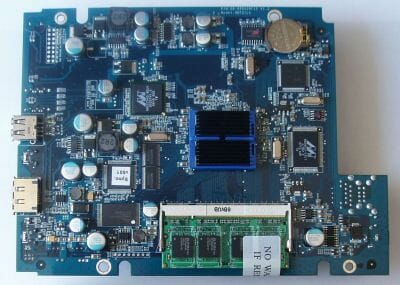
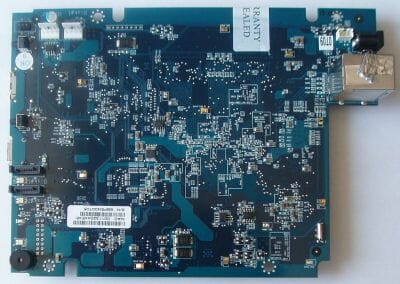
The PCB looks impressively large occupying almost all the free space inside the case. The blue piece of textolite carries a lot of various chips and auxiliary elements. The PCB layout is clever overall, all the components being distributed evenly on the face side of the PCB. The reverse side has some surface-mounted components, a few indicators, and connectors. The components of the DS209+ are quite unusual, by the way.
First of all, the NAS uses an MPC8533 processor from Freescale. It is thanks to this processor that the new NAS is going to conquer new performance peaks.
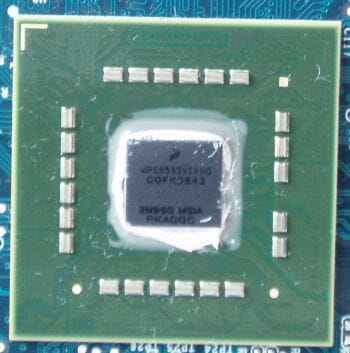
The marking says that this processor model incorporates an e500 core based on the PowerPC architecture.
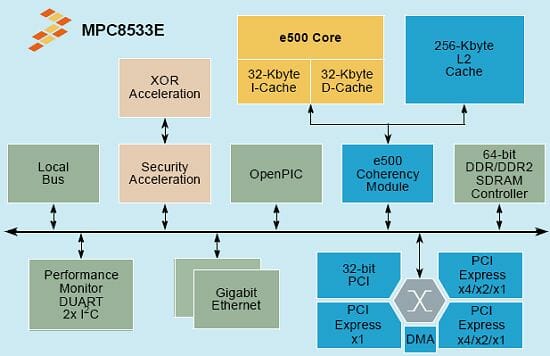
The MPC8533 can be clocked at frequencies up to 1 gigahertz, but the NAS uses an 800MHz sample. Anyway, this is 300MHz higher than the frequency of the Marvell processor employed in the DS207+. The 800MHz processor is going to get quite hot at work, so there is an aluminum heatsink on it for additional cooling.
The DS209+ comes with as many as 512 megabytes of system memory. It would have been problematic to install so many chips on the PCB, so the developer installed a SO-DIMM slot instead.
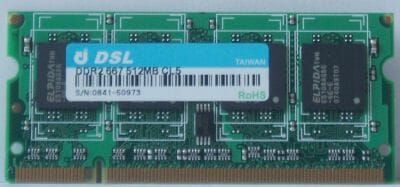
In our sample of the NAS the slot is occupied with a module from DSL based on Elpida chips (DDR2-667MHz, CL5, 512MB). We don’t know what amount of memory the processor can address, but as we learned from its specs, the MPC8533 supports DDR2 memory with frequencies up to 533MHz only. So, we guess the employed module is not clocked at its maximum frequency.
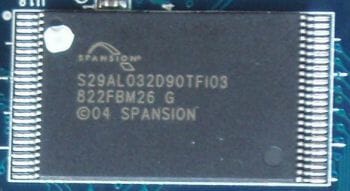
The firmware is stored in a 4MB Spansion S29AL032D90TF103 flash memory chip because most of the OS resides on the HDD.
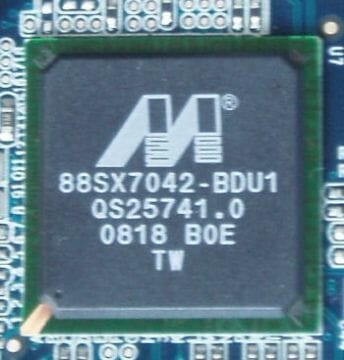
The two internal and one external SATA ports are supported by a Marvell 88SX7042 controller. The controller itself supports up to four SATA ports and allows uniting the connected drives into a RAID array.
The NEC D720102GC controller is responsible for all the USB ports the DS209+ offers.

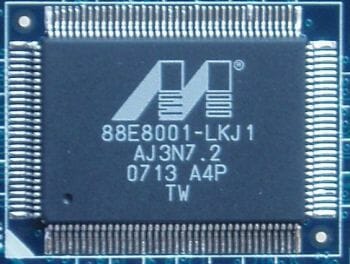
The Gigabit Ethernet port is based on a 32-bit Marvell 88E8001 controller which is often installed on mainboards.
The device’s controls and indicators are based on PIC16F627A and LC4064V chips.
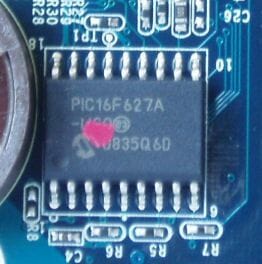
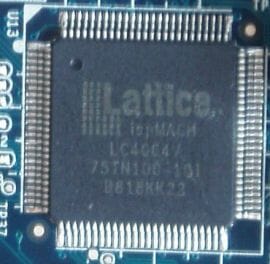
There is a console connector on the PCB for in-circuit programming of the latter chip but we could not find an appropriate connector for the PIC. The processor has two consoles, one of which is not installed. The missing console is JTAG while the installed one is UART.
Firmware and Web-Interface Overview
Having advanced hardware capabilities, the DS209+ offers a rich selection of extra services that can rarely be found in other devices of its class. This functionality is supported by firmware, and the firmware image you can download from the manufacturer’s website is about 20 times the capacity of the NAS’s flash memory chip. It is because most of the firmware is written to the internal hard disk rather than into the flash memory. When booting up for the first time, the NAS creates a system partition, over 100MB large, for that purpose.
By the way, the source code of the firmware is only available at a special request and will cost you $20. Perhaps this is the reason why PC enthusiasts do not create their own versions of this firmware. At least we couldn’t find serious projects concerning Synology products on the Web. However, you can find some info about customizing Synology’s firmware, for example at http://oinkzwurgl.org/diskstation. Although that resource is focused on junior NAS models from Synology, some of its materials should be interesting for owners of the DS209+ as well.
Judging by the forum at the Synology website and by the Wiki-page the company supports, Synology has a favorable attitude towards hardware enthusiasts. The company is among the few manufacturers of home networking equipment who officially make their product accessible via Telnet and SSH. You had to install a patch to enable such access before, but this capability has been added into the web-interface since the second version of Disk Station Manager.
People at Synology do not wait for individual users to polish the official firmware off but do the job themselves. The services you will find available in the firmware of the DS209+ are going to satisfy most users. When we were writing our review of the DS207+, we had the second version of the Disk Station Manager software (it is the name of the web-interface of Synology’s NASes) that pushed the functionality of Synology products to a new level. And our tests of the DS209+ nearly coincided with the official release of Disk Station Manager version 2.1. This update doesn’t offer any dramatic innovations, but provides considerable improvements. We will discuss them during our description of the firmware.
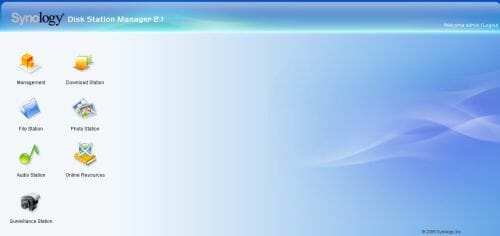
So, DSM 2.1 is an AJAX-based interface. It is visual, beautiful and intuitive. The NAS’s functions are fully integrated within the interface.
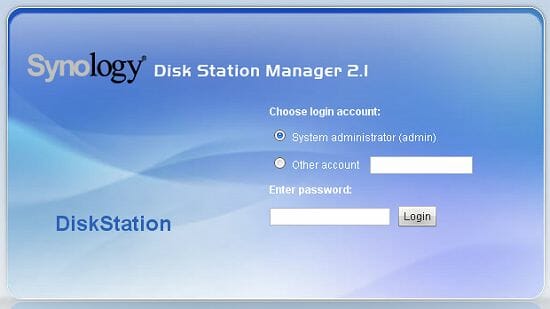
It now has a Desktop, like Windows’ one, where icons of all the active services of the DS209+ are located.
Official Firmware Applications
We’ll now glance over the applications integrated into the official firmware. First of all, the DS209+ comes with such applications as iTunes Server, PHP and MySQL. These don’t need our description, so let’s see what services can be accessed from the Desktop.
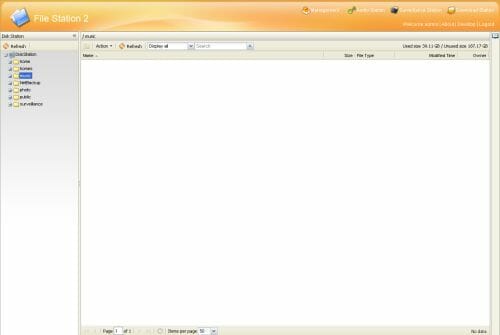
File Station
The DS209+ offers a file manager called File Station. You can use it to perform basic operations with files and folders on the internal HDDs as well as external disks connected to the DS209+.
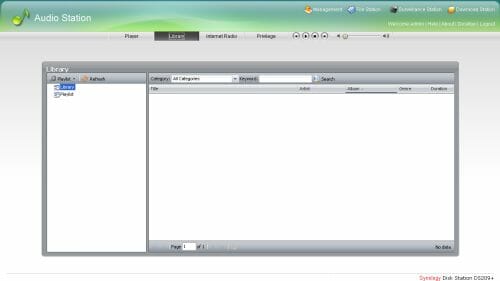
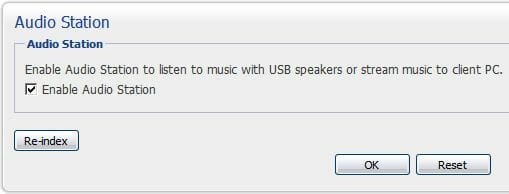
Audio Station
The Audio Station link leads to the namesake application that can be used if you connect special speakers or an iPod to one of the NAS’s USB ports.
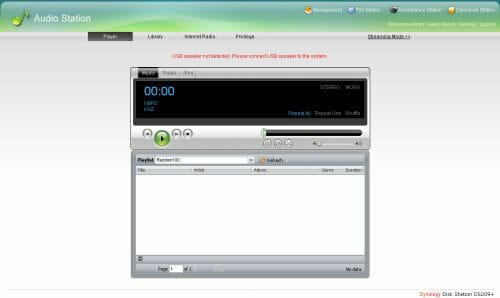
The Audio Station allows to play music stored on the DS209+ and broadcast Internet-based radio stations via these devices. In the new version of DSM, the USB playback mode and streaming mode are separated, so you can easily see what opportunities are available if you don’t have USB speakers. Besides, there are tools to create an indexed library of music and play-lists.
You can make it even more comfortable for yourself by attaching a remote control with a USB interface.
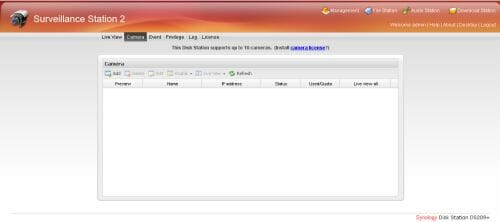
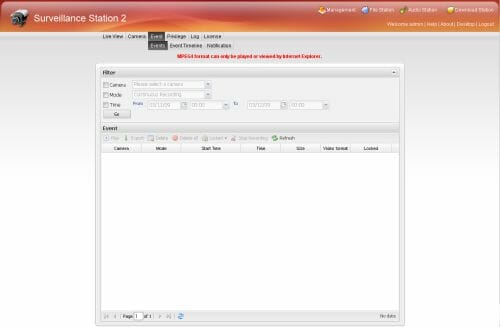
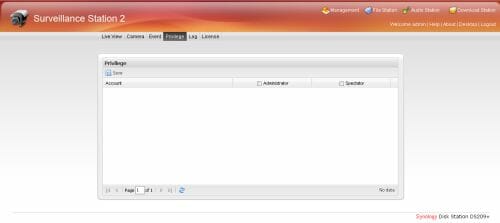
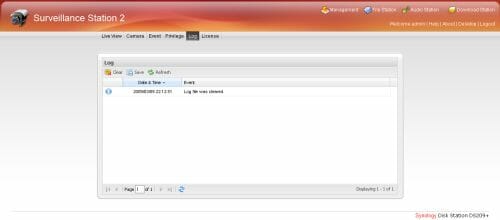
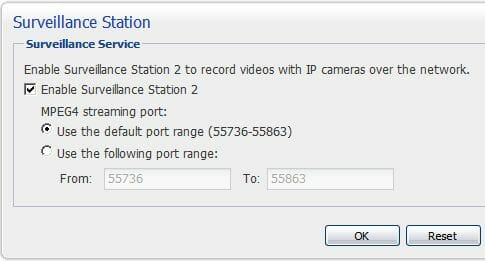
Surveillance Station
The DS209+ can also be used as a basic video surveillance system. To enable this mode, you must connect a web-camera to the NAS and set it up using the Surveillance Station service. This application allows you to record video by a schedule or when there is any movement detected in the surveillance zone. You can also view the camera’s image in real time. The Surveillance Station can work with multiple cameras simultaneously, but you need to buy an additional license with activation key for each additional camera.
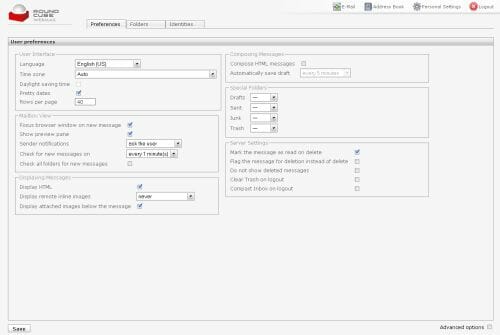
E-Mail Server and RoundCube
New in Disk Station Manager version 2.1 is the email server but it is not yet integrated into the firmware – you can install it separately via the package management service. Besides the server, this package includes a web-application called RoundCube. It is quite a popular IMAP client.
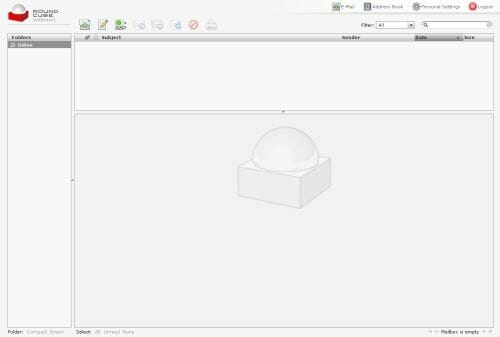

You can learn more about its capabilities at the project website at http://roundcube.net.
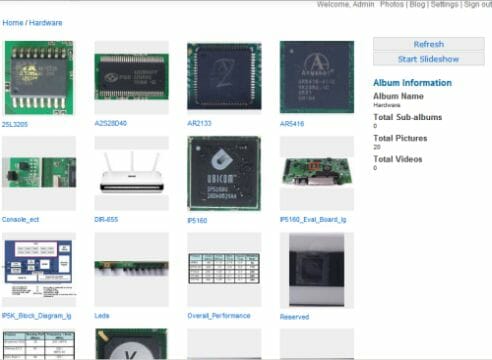
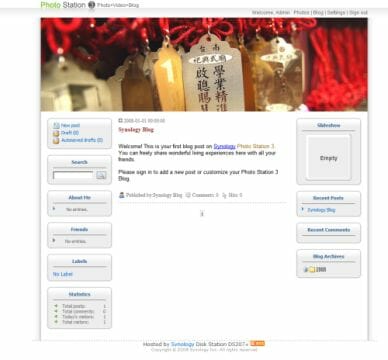
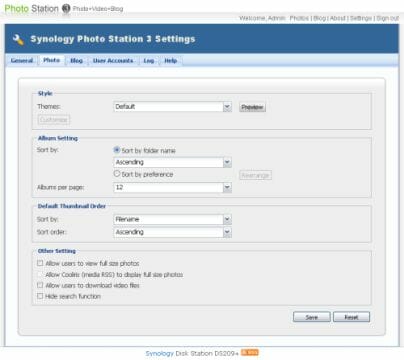
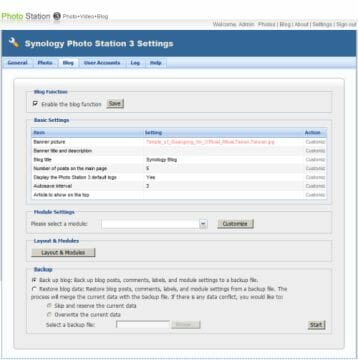
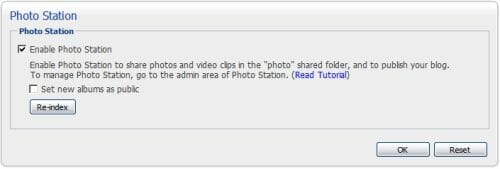
Photo Station 3
Photo Station 3 allows you to view photos and video clips stored on the DS209+ as cute galleries accessible via Internet. You can also set up your blog here. The blog offers wide customization opportunities, by the way.
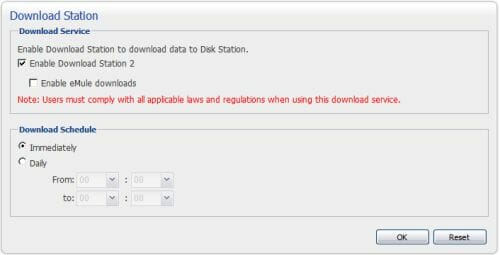
Download Station
And last but not least, the Download Station service is about the integrated download manager. The Tasks page is for managing the list of current downloads while the Settings page is for setting up the manager’s parameters.
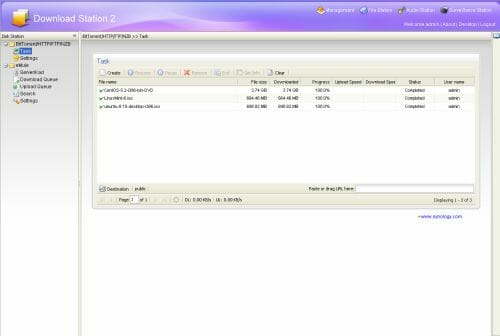
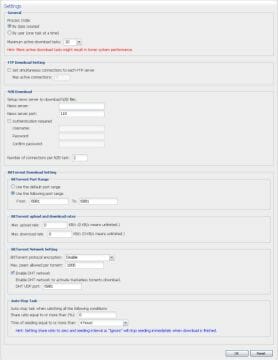
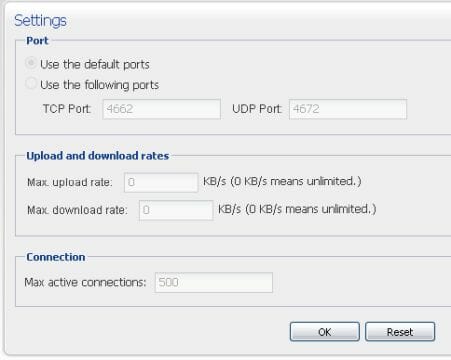
There are quite a lot of BitTorrent-related settings here. Besides, the ed2k protocol is supported, which is quite a rare thing among BitTorrent-compatible NASes.
Web-Interface Functionality
Now let’s see what NAS-related setup options are available in the web-interface
.
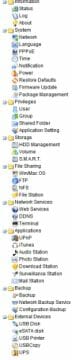
Besides the firmware name, the header of the manager window contains links to the integrated applications, DSM Desktop, and exit page (Logout). A navigation menu is located in the left part of the window. This menu looks prettier than in the previous version of the firmware but has retained its laconic two-level design and logical structure.
There is one small but handy innovation here: context search.
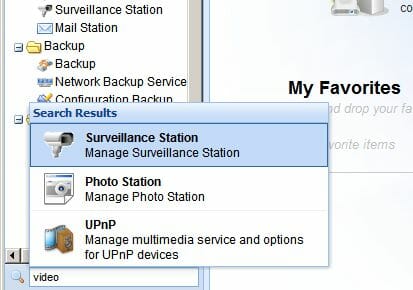
If you begin to type in some word, the DS209+ will try to find corresponding groups of settings and show links to them in a pop-up window.
The current page with settings is displayed in the right part of the window. The integrated Help system is designed as a vertical band along the edge of the window. You don’t even see a link to it until you choose some page. But when you do, there appears a book icon at the top of the band.
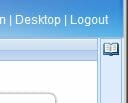
This is a link to the Help page which moves out of the band when you click it.

The Help system is complete and comprehensible, so even beginner users shouldn’t find it a problem to set the NAS up.
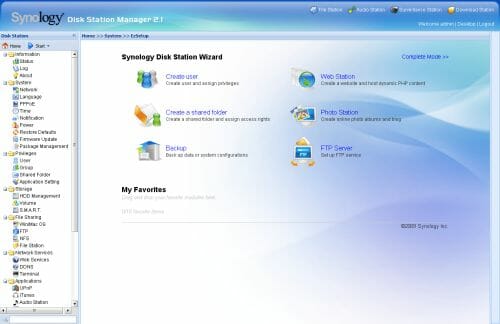
When you open the setup manager, you can see a page with a few setup Wizards that are indeed very helpful. You can also see the My Favorites zone here. You can drag-and-drop up to 10 links to any menu items into this zone for quick access. You can also change the appearance of the start page by clicking the Complete Mode link. This displays all of the menu items in a single list.
Now let’s see what setup options you can use in the Manager.
Information Group
So the first group of settings is Information. It contains the Status page that offers rather detailed information about the current parameters of the device. For example, it reports the current temperature of the HDDs.
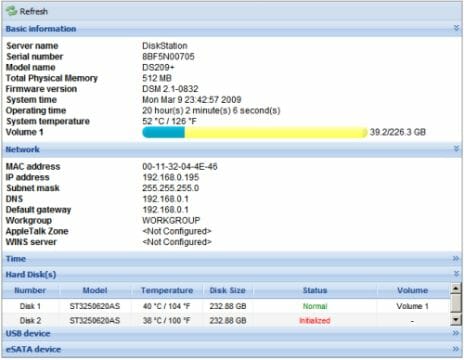
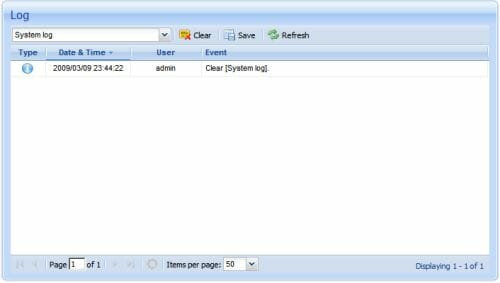
The Log page is especially interesting as it provides logs of the device’s operation divided into categories. Each log is very detailed and visual. The last page, About, contains information about the trademark, etc.
System Group
The next group is called System and contains settings related to the NAS proper. It begins with the Network page where you can specify the parameters of the Ethernet port and change the network name of the DS209+.

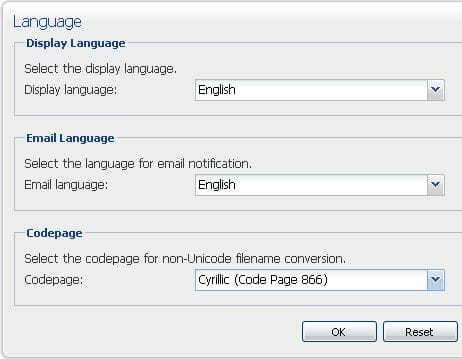
The Language page is for choosing the language of the NAT’s web-interface, e-mail notifications and codepage for filenames.
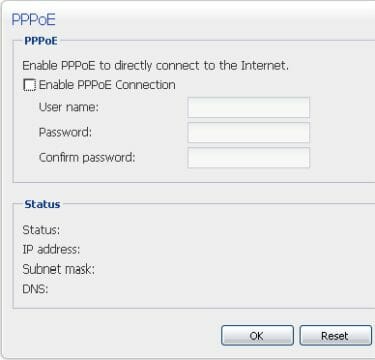
VPN connection parameters are specified on the PPPoE page.
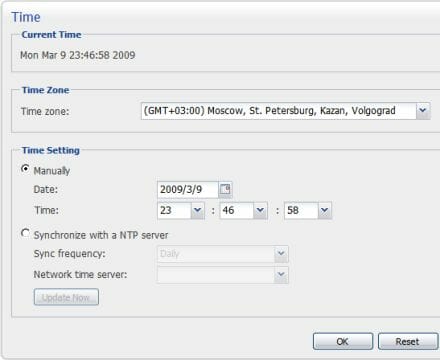
The system date and time of the NAS device are configured on the Time page. Parameters of the NTP protocol are specified here, too.
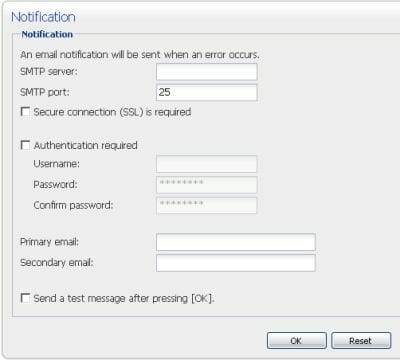
The way to notify the administrator about errors is specified on the Notification page. You enter the parameters of an external SMTP server and the recipient’s email here.
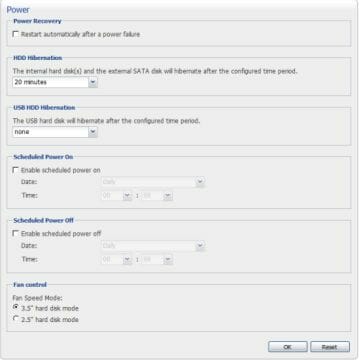
The power-saving mode of the DS209+ is configured on the Power page. Particularly, you can specify the idle period after which the HDDs will be shut down. DSM version 2.1 has added two new features: scheduled shutdown and fan speed control.
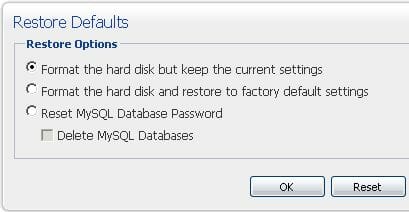
To restore the settings to their defaults and/or format the internal HDD you should go to the Restore Defaults page.
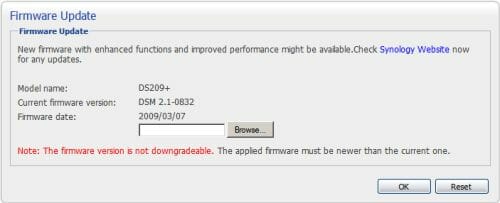
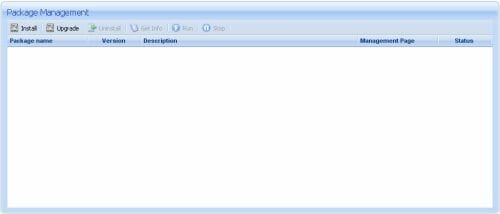
The Firmware Update page is where you can update the firmware and install patches that add to the functionality of the already installed firmware.
New in the latest version of its firmware, the DS209+ offers a package management service. Such packages enhance the NAS’s functionality. Particularly, an email server can be installed as a package.
Privileges Group
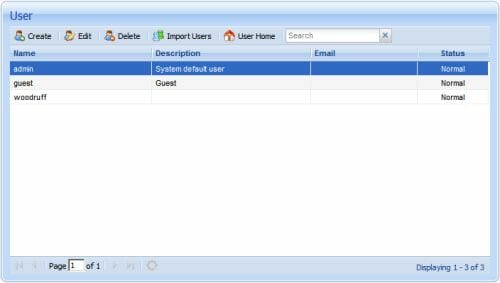
The Privileges group is about user accounts which are created and edited on the User page.
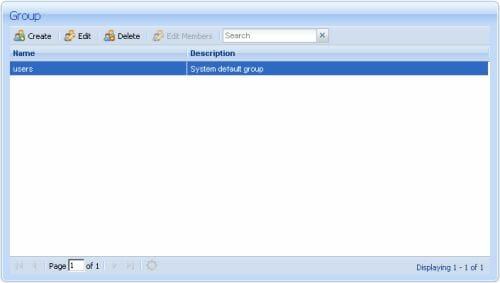
All users are divided into groups you can create on the Group page.
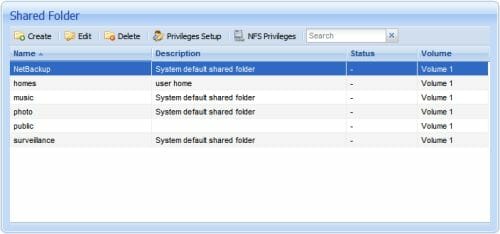
Each group has its particular access rights which are defined on the Shared Folder page.
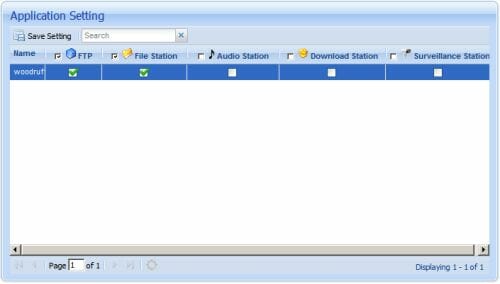
Starting from the latest version of the firmware, this group offers a page called Application Settings for defining which NAS applications will be accessible for specific users. Inaccessible services just won’t be displayed after user’s authentication.
Storage Group
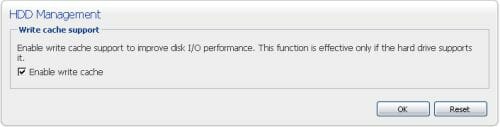
The Storage group contains settings pertaining to the folder structure on the DS209+. The HDD Management page is where you can turn data caching on and off.
The Volume page allows to perform basic operations with the disk partitions, enable one of the available RAID modes (the new firmware also supports JBOD) and initialize a new HDD.

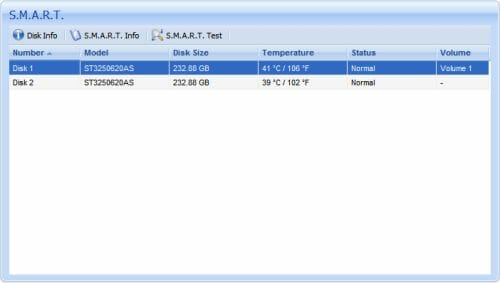
The new firmware version also contains a page where you can view the HDDs’ S.M.A.R.T. parameters and perform appropriate tests.
File Sharing Group
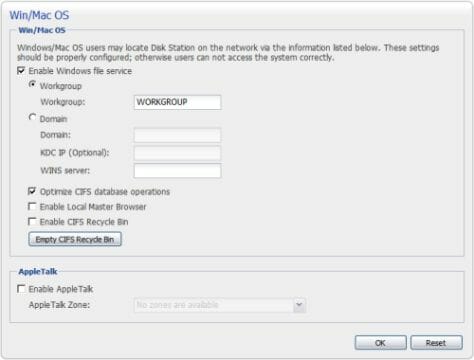
DSM 2.0 had a group of settings called Network Services. It contained setup options of almost all the integrated services of the NAS. It is now split into three groups: File Sharing, Network Services and Applications. The File Sharing group covers the services pertaining to remote access to files stored on the DS209+. The Win/Mac OS page allows setting the DS209+ up for Windows’ Network Environment or an Apple Talk network.
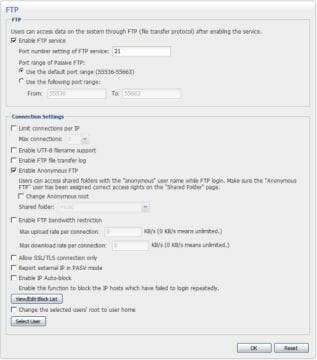
The integrated FTP-server is configured on the FTP. There are now a couple of new options such as Unicode support or an individual log for FTP connections. Note also the support for encrypted FTP connections, which is a rare thing for NASes.
The NFS page is for setting up the appropriate service.

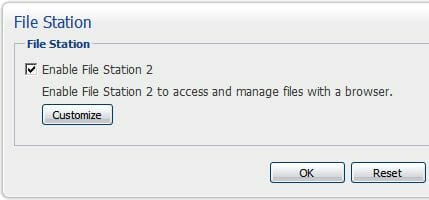
The File Station service is activated and configured on the namesake page.
Network Services Group
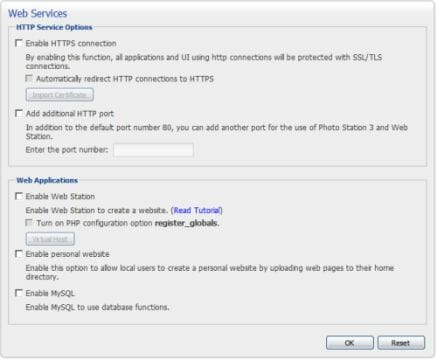
Next goes the Network Services group where you can set up the NAS’s network services. The Web Service page is for specifying the parameters of the integrated Apache server.
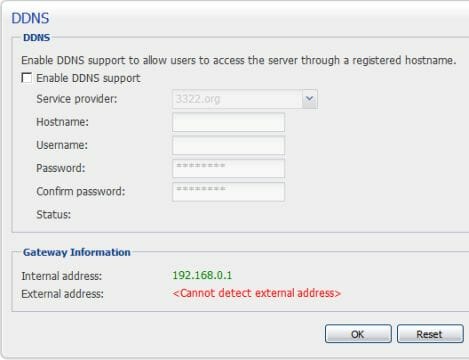
The DDNS page allows to enter your DDNS account parameters to identify the DS209+ by a domain name irrespective of its IP address. This is useful if the DS209+ is used for storing a website or blog.
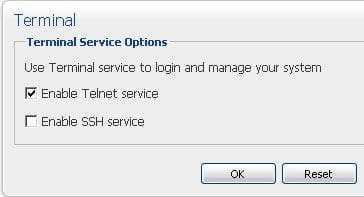
The last page in the Network Services group is called Terminal. You can enable/disable Telnet and SSH here.
Applications Group
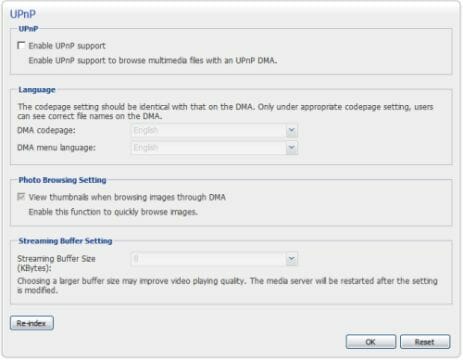
The Applications group offers pages for activating all of the NAS’s multimedia-related services most of which have been mentioned at the beginning of this section.
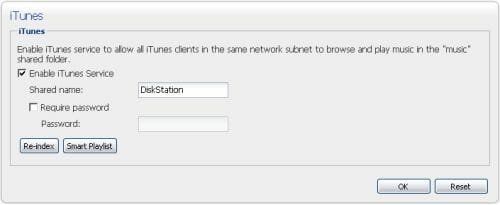
The integrated UPnP server has flexible setup options, for example.
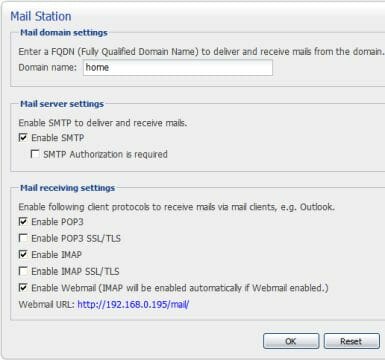
The settings of the email server, after you install it, appear in this group, too. The Mail Station page is, for example, for specifying the domain name from which email will be sent, turning on support for secure POP3 and IMAP, and enabling the IMAP client we have written about above.
Backup Group
The Backup group has been revised greatly in the new firmware.
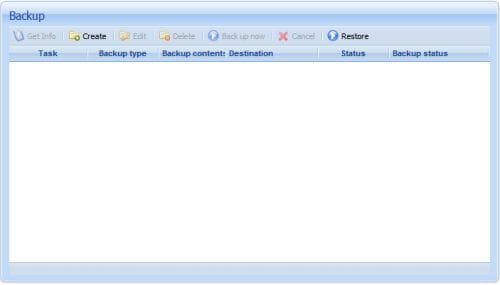
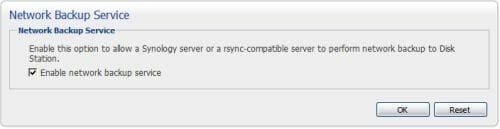
The local backup and network backup options used to be in different pages, but now there is a single page for them. The other two pages are necessary for making a backup for the NAS’s system configuration and enabling the option of network copying.

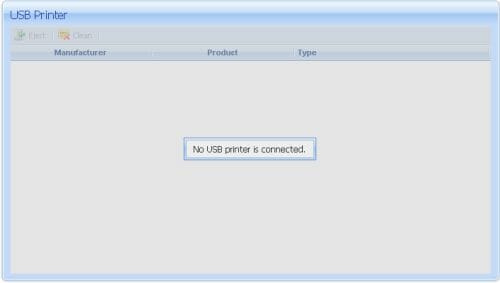
External Devices Group
The pages of the External Devices group provide a list of supported devices that are connected to the DS209+.
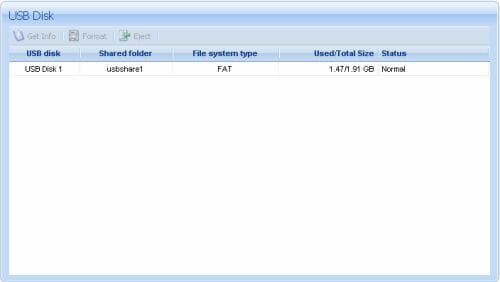

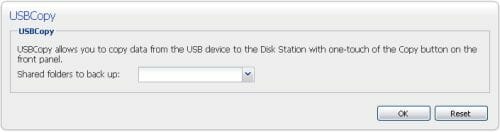
You can unmount those devices there, too. You can also define which folder the data from the USB drive will be copied to on your pressing the C button on the front panel.
That’s actually all we wanted to tell you about in this section. Without doubt, the DS209+ comes with high-quality firmware, especially in version 2.1. This is in fact an example of good firmware for a network device.
Software Bundle
There are three programs in the software bundle included with the DS209+.
Synology Assistant
You begin to work with your newly bought NAS device by launching Synology Assistant.
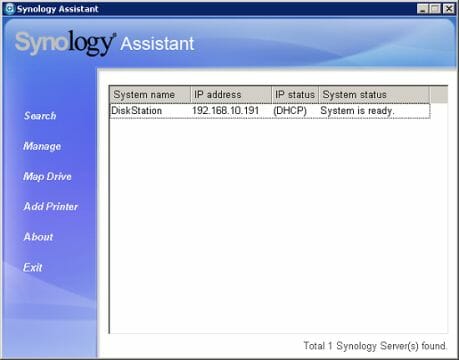
When started for the first time, the program proposes to search for new Synology devices. Then you can choose a device, load firmware into it and run a preliminary setup procedure. Afterwards Synology Assistant will allow you to perform certain operations with Synology devices in a visual manner: search for new devices, attach network disks, set up a network printer, etc.
Data Replicator 3
The second program is called Data Replicator 3.
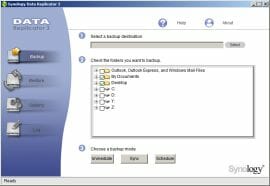
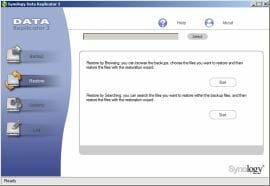
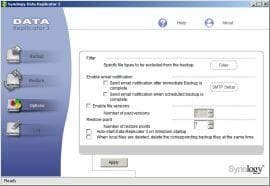
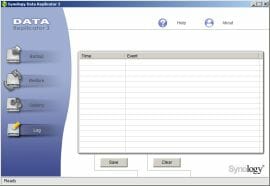
You can use it to make backup copies of data from the remote machine it is installed on to the DS209+’s internal disk. The program interface consists of four screens: a data backup page, a data restore page, a settings page, and a log.
Data Redirector
The last program is a remote client for the download manager integrated into the DS209+. It is called Data Redirector.
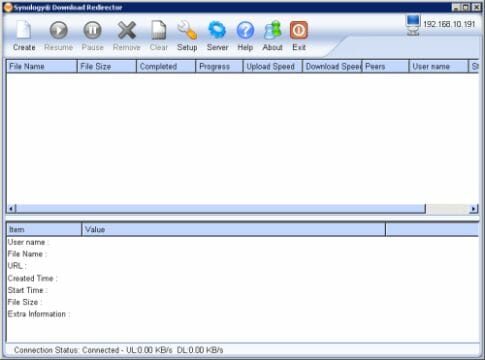
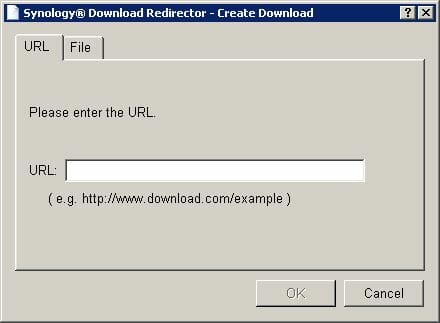
After typing in the server address you can use this program to manage the list of downloads at the server. The client offers all the management options available on the server but provides a visual interface to them.
All the programs from the software bundle feature a user-friendly interface and are really helpful tools indeed. Surely they add more points to the DS209+’s overall score.
Performance
Judging by the specs, the Synology DS209+ is going to be good in our tests in which we will use a new benchmark from Intel developed especially for NASes. It is called NAS Performance Toolkit and allows benchmarking a NAS under real-life conditions. With NASPT you can launch a set of NAS usage scenarios with a click of one button, which is very handy. The test can be launched in single-run or batch mode (in the latter mode the test is performed several times and the results are averaged).
This is the equipment we used for this test session:
- Synology DS209+(DSM 2.1)
- Synology DS207+(DSM 2.0)
- Desktop PC (X6800/4GB/Gigabit Ethernet/Windows XP SP2)
- Category 5e Ethernet cable
- Two Seagate Barracuda 7200.10 hard disk drives (250GB, SATA-2)
- Transcend JF130 USB flash drive (2GB)
- D-Link DIR-655 router (Gigabit Ethernet)
- NAS Performance Toolkit
- Intel Centrino notebook
- IOMeter
- Putty SSH-client
- FlashFXP FTP-client
Yes, we tested the DS207+ with older firmware in order to see how Synology’s products are evolving over time.
So, first we used NASPT to check out the performance of the SMB protocol, i.e. when the NAS is used as a networked disk. We used all the scenarios available in NASPT 1.7, running tests in batch mode. The names of the tests are quite self-explanatory.

The results seemed somewhat disappointing to us because IOMeter had produced much higher numbers. But IOMeter is a synthetic benchmark and its results are often higher than what the device can yield under real-life load. Having run NASPT under identical conditions, we also noticed that even the results of the batch mode varied up to a couple of MBps. It means that you should view similar results as identical.
NASPT actually sets the scene. We can see that the DS209+ is faster throughout most of the tests. A performance increase in RAID0 mode can also be observed whereas IOMeter wouldn’t make this increase obvious.
Now that we’ve got a general notion of how the DS209+ performs as a networked disk, we can run another test we have not used before. Today, BitTorrent is the main protocol for sharing files. Many NASes offer the opportunity of downloading files via this protocol, and some, like Synology’s ones, can also seed files. However, a NAS can often lower its SMB performance, for example, if it is downloading too many torrents. To check out the behavior of the DS209+ in such a situation we connected it to the router (before that, the NAS had been attached directly to the desktop PC), launched a couple of torrents (with a total of about 200 peers) and performed another round of NASPT tests (we had also run this test with the torrents disabled to make sure the router would not be a bottleneck). During the test we accessed the NAS remotely via SSH and issued the top command to monitor the usage of the NAS’s resources in real time. The screenshots were made at peak moments, i.e. when the resources were used the most.
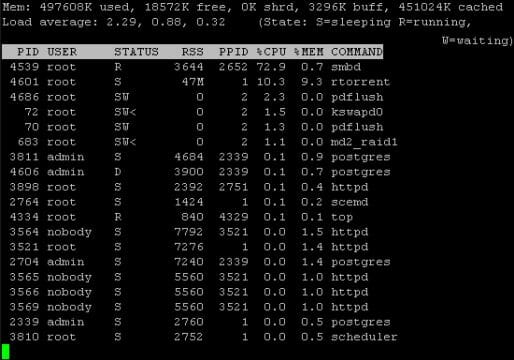
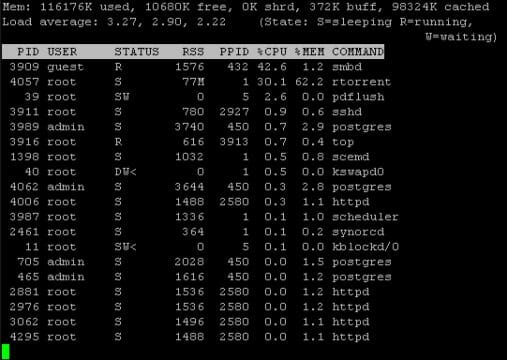
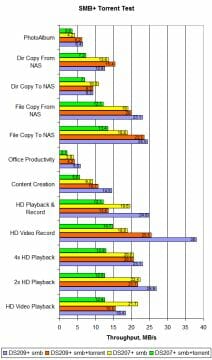
As you can see, both devices show similar performance when torrents. The speed is lower than without the torrents, but acceptable anyway.
So far we’ve been testing the NASes’ internal HDDs, but you can also attach an external drive to them. To test the data-transfer speed of the USB port we use an ordinary USB flash drive with a capacity of 2 gigabytes. We have to use IOMeter for that because NASPT’s test data just don’t fit into this capacity.
| Model | Mode | Read | Write | |
|---|---|---|---|---|
| DS209+ | 512B | MB/s | 2.31 | 2.09 |
| DS209+ | MB/s | 51.45 | 19.74 | |
| DS209+ | 64K | MB/s | 2.31 | 2.09 |
| DS209+ | MB/s | 59.69 | 14.54 | |
| DS207+ | 512B | IO/s | 4737.51 | 4280.88 |
| DS207 | IO/s | 4737.51 | 4280.88 | |
| DS207 | 64K | IO/s | 823.27 | 315.96 |
| DS207 | IO/s | 955.08 | 232.64 | |
We don’t quite understand these results even though they are similar for both NASes. The speed is too high because the flash drive yields only 20MBps when connected directly to the desktop PC. Anyway, the speeds of writing to the flash drive are high with both NASes, the DS209+ being somewhat faster.
The next test is about the integrated FTP server available in both NAS devices. FTP remains an important data-transfer protocol and we measure the data-transfer speed not only for the integrated HDD but also for an external device, a USB flash drive. We upload and download files with FlashXFP and mark the average download speed reported by the program in the server connection log. We use the following content types: a 3.8GB image of a DVD (L), a 200MB folder with MP3 files (M), and a 200MB folder with photographs (S).
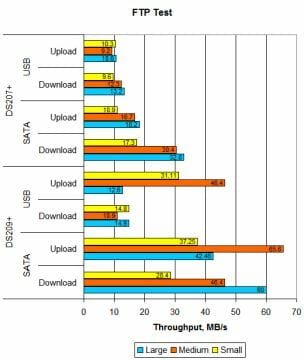
The results are impressive, again, even though there are odd fluctuations of speed when exchanging data with the USB drive. Perhaps they are due to the inaccuracy that occurs when we extrapolate the transfer speed of small files (they are transferred in less than a second) as well as due to very low latencies between transfers of individual files (that’s another point in favor of the DS209+).
As we have seen in each test, the DS209+ can really put its hardware resources to good use. Its performance will make a new reference point for every other NAS to try to achieve.
Conclusion
Once again we see that Synology’s products are beyond competition in almost every aspect. Most importantly, the developer is improving from model to model, making its products an example of quality.
The DS209+ is impeccable. The developer has corrected the minor flaws in the design of the DS207+ and released a new, improved version of firmware. Coupled with the more advanced electronic stuffing, this makes the DS209+ the flagship of Synology’s NAS range. The only thing that worries us is the big difference in price between the DS209+ and DS207+. We don’t know about the cost of the new processor, but the other improvements, particularly the amount of system memory, do not seem worth the money. We hope the price is high because the model is new and will decline eventually. After all, paying about $500 for a dual-disk NAS is too much for most users. But if you can afford such a purchase, you won’t be disappointed with the DS209+ as it is good in everything from design and functionality to performance.
According to the results of our today’s test session, we are glad to award Synology DS209+ with our Editor’s Choice title as the best two-disk NAS solution:

Highs:
- Excellent performance
- Top-notch design
- High quality of manufacture
- eSATA port
- Localized interface and services
- Multi-language integrated Help system
- User-friendly web-interface
- A lot of integrated services
- Supports external connection via PPPoE
- Good logging options
- Copying data from external drives with a single button press
- Telnet and SSH available in the official firmware
- Handy software tools for working with the NAS remotely
Lows:
- High price
- Firmware source is not free
- No VPN protocols other than PPPoE