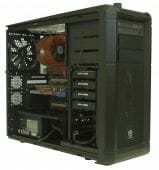
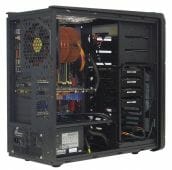
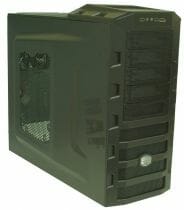
Thermaltake Element G, AeroCool XPredator and CoolerMaster HAF 922

For our new system case review we selected three models from the upper mainstream price segment, which we haven’t had a chance to check out previously. Which one of these products will turn out the most appealing considering that they all are priced very similarly?
There is currently a very wide selection of midrange system cases for building rather advanced computers. Quite a number of such products that claim to have an optimal price/functionality ratio have already been tested in our labs but there are still others we haven’t covered yet. For our today’s review we’ve selected three system cases that sell without power supplies and are all available for less than $150.

The Thermaltake Element G features compact dimensions but good expandability options, a large number of preinstalled fans, and manual regulation of the speed and highlighting of those fans.
The AeroCool XPredator is huge, supports XL-ATX mainboards and USB 3.0, and offers two regulators to control up to six fans.
The Cooler Master HAF 922 features excellent cooling and a roomy interior. It has become more affordable since its release and can make a worthy opponent to the newer products.
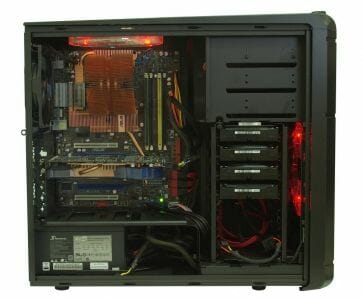
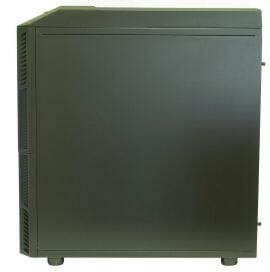
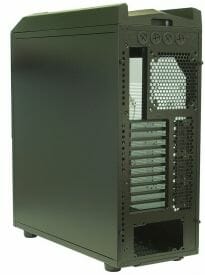
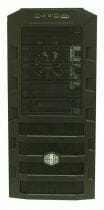
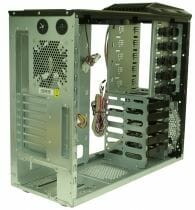
Thermaltake Element G
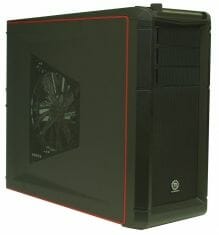
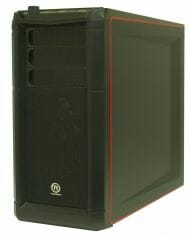
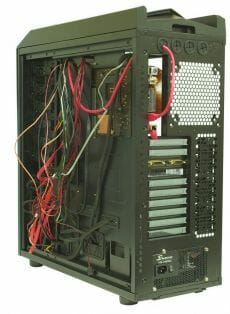
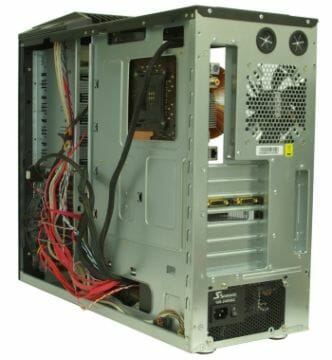
This system case has the typical exterior design of midrange products: black surfaces, a fine mesh front panel, a bottom PSU compartment, and large fans.

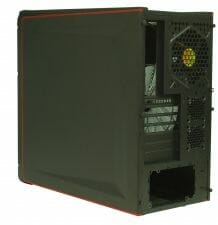

It has a couple of distinguishing features, though. For example, the Element G has only three external 5.25-inch bays whereas typical mid-tower system cases have four.
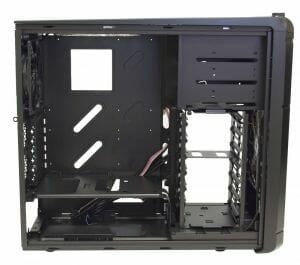
Thanks to that, the Element G has as many as seven internal 3.5-inch bays, which should make up for the lack of one external 5.25-inch one. It means you can pack a lot of hard disks into this system case or, if you’ve got up to four HDDs, provide better cooling for them by installing them alternately with empty bays. It would be harder to make four 5.25-inch bays useful. One is usually reserved for an optical drive and another, for a card-reader (via an adapter). And then, it’s hard to find a purpose even for a third 5.25-inch bay, let alone a fourth one.
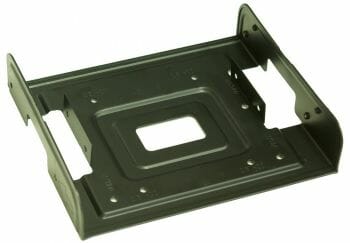
A 3.5”-5.25” adapter is included into the kit. It supports not only 3.5-inch but also 2.5-inch devices.
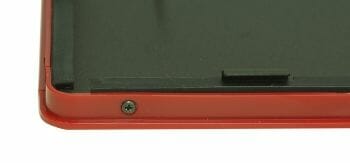
Except for the rear panel, the external metallic surfaces have a rough powder coating. The coating is scratch and stain resistant.
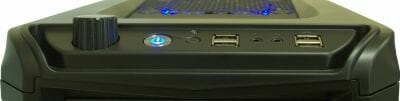

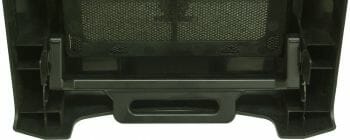
The Element G is evidently meant to stand on the floor or in a desk niche. Its connectors and buttons are located on the slanting top of the front panel, suggesting that you reach for them from above. The connectors are grouped rather conveniently but eSATA and FireWire are missing to make them a complete set. We’ve got only four USB 2.0 ports and microphone and headphone connectors here.
To the left of the USB ports and audio connectors there is a fan controller knob. You can turn it to change the speed of the fans or press it to switch between the six highlighting modes:
- Constant blue light
- Constant green light
- Constant red light
- Rotating lights with changing colors
- Mixed highlighting
- No highlighting

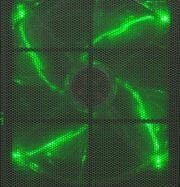
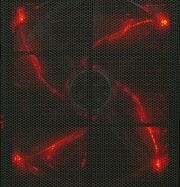
For all this freedom of choice, we found the red highlighting the most pleasing. It matches the red plastic elements of the side panels and the amber HDD indicator but doesn’t go quite well with the bright blue indicator of the Power button. The blue highlighting is the opposite of the red one and only matches the Power button whereas the green highlighting doesn’t match any elements of the system case at all.
The rotating highlight is rather tiresome whereas the mixed mode is exciting but also distracting.
We can spot a few manifestly cheap details in the design of the system case that don’t match its market positioning such as the single-use brackets (except for the top expansion-slot bracket) and the plain feet made of robust plastic. Even the openings for the pipes of a liquid cooling system, which are an almost obligatory feature of any midrange system case today, have to be torn open and lack the rubber rims that we find in most other products.
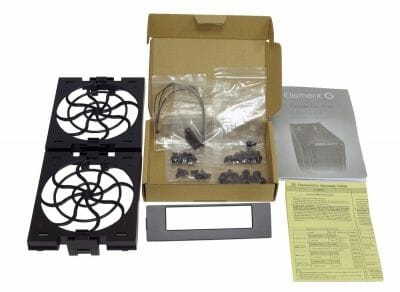
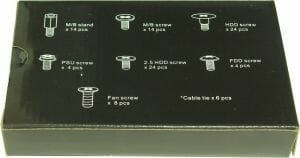
The accessories to the Element G include a multilingual user manual, a set of fasteners of all kinds (each kind in an individual pack), a faceplate for a 3.5-inch device, a plastic anti-theft fastener for mouse and keyboard cables, and a few single-use cable straps.
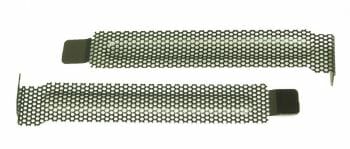
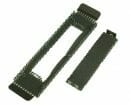
There are also a couple of plastic casings for 120mm fans you can replace the 200mm front-panel fan with.
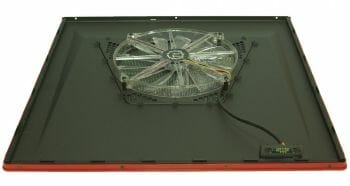
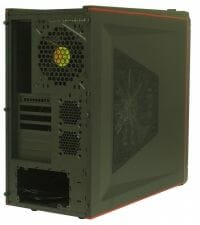
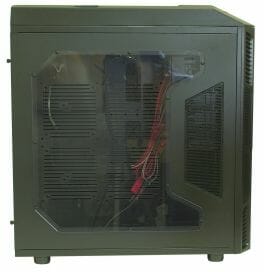
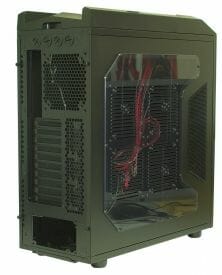
The side panels are 0.8 millimeters thick, which is good, and are further reinforced with extrusions. Still, notwithstanding these tricks, the panel with the preinstalled fan is rigid but the other one wobbles in your hands when you take it off.
As opposed to the Enermax Hoplite we tested earlier, the extruded section goes into the panel, leaving less space to lay cables in behind the mainboard. Well, the deepest extrusion is closer to the back where there is only a mainboard power cable, so you still have quite enough of space for your cables.
As we wrote above, the appearance of the system case is enlivened with the red moldings along the edges, but the segments of the moldings are not fitted together very neatly.
On the interior of the side panels you can see rubber pads that absorb vibrations.
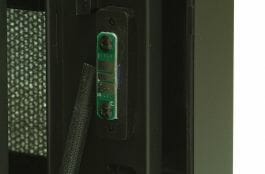
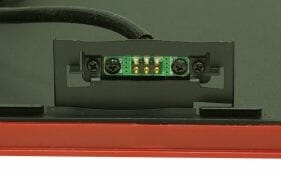
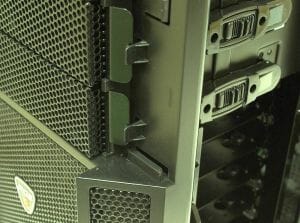
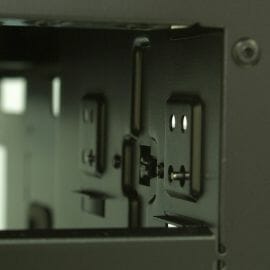
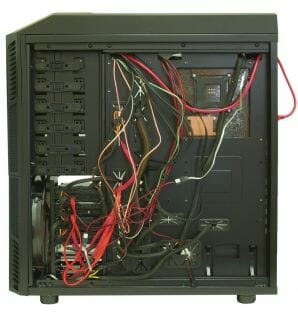
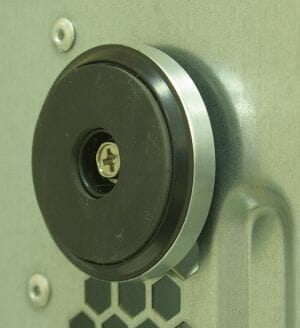
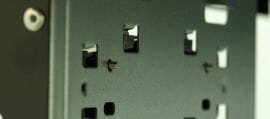
The Element G developers have come up with a clever solution for connecting the side-panel fan. With other system cases, you have to disconnect this fan before you take the side panel off, and you have to be careful not to damage the connector or cut the wire. You won’t have any such problems with the Element G because no cables trail behind the side panel when you take the latter off. The photos describe the ingenious simplicity of the solution quite well.
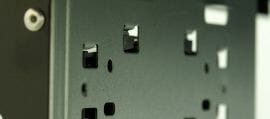
One consequence of it is that when you take the side panel off with the side fan’s highlighting turned on and then put it back in its place, the highlighting of that fan will reset to the first mode. If another mode has been selected for the rest of the fans, their highlighting goes out of phase, so to say.
Assembling a computer system in this case was rather easy, but we had to use our screwdriver often even where we were not supposed to (many thumbscrews were too tight to be turned with bare fingers or resided in such locations that we couldn’t grasp them properly).

You don’t have to remove the front panel in order to install 5.25-inch devices. The faceplates can be easily extracted with your finger. Each device has to be fastened with screws; there are no screw-less fastening mechanisms here.
Although it is not necessary to take it off to assemble your computer, the front panel can be removed by means of a lever. The lever doesn’t seem to be any better than taking the front panel off manually as with other system cases, though.
There is a layer of foam rubber on the interior of the face panel. It suppresses the noise from the computer components and also serves as a dust filter for the front fan.

There is an unusual plate above the PSU bay inside the chassis. People from Thermaltake must have implemented it in order to keep the PSU in an isolated compartment for better cooling or something like that, but we can see the following two purposes for it.
First, they wanted to provide a place for 2.5-inch drives (that’s not the best location possible, just like installing such a drive into a 5.25-inch bay, but better than nothing). Second, the chassis isn’t rigid enough when the side panels are taken off since the internal details are 0.6mm steel. So, the additional strut helps make the chassis somewhat sturdier.
Anyway, if you don’t have to install 2.5-inch drives, we’d recommend you to remove that strut. It makes it harder to move things around inside the chassis.
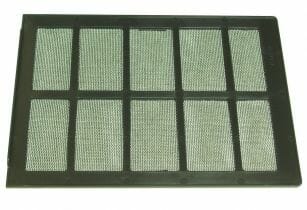
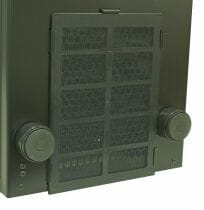
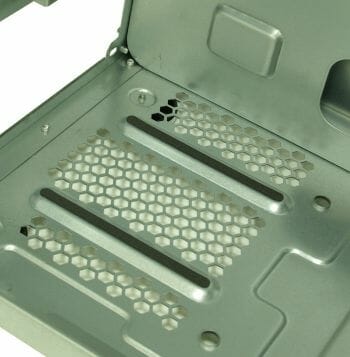
The PSU bay allows installing your power supply in two different positions. If the PSU is placed with its fan facing down, there are vent grids in the bottom panel covered with a perforated bar of a dust filter. However, the vent grid is smaller even than a 120mm fan and, coupled with the rather mediocre filter, does not let the fresh air in freely.
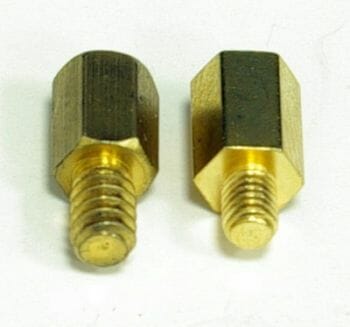
The posts for installing the mainboard have a smaller thread than usual, so you should take care not to lose the ones included with the system case (there’s a lot of spare ones in the kit, though).
The system case cannot accommodate some of the longest graphics cards, including not only the monstrous Radeon HD 5970 but also the smaller Radeon HD 6990. The shorter GeForce GTX 590 and Radeon HD 6950/6970 will fit in without leaving any extra space.
Besides, the Element G will not be able to accommodate ATX mainboards which are wider than usual (for example, an ASUS Rampage II Extreme or Rampage III Extreme).
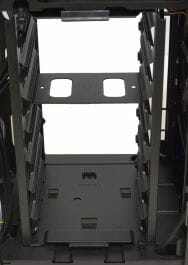
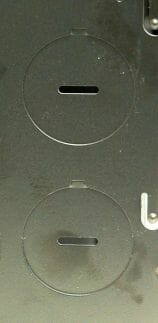
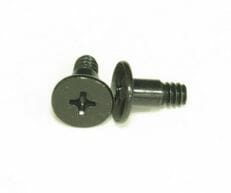
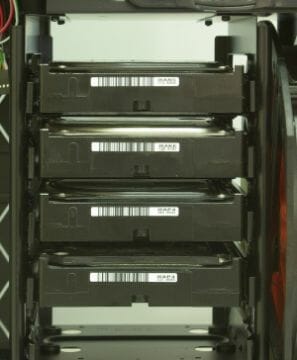
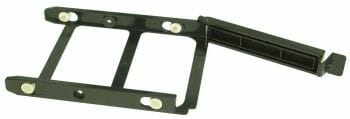
The Element G offers an innovative way of installing hard disk drives. First you screw four originally shaped screws with wide caps into the HDD’s mounting holes. Then the HDD is inserted into the bay along the rails and is fixed with plastic locks.
The locks are not strong, though. If you pull the installed HDD towards yourself, the lock will give in easily. This fastening should be sufficient for a stationary computer, but we’d be worried about it if we were to transport the system case to some other place. The rail-based installation means a total lack of protection against noise and vibration, and the system’s behavior during our tests was the proof of that: the HDDs could be heard from an adjacent room when doing the disk access time test.
The compartment for cables is narrow opposite the mainboard, thus allowing to install CPU coolers up to 162 millimeters tall despite the thick fan on the side panel. It becomes wide in the front part, so most of the cables are supposed to be tucked in behind the HDD rack.
This worked with our testbed configuration, but we have some apprehensions as to whether the side panel can be closed if the HDD rack were full. The HDD cables resisted our effort to close the side panel even with our components.
There are no openings for cables in the top part of the chassis. This prevented us from connecting the back-panel fan to the mainboard’s 3-pin connectors near the memory modules. You may have to route the cables through the holes in the sides of the 5.25-inch bays.
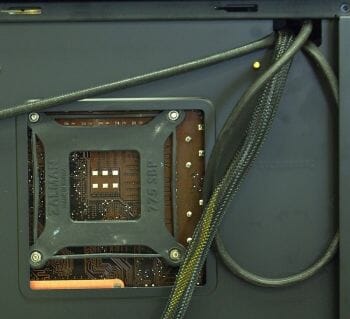
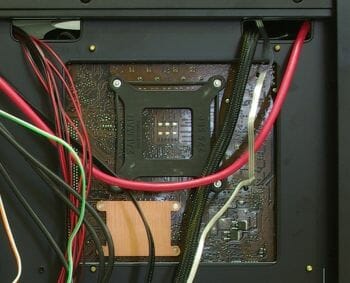
The cutout in the mainboard’s mounting plate opposite the CPU is very small. It is but slightly larger than the area defined by the screw holes of the LGA775 socket. You won’t be able to replace your CPU cooler without taking the mainboard out of the system case if the CPU socket of your mainboard doesn’t match the cutout exactly.
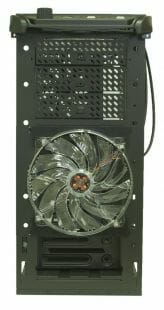
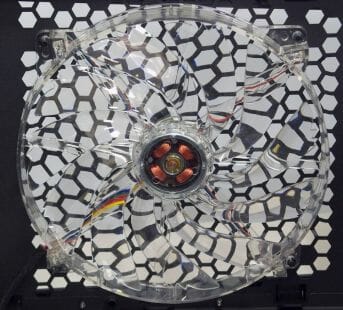
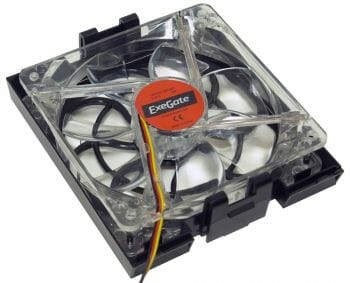
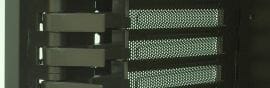
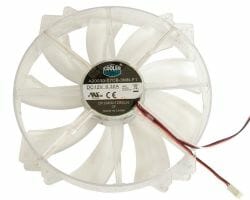
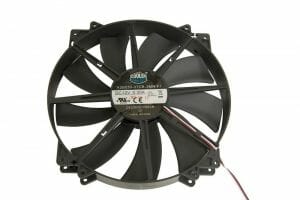
The cooling system of the Element G consists of four fans: one 230mm intake fan on the side panel, two 200mm fans on the front (intake) and top (exhaust) panels, and one 140mm exhaust fan on the back panel. The three larger fans are powered via a single PATA connector and are also connected to the fan speed controller. The 140mm fan has a 3-pin power plug that goes into a mainboard’s connector.

There are also seats for two 60mm fans on the back panel (Thermaltake seems to be the only manufacturer to have kept the irrational love for this low-efficiency and noisy format). The front 200mm fan can be replaced with two 120mm fans using the included plastic frames.
The 200 and 230mm fans have a speed range of 600 to 800 RPM, depending on the controller settings while the speed of the 140mm fan is about 1150 RPM (although Thermaltake wrote 1000 RPM into the specs).
The difference between the minimum and maximum speed of the large fans can hardly be discerned by the ear, and the Element G is overall average in terms of noisiness. It can hardly be a nuisance in daytime, but we wish it were quieter at night, especially in terms of the noise from the installed HDDs.
Highs:
- Good accessories
- Compatible with 2.5-inch drives
- Controllable highlighting and fan speeds
- Durable painting of the external metallic elements
- Vibration-absorbing pads of the side panels
- Original solution for connecting the side-panel fan
Lows:
- Low rigidity of the chassis
- Graphics cards longer than 28 centimeters cannot be installed
- Poor position for 2.5-inch drives
- No protection against noise and vibration from the installed HDDs
- Poor protection against dust
- No eSATA or FireWire among the front-panel connectors
- A few cheap details such as the feet or expansion-slot brackets
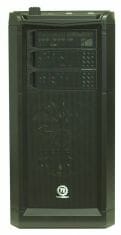
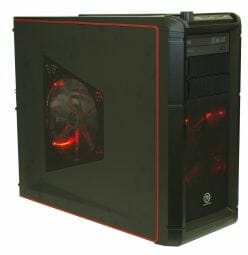
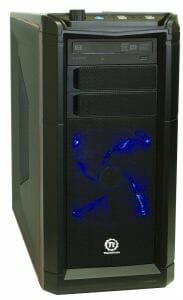
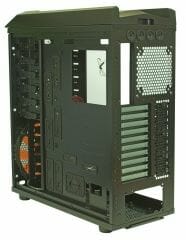
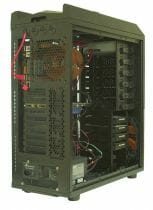
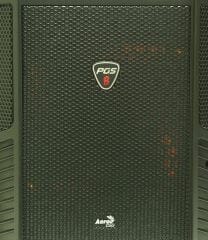
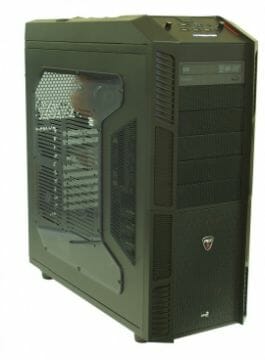
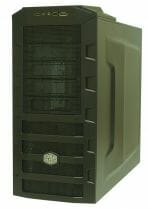
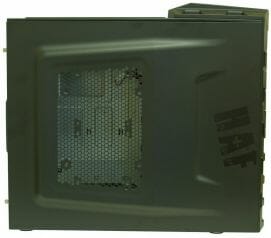
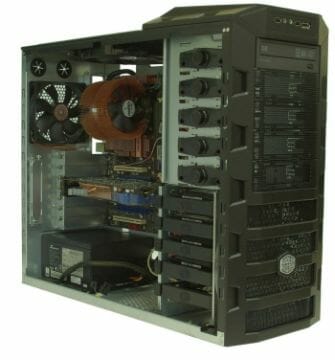
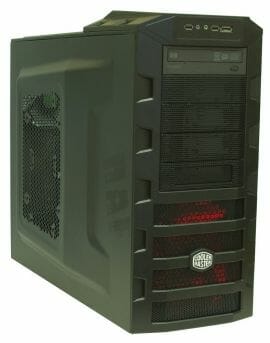
AeroCool XPredator

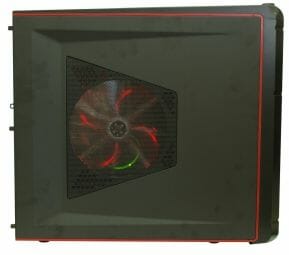
The XPredator seems to be only different from the above-discussed Thermaltake in a few details such as the side window, the scaly armor on its top, and the more generous selection of front-panel interfaces. Otherwise, it is quite a typical mainstream system case.
The difference in size is more conspicuous, though. This recently released XPredator from AeroCool is a big tower and offers as many as 10 expansion slots. Besides people who have mainboards of the rather rare XL-ATX form-factor (the XPredator is perfectly compatible with them), this should be appreciated by those who build multi-GPU subsystems out of several graphics cards and also need one or two free expansion slots below the bottom PCI-Express x16.
The XPredator comes with a set of fasteners, single-use cable straps and a user manual.
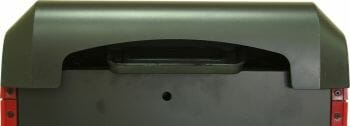
The scales on the top panel are a distinguishing trait of the XPredator which seems to have been borrowed from Alienware. Besides adding an aggressive edge to the exterior design, they serve a practical purpose as a vent grid. You may want to open them for the top fan to work efficiently but you can also close them when you don’t use your computer to keep off dust which is a plague of most system cases with a top-panel fan. The scales are opened/closed by moving the plastic slider on the top of the XPredator.
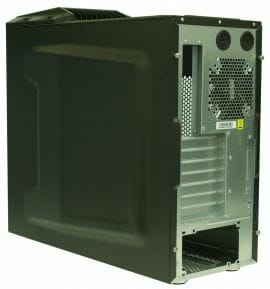
The XPredator is more robust than the Thermaltake Element G. Its chassis is 0.8mm steel whereas the side panels are as thick as 1 millimeter!
Still, we can’t say that the XPredator is perfectly rigid. Like with the Element G, there are no complaints only when the system case is fully assembled. But if you take the side panels off, the whole arrangement wobbles under your hand, even though not as much as the Element G does.
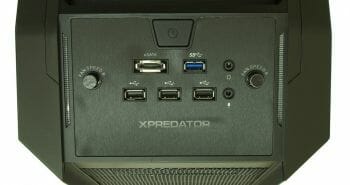
The plate with controls and front-panel connectors can be found in the same location as on the Element G: the slanting top of the front panel. It seems to be made from aluminum at first but that’s just an illusion. The appearance of rough metal is created with the help of a trivial sticker which isn’t even fastened neatly. On the other hand, the sticker allows highlighting the name of the system case when it’s turned on. This looks quite effective, we must confess.

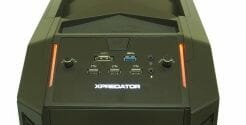
The selection of controls and interface ports is quite impressive, too. There are two knobs of fan controllers (each of which can be hooked up to three 3-pin fans), three USB 2.0 ports, one USB 3.0 and one eSATA, headphone and microphone connectors. The Power button is not accompanied with its traditional companion Reset although the latter may still be occasionally necessary.
To the sides of the plate with controls and connectors there are two decorative orange highlights that do double duty as HDD activity indicators (the orange highlight is accompanied with white). Behind that plate, on the top panel of the case, there is a depression with a soft rubber base for storing various small things. There is an AeroCool logo there. The rubber base has a rough surface which is hard to clean.
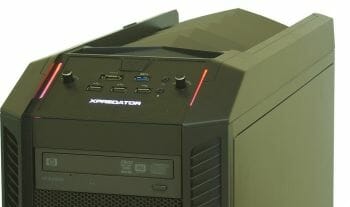
Overall, the top part of the XPredator looks attractive, representing a nice digression from the commonplace design solutions that have become as boring as the gray boxes of over a decade ago.
As opposed to the above-discussed model, the XPredator doesn’t show any signs of its maker’s trying to cut the manufacturing cost. The front-panel brackets are not reusable, but it’s the same even with more expensive products. The feet and expansion-card brackets, which are the most common details to be made cheap, are blameless here.
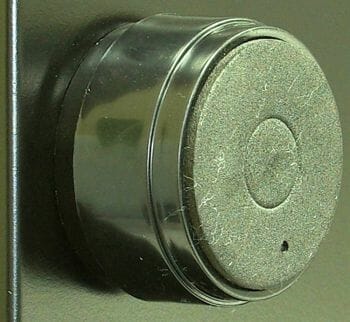
The XPredator stands on large round feet which have a soft base to absorb vibrations.
The reusable expansion-slot brackets are meshed for better ventilation.

The screw-less installation system for expansion cards deserves our praise. It is compatible with any cards and ensures simple and reliable fastening. The only downside is that the plastic levers get in the way when you are installing the mainboard, making you hold your screwdriver at an angle.
The XPredator offers a lot of space for building a top-performance system.

The manufacturer claims it can accommodate graphics cards with a length up to 330 millimeters and our own measurements agree with that claim. That’s enough for any modern graphics card except for the Radeon HD 5970.
Well, even the mentioned card may be fitted into the XPredator if you install it in the top graphics slot because there is about 1 centimeter more of free space above the HDD rack. Although the Radeon HD 5970 is somewhat longer due to its cooler’s casing, the excess length will fit right into the unoccupied bottom 5.25-inch bays.
In order to remove the faceplates of the external 5.25-inch bays you have to first take off the right (it’s on the right when you face the system case) decorative molding. The latter is fitted into a plastic guide without any locks and wiggles under your hand unpleasantly if you accidentally grasp it while carrying the system case.

5.25-inch devices are secured in their bays by means of a quick installation system which follows a popular design: moving a slider extends prongs that fix the inserted device in place. The downside of this system is well-known. The prongs are smaller than the mounting holes in the device (so that it was easier to align the latter with them), making the optical drive rather loose in its bay. If you don’t like that, you can fasten your device with screws.

The top 5.25-inch bay lacks a faceplate but contains an adapter for an external 3.5-inch device.
There is a thick sheet of foam rubber behind the metallic mesh of the front panel. It will help suppress the noise from the working computer, but may have a negative effect on the performance of the front fan, especially at a low speed.
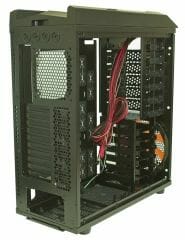
HDDs are installed into metallic boxes which are then inserted into the bays. An HDD is fastened inside a box with screws using the bottom mounting holes.
There is a rubber vibration-absorbing pad between the HDD and the box if you install a 3.5-inch drive, therefore the screws are somewhat longer than standard. No protection against vibration is provided for 2.5-inch HDDs which are compatible with the boxes in terms of the mounting holes. On the other hand, ordinary 2.5-inch HDDs are not usually installed into large system cases. The only exception is the Western Digital VelociRaptor series which features a heatsink that serves as an adapter for a 3.5-inch bay. As for SSDs, they do not vibrate because they don’t have any moving parts.
HDDs are placed rather densely, yet there are gaps in between them. They should be cooled sufficiently well if there is a strong enough air flow from the front fan.

The cable for the front-panel USB 3.0 connector can only be routed to the mainboard’s back panel through one of the openings for the pipes of a liquid cooling system (there are as many as four of them here).
The cutout in the mainboard’s mounting plate for accessing the CPU cooler is the largest among the three system cases included into this review. There can hardly be a mainboard whose CPU socket would not match it.
The compartment for cables is not very large but sufficient, although the side panel bulges out a little against it.

Like in most of new system cases, the PSU bay is at the bottom. The mounting holes allow installing the power supply in two positions. There are vibration-absorbing pads in the bay along the line of the PSU’s contact with the bottom and back panels.
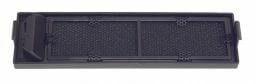
If the PSU is installed with its fan facing down, the fresh air will be coming in through the large-mesh perforation in the bottom panel, covered with an easily removable dust filter in a plastic frame.
The XPredator comes with only two preinstalled 230mm fans (measured by the manufacturer along the longer edge of the fan case whereas the impeller is actually 185 millimeters in diameter, which corresponds to the impeller size of the 200mm fans of the other system cases).
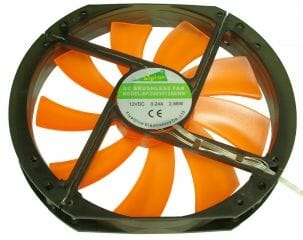
The front fan has translucent orange blades and an always-on amber highlight which gets brighter when the speed is increased. However, the thick sheet of foam rubber behind the front panel almost completely obscures the highlighting. You can barely see it in the photo above.
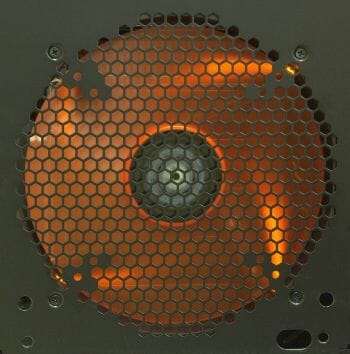
The fan’s LEDs are actually bright as you can see with the front panel taken off.
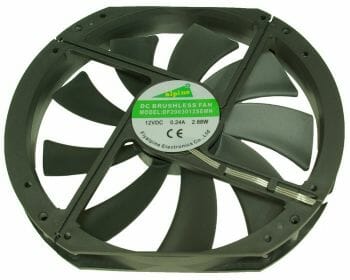
The top fan is black and lacks any highlighting. Both fans are manufactured by Flyalpine Electronics.
Despite the identical electric parameters specified on their stickers, the fans differ in speed a little. The front intake fan works at 780 RPM when the integrated speed controller is set at the maximum; its minimum speed is about 340 RPM. The top fan is somewhat slower: 730 RPM at the maximum and 280 RPM at the minimum. The difference is actually within the range of 750±100 RPM as specified by AeroCool.
The fans were rather quiet at any speed. Their noise didn’t change much when their speed changed from the minimum to the maximum. Therefore we’d recommend you to use these fans (or at least the front fan) at the maximum speed. This won’t affect your acoustic comfort but will ensure better cooling, especially for your hard disks which reside behind the thick foam-rubber sheet that weakens the air flow.
By the way, that very foam-rubber sheet, the quiet fans and the vibration-absorbing fastening of HDDs makes the XPredator the quietest of the three tested products. Although it may prove to be rather too loud for fastidious users, it is definitely quieter than the other two.
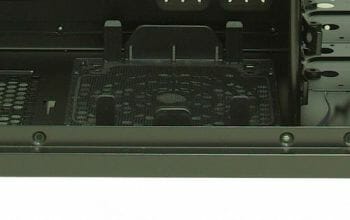
Besides the pair of preinstalled fans, there are seats for single 120/140mm fans on the back and bottom panels as well as the opportunity to install four 120/140mm or a single 180/200mm fan on the side-panel window. The bottom-panel fan seat is the only one to have a dust filter.
The vent slits in the transparent plastic of the side window raise our apprehensions. If fans are installed on the side panel, the air passing through them may produce a lot of noise.
We also have to tell you about one unpleasant defect. After working for a while at the minimum speed, the fans suddenly stopped, their highlighting went out, and an obnoxious smell came out of the system case. That was the death of the controller the fans were connected to. We continued our tests by connecting the fans to a second controller, but our impression about the XPredator was somewhat marred by the incident.
With the system case filled with our testbed components, the top illumination looks good but the front fan’s highlighting is almost invisible.
Highs:
- Huge interior
- Easy to assemble
- Handy and efficient fast installation system for expansion cards
- Vibration-absorbing boxes for 3.5-inch drives
- Compatibility with 2.5-inch drives
- Two speed controllers (for three fans each)
- Rather quiet preinstalled fans
- Good noise insulation thanks to the thick foam-rubber sheet behind the front panel
- 10 expansion slots
- Rich selection of front-panel connectors including USB 3.0
- Good protection against dust (except for the optional side-panel fans)
Lows:
- Unreliable speed controllers
- Poorly designed vent grids for side-panel fans
- The thick foam-rubber filter of the front fan weakens the air flow and dims the fan’s highlighting
- No rear exhaust fan by default
- No Reset button
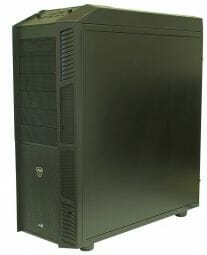
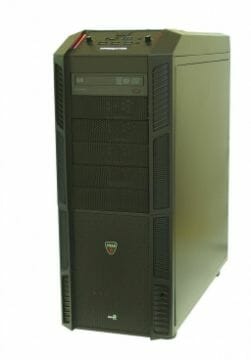
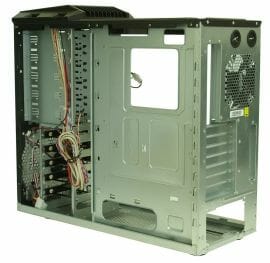
Cooler Master HAF 922
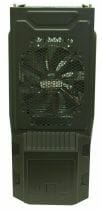
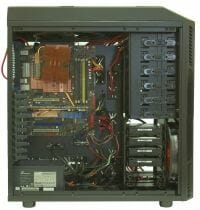
The design of this system case follows the conventional principles. It is black, it has a meshed front panel and a bottom PSU bay, and there are large fans on its front and top panels. This is no wonder since the HAF 922 (or its larger ancestor HAF 932, to be exact) is in fact one of the progenitors of this design style.
This model being rather old already, we don’t see such typical features as black painting of the interior or a dust filter in the PSU bay. The HAF 922 is not compatible with 2.5-inch HDDs and does not support USB 3.0.
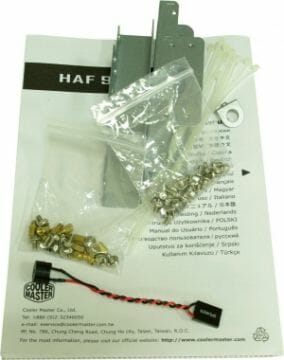
Included with the product are an installation guide, a box with two packs of fasteners (one pack is for the mainboard and another is for everything else), a pack of plastic straps, adapters for installing 3.5-inch devices into 5.25-inch bays, a PC speaker, and an L-shaped detail for hanging a lock on the side panel.
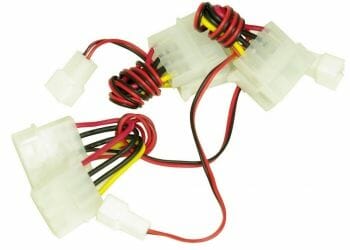
Besides, each of the three preinstalled fans has an adapter for a PATA power connector, so you can easily connect them to any power supply.
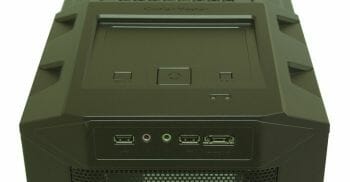
Like with the Thermaltake and AeroCool system cases discussed above, the I/O connectors of the HAF 922 are located in the top part of the front panel, but the latter has no slanting section. The connectors include two USB 2.0 ports, one eSATA connector, headphones and microphone connectors. They can be used simultaneously unless you’ve got very large USB flash drives or 3G modems.
In the front part of the top panel there are Power and Reset buttons, a button for turning on the highlighting of the front fan, and a couple of plain red indicators of power and HDD activity.
The free space behind them might be used for storing some small things if it were separated somehow from the buttons.
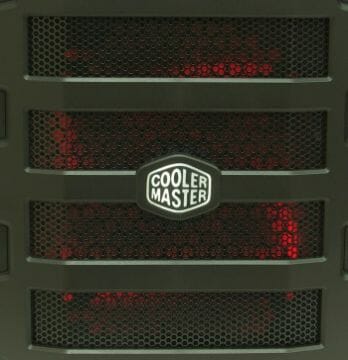
The highlighting has only one mode: a rather bright red. When pressed, the highlight button turns the highlighting on. When depressed, it turns the highlighting off.
Cooler Master stays true to its long-time corporate traditions: the company’s logo in front of the fan on the face panel is glued somewhat askew.
The system case stands on cute composite feet you can see in many other Cooler Master products.
The decorative front panel is unexpectedly slim and, unlike in the other system cases reviewed here, is fastened to the chassis with screws. There are but thin mesh filters behind the metal grid of the façade. They do not weaken the air flow from the front fan but also do not muffle the sounds of the fans and other components.
It seems to be rather difficult to access the front fan’s filter because of the screws fastening the panel, so it is easier to use a vacuum cleaner for it.
One of the external 5.25-inch bays can be transformed into a 3.5-inch one if necessary.
There are no brackets in front of the drive bays. The Cooler Master developers must have thought that the metallic mesh of the front panel offers enough protection.
The quick and easy mechanism for installing 5.25-inch devices is indeed quick and easy (you just insert your drive and push the spring-loaded button to fix it with prongs) but these are in fact all of its advantages.
The fastening is insecure because the thin prongs fix the drive from one side only, so it remains rather loose in its bay. It’s impossible to put unused locks on the other side of the bay due to the lack of appropriate holes.
Well, the drive bays allow fastening the devices with screws, and we’d recommend you to use this opportunity.
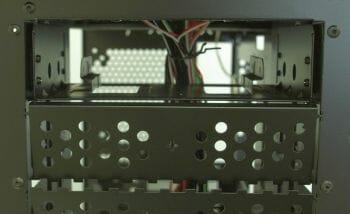
The HDD rack has a couple of metallic struts in the middle to ensure that each bay is properly fixed inside.
HDDs (of the 3.5-inch format only) are installed by means of plastic guides which have rubber vibration-absorbing pads. The noise and vibration are further reduced through the contact of the metallic HDD rack with the plastic of the guide. The installation process is fast and handy and doesn’t call for a screwdriver.
There are rather large vent holes in the HDD rack. The installed drives are going to be cooled well by the front-panel fan.
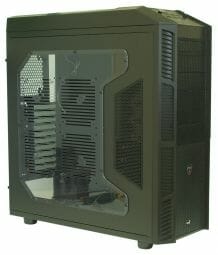
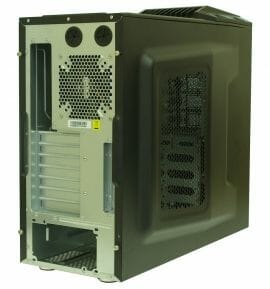
As opposed to the above-discussed products, the side panels of this system case are monumentally strong. Although they are only 0.8 millimeters thick (equal to the Element G and inferior to the XPredator in thickness), the extrusions ensure the best rigidity. Besides, the relief surface expands the capacity of the compartment for cables and may even allow to install a CPU cooler which is taller than the officially specified 160 millimeters (this depends on whether the top of the cooler fits into the relief part of the side panel or not). The 0.6mm chassis is as rigid as the “thicker” AeroCool, too.
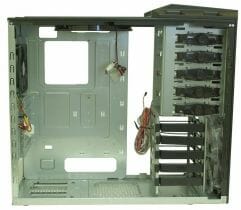
The HAF 922 is in between the Element G and the XPredator in terms of dimensions, but offers more room for expansion cards than either of its opponents.
This system case can accommodate graphics (and other types of) cards up to 35 centimeters long. In other words, any graphics card model available today.
The cables compartment is not as isolated in the HAF 922 as in the other tested system cases. There is a large gap between the mainboard and the drive bays.
This solution isn’t effective in terms of hiding cables out of sight but is quite convenient when it comes to laying the cables out. Moreover, the HAS 922 proved to be the only system case in this review whose side panel didn’t bulge after we assembled our testbed configuration in it. It has the largest compartment for cables thanks to the extruded side panel in particular.
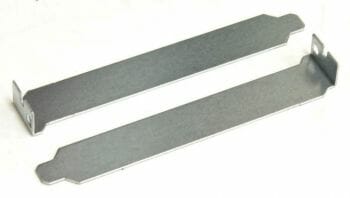
The expansion slot brackets are unpainted smooth metal bars. They are reusable and can be fastened with thumbscrews.

The additional expansion slot to the side of the others may come in handy if you need to install a bracket with I/O ports or a fan speed controller.
The PSU bay is below the expansion slots. You can install your power supply in two positions here. There are two rubber vibration-absorbing stripes along the protrusions in the bottom panel but there is no dust filter above the vent grid.

The cutout in the mainboard’s mounting plate is average in size. It matched our mainboard’s CPU socket very well but we wouldn’t be sure about other mainboards.
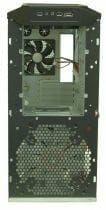
The cooling system of the HAF 922 consists of two 200mm fans (an intake front fan with red highlighting you can turn off and a top fan without highlighting) and one exhaust 120mm fan. You can also install two 120mm or one 200mm fan on the side panel and yet another 120mm fan on the bottom of the chassis.
The 200mm fans rotate at about 700 RPM and have a voltage of 12 volts.

The rear 120mm exhaust fan has a speed of 1100 RPM.
The fans are not very quiet for their size (which is typical enough of Cooler Master products) but do not cause much discomfort despite the total lack of noise insulation.
Overall, the HAF 922 (with its 200mm fans connected to the mainboard in Silent mode) is comparable to the Thermaltake Element G at the minimum speed of the latter’s fans. HDDs are quieter in the HAF 922 due to the plastic guides with vibration-absorbing pads.
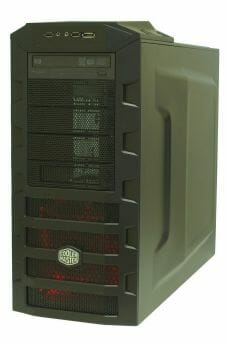
The HAF 922 is quite an impressive view when assembled. The angular sides, red highlighting and aggressive protrusion at the top create an imposing appearance.
Highs:
- High rigidity of the chassis
- Enormous interior
- Easy to assemble
- Handy installation system for 3.5-inch drives
- Excellent CPU cooling and good cooling of the rest of components
Lows:
- Incompatible with 2.5-inch drives
- No protection against dust for the fans except for the front one
- The front fan’s dust filter is hard to access
- Ineffective fastening of 5.25-inch devices
Testbed and Testing Methodology
We test assembled system cases at a constant ambient temperature of 23°C maintained by an air conditioner. As we assume that most users prefer low-noise computers, we set the speed of the CPU and system fans (those connected to the mainboard’s 3-pin connectors) into Silent mode (the quietest mode in the mainboard’s BIOS). If a system case has its own speed controller, we switch it to minimum and maximum speed to check out both modes. We do not change the default configuration of air flows determined by system case design.
The following components are installed into each system case:
- Intel Core 2 Duo E6850 processor at 3.00 GHz
- Zalman CNPS9500 AT cooler
- ASUS P5E Socket 775 mainboard
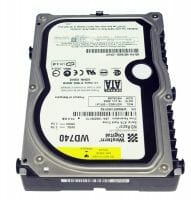
- Western Digital Raptor WD740GD hard disk (10,000 RPM)
- Western Digital Raptor WD740ADFD hard disk (10,000 RPM)
- Western Digital Raptor WD1500ADFD hard disk (10,000 RPM)
- Western Digital Raptor WD1500AHFD hard disk (10,000 RPM)
- 2GB DDR2-800 SDRAM Patriot PDC24G6400LLK
- HIS HD 3870 IceQ3 Turbo H387Q512NP graphics card (Radeon HD 3870)
- Seasonic M12D SS-850EM power supply (850 W)
- Microsoft Windows 7 Home Premium 32-bit SP1
If not stated otherwise, the HDDs are listed in the order of their placement from the top main HDD bay downwards without any gaps.
The temperature of the CPU is measured with Core Temp 0.99.8. HDDs, GPU and mainboard temperatures are measured with CPUID Hardware Monitor. The speed of the fans is measured with an optical tachometer Velleman DTO2234. There are the following test modes:
- Idle
- IOMeter (IOMeter’s Access Time test running on all the HDDs to load them fully)
- Linpack (Linpack-based Intel Burn Test 2.5 runs in the stress test mode, loading both CPU cores; we show you the peak temperature of the hottest CPU core in the diagrams)
- MSI Kombustor (full-screen mode, DirectX 9 rendering, 1280×1024 with 8x MSAA, Xtreme burn-in)
Every temperature is read after the system has worked for half an hour in the current test mode.
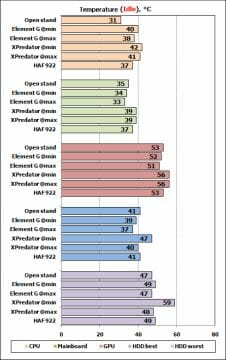
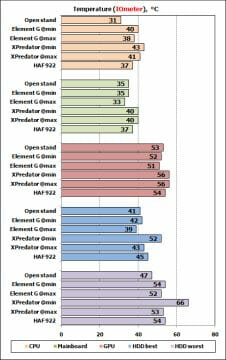
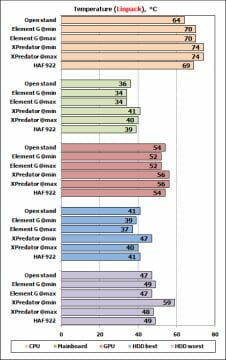
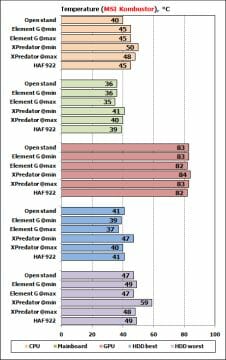
The following table shows the temperatures of the components if the system is assembled without an enclosure (“open testbed”).

The noise level is evaluated subjectively.
Test Results
When testing the Thermaltake Element G and AeroCool XPredator, we set the fans at minimum and maximum speed using the fan controllers. The Cooler Master HAF 922 doesn’t have such controllers, so we connected its fans to the mainboard in Silent mode.

The Thermaltake cools the components well enough even at the minimum speed of its fans.

When the fans get faster, the system case becomes just a little noisier and cools the components even better. Every temperature decreases by 1-2°C. Considering that the main source of noise in the Element G is the hard disks, we guess that running the fans at the maximum speed is quite appropriate. You may only want to move the controller’s knob to its leftmost position when you want complete silence.
The Thermaltake is especially good in terms of cooling the HDDs, mainboard’s chipset and graphics card. The HDDs benefit from the large vent grids and the slim dust filter of the front panel fan. The chipset and graphics card are cooled by the large side-panel fan which is missing in the other system cases by default.

The HDDs get very hot in the AeroCool at the minimum speed of its fans. The rest of the components have normal, even though not ideal, temperatures.
The problem with the HDDs is that the front fan is unable to push the air through the thick layer of foam rubber that serves as a dust filter.
The unassuming results in terms of the other components can be explained by the weakest default cooling system among the three tested products.
When the fan speed is set at the maximum, the XPredator lowers the temperature of the HDDs by 7 to 14°C depending on their position and test type. Its results are now comparable to those of the Element G.
The rest of the components do not benefit much from the increased speed of the fans. This can only be helped by installing more fans.

As opposed to the AeroCool XPredator, the Cooler Master does not call for further improvement. It copes well with its job of cooling the components. It even keeps the CPU temperature lower than the compact Thermaltake Element G with its numerous fans. And the Cooler Master’s fans are rotating at a much lower speed!
It’s clear that the HAF 922 can beat the Thermaltake in other temperatures if not limited to the mainboard’s Silent mode (except for the chipset temperature because you can’t lower it much without a side-panel fan).
Finally, we can show you diagrams that compare the tested system cases with the open testbed:
Conclusion
The first thing we want to note in this conclusion is that each of the three tested system cases is capable of being an easy-to-use enclosure for computer components and providing sufficient cooling for them. However, each of them has certain nuances.
The Thermaltake Element G is going to be a good choice for assembling a top-end configuration in a rather small system case. It cannot accommodate the longest graphics card models, provides a controllable highlight, and has a good ventilation system by default. It is also compatible with 2.5-inch drives (but we’d prefer other products if you want to use such drives extensively and have them installed in convenient locations). This model is also somewhat cheaper than its opponents in this review.
The AeroCool XPredator is designed for top-end gaming configurations with multiple graphics cards (including 3-way SLI subsystems). It features better noise insulation than most other gaming products, provides a lot of front-panel connectors including USB 3.0, allows to flexibly control your fans, and is compatible with 2.5-inch drives. It is a most appealing option as an inexpensive system case for a fast gaming computer that needs more than the seven standard slots for expansion cards. However, you should keep it in mind that this model requires additional fans (an exhaust fan for the rear panel is just obligatory) and needs to be set to the maximum speed of the front fan to cool HDDs properly. It may also have problems with its integrated speed controllers.
The Cooler Master HAF 922 has been around for over 2 years and stays true to its name (HAF is spelled out as High Air Flow). Even at the reduced speed of its large fans it ensures the best cooling of the CPU and good cooling of the rest of the components. This model also seems to be easier to assemble a computer in than the products from AeroCool and Thermaltake. So, if you want a sturdy and handy system case compatible with long expansion cards, the HAF 922 still remains an excellent buy for reasonable money. It provides good cooling but doesn’t offer bays for 2.5-inch drives and isn’t good for multi-GPU configurations.