Thermaltake Frio Advanced CPU Cooler Review

Today we are going to talk about features and functionality of the fourth Thermaltake cooler from the Frio lineup. This time we will introduce to you the Advanced model. Our today’s review will talk about the differences between the new Advanced cooler and the previous three models as well as about the specific peculiarities of the newcomer.
About two years ago Thermaltake Technology Co., Ltd. released a rather successful cooler called Frio. Although not as popular as the Big Typhoon, the first Frio could offer high performance (but at a rather high level of noise, too). It was soon followed by the more advanced FrioOCK targeted at overclockers and recently the company has also unveiled its Extreme version.
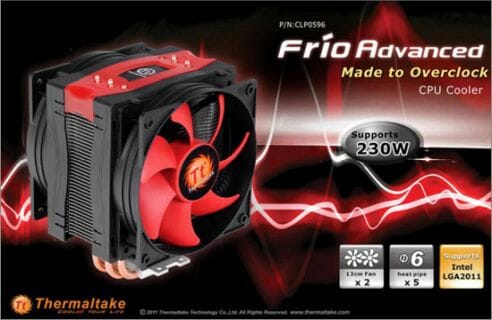
Alongside it, the Advanced version was released, featuring the lowest price tag in the whole Frio family. Indeed, the Frio Advanced has a very simple heatsink with direct-tough technology and lacks any special design solutions. On the other hand, it is equipped with two fans and comes with fasteners for all modern PC platforms. It looks attractive, too. Are you interested to learn how efficient and noisy it is?
Packaging and Accessories
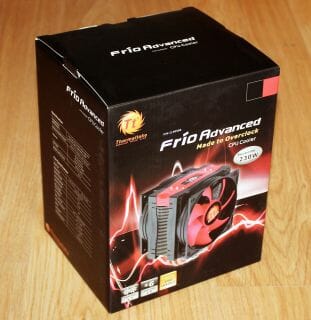
The cooler comes in Thermaltake’s conventional packaging with a picture of the product on the front and detailed specifications on one side of the cardboard box.
Inside it, there is a polyethylene-foam tray in which the cooler is securely fixed. Above it you can find a smaller box with accessories that include everything you need to install the Frio Advanced onto any modern PC platform.
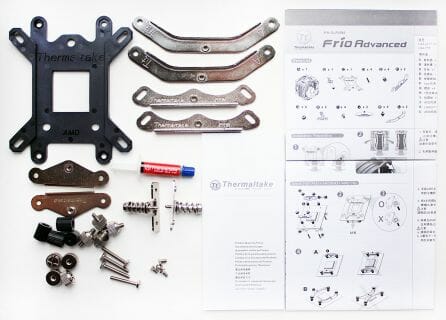
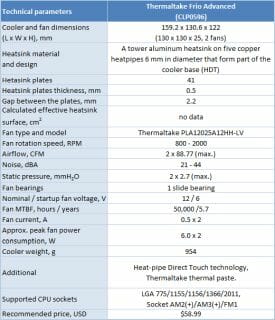
Thermaltake’s thermal grease and detailed installation instructions are also included into the box. The recommended price of the Frio Advanced is $58.99. It is manufactured in China and comes with a 3-year warranty.
Design and Functionality
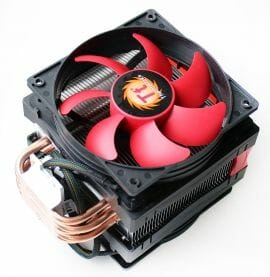
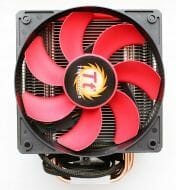
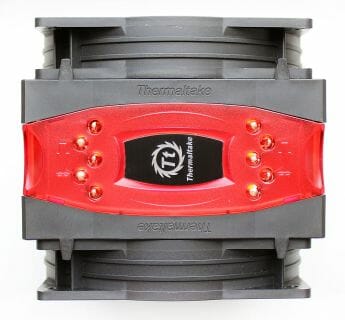
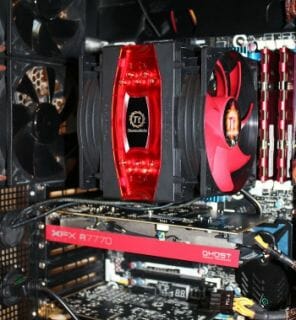
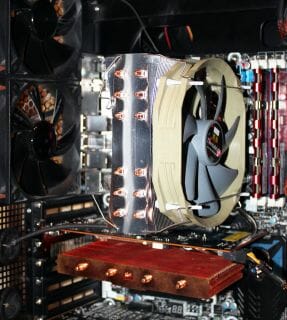
The Thermaltake Frio Advanced is a rather beautiful cooler in the first place, largely due to the two fans with black frames and bright-red impellers that provide a striking contrast. There is also a translucent plastic cap with Thermaltake logo above the heatsink.
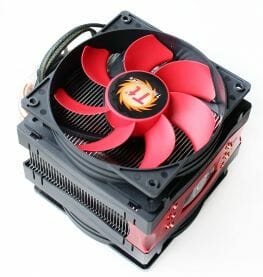
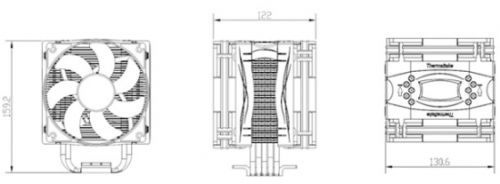
Despite its visual bulkiness, the cooler is rather light at 954 grams. Its dimensions are quite modest, too: 159.2 x 130.6 x 122 millimeters.
The heatsink of the Frio Advanced is almost completely hidden under the plastic “armor” in the form of the fans, fan frames and top cap.
Only the sides and bottom of the heatsink are exposed a little:
All of those things can be easily taken off, though, so we can have a better view of the heatsink.
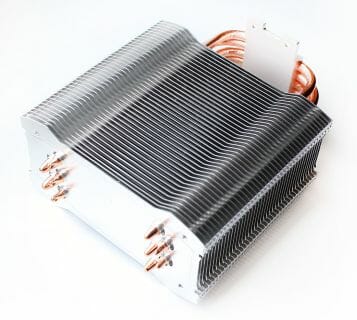
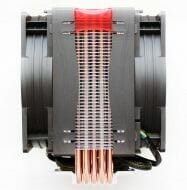
As we’ve noted above, it lacks any innovative solutions. It’s a typical tower-design heatsink made of 41 fins, 0.5 millimeters thick. Placed 2.2 millimeters apart from each other, the fins are pierced by 6mm heat pipes. The contact between the pipes and fins is ensured in an interesting way that may be called dual-sided crimping.
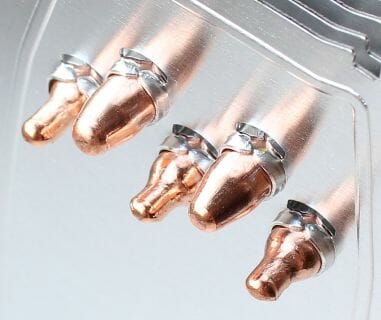
We don’t think this is going to be more efficient than the conventional soldering or press-fitting, though. The heat pipes do not form a straight line in the heatsink body:
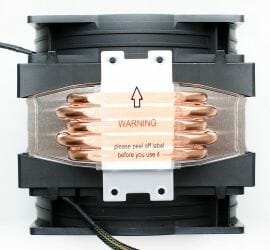
This solution helps distribute the heat more uniformly among the fins. The cooler’s base features direct-touch technology. The 1.5mm gaps between the pipes are filled in with an aluminum insert:
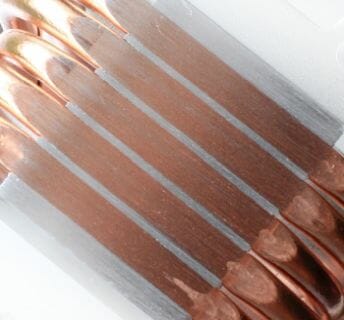
The finish quality is typical of direct-touch coolers. Traces of the milling machine are visible but cannot be felt by touch. The cooler’s base is flat, producing uniform thermal grease imprints:

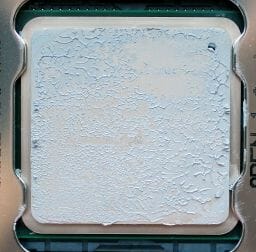
Each of the six heat pipes takes part in transferring heat from the large heat-spreader of an LGA2011 processor. The same would be the case with AMD processors. On a smaller Intel LGA1155 processor the cooler’s outermost pipes will only touch the heat-spreader partially.
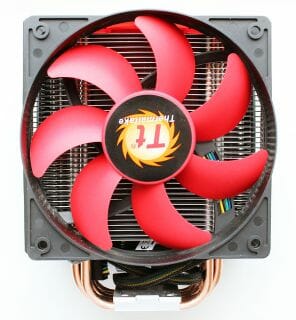
The Thermaltake Frio Advanced is equipped with two 7-blade 130mm fans, one for intake and another for exhaust, which are installed on the heatsink in plastic frames with side latches.
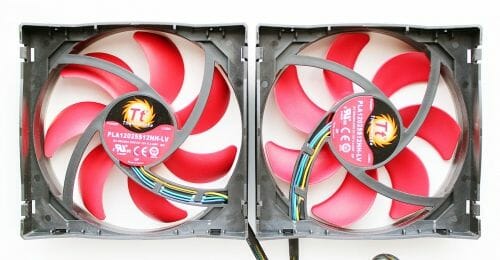
You can replace these fans with 120x120mm fans of any thickness because the mounting holes are standard. The speed of the fans is PWM-regulated from 800 to 2000 RPM. Working at their maximum speed, the fans generate an air flow of 88.77 CFM and produce 44 dBA of noise.
The stickers on the fans indicate their original manufacturer, which is Power Logic. It is the PLA12025S12HH-LV model.
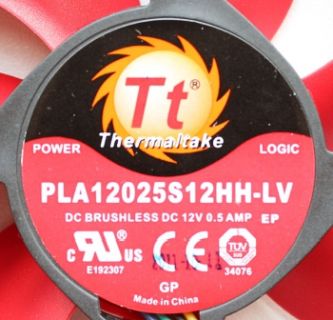
The fan’s sleeve bearing is expected to serve for at least 50,000 hours (or 5.7 years) continuously. The peak power consumption is specified to be 6 watts. The startup voltage is 6 volts. According to our measurements, the fans started up at 4.9 volts and consumed no more than 3.8 watts. Their cables are 450 millimeters long.
Compatibility and Installation
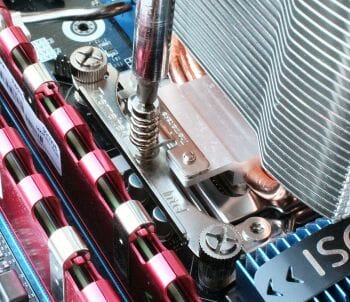
The Thermaltake Frio Advanced can be installed on any modern platform including LGA2011. The step-by-step instructions can be found at the official website. Let’s study this procedure using an LGA2011 mainboard.
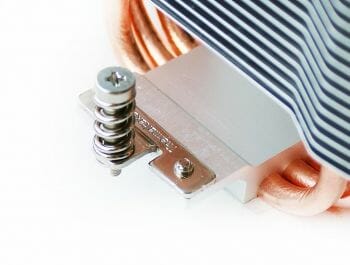
Mounting the heatsink on the mainboard is done in 3 steps. First, you attach the included fasteners with spring-loaded screws to the base of the heatsink.
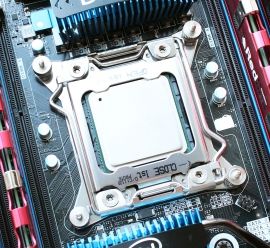
Second, you insert bushings with dual threading into the CPU socket’s mounting holes and secure two steel guides on them.
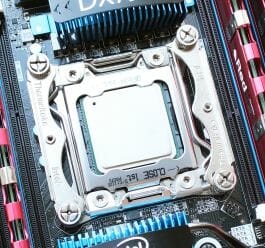
And third, the heatsink is mounted on the CPU and gets fastened with screws.
Don’t forget to apply thermal grease, by the way. When the heatsink is in place, you only have to attach the fans. Their plastic frames are latched onto the sides of the heatsink.
There is about 40 millimeters of space between the bottom edge of the fans, which hang lower than the heatsink, to the mainboard surface. This should be enough to make the Frio Advanced compatible with heatsinks on the mainboard’s power components and memory modules.
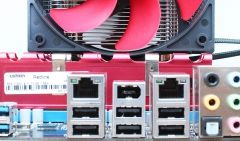

The installed cooler is 166 millimeters tall and can be easily fitted even into rather narrow system cases of the ATX form-factor.
Technical Specifications and Recommended Pricing
Testbed Configuration and Testing Methodology
We tested all coolers inside a closed system case with the following configuration:
- Mainboard: Intel Siler DX79SI (Intel X79 Express, LGA 2011, BIOS 0494 from 04/24/2012);
- CPU: Intel Core i7-3960X Extreme Edition, 3.3 GHz, 1.2 V, 6 x 256 KB L2, 15 MB L3 (Sandy Bridge-E, C1, 32 nm);
- Thermal interface: ARCTIC MX-4;
- Graphics card: Asus Radeon HD 6770 DirectCU Silent (EAH6770 DCSL/2DI/1GD5) GDDR5 128 bit, 850/4000 MHz (with a passive heatsink from the DeepCool V4000 VGA cooler);
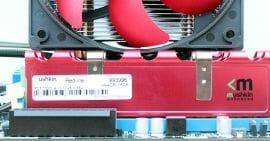
- System memory: DDR3 4 x 4GB Mushkin Redline (Spec: 2133 MHz / 9-11-10-28 / 1.65 V);
- System drive: Crucial m4 256 GB SSD (SATA-III,CT256M4SSD2, BIOS v0009);
- Drive for programs and games: Western Digital VelociRaptor (300GB, SATA-II, 10000 RPM, 16MB cache, NCQ) inside Scythe Quiet Drive 3.5” HDD silencer and cooler;
- Backup drive: Samsung Ecogreen F4 HD204UI (SATA-II, 2 TB, 5400 RPM, 32 MB, NCQ);
- System case: Antec Twelve Hundred (front panel: three Noiseblocker NB-Multiframe S-Series MF12-S2 fans at 1020 RPM; back panel: two Noiseblocker NB-BlackSilent PRO PL-1 fans at 1020 RPM; top panel: standard 200 mm fan at 400 RPM);
- Control and monitoring panel: Zalman ZM-MFC3;
- Power supply: Xigmatek “No Rules Power” NRP-HC1501 1500 W (with a default 140 mm fan).
For the primary tests and summary diagrams we overclocked our six-core processor with the clock generator frequency set at 125 MHz, the multiplier set at 35x and “Load-Line Calibration” enabled to 4.375 GHz. The nominal processor Vcore was increased to 1.385 V in the mainboard BIOS. After that we tested the new cooler at even higher frequency and voltage settings. Turbo Boost was disabled during this test session, and Hyper-Threading technology was enabled to increase the heat dissipation. The memory voltage was at 1.65 V and its frequency was 2000 MHz with 9-10-10-28 timings. All other parameters available in the mainboard BIOS and related to CPU or memory overclocking remained unchanged.
All tests were performed under Windows 7 Ultimate x64 SP1 operating system. We used the following software during our test session:
- LinX AVX Edition version 0.6.4 – to load the processor (memory – 4500 MB, Problem Size – 24234, two 11-minute cycles);
- Real Temp GT version 3.70 – to monitor the processor core temperatures;
- Intel Extreme Tuning Utility version 3.1.205.5 – for monitoring and visual control of all system parameters during overclocking.
The CPU was loaded with two consecutive LinX AVX test runs with the settings as indicated above. The stabilization period for the CPU temperature between the two test cycles was about 8-10 minutes. We took the maximum temperature of the hottest CPU core for the results charts. Moreover, we will also provide a table with the temperature readings for all cores including their average values. The ambient temperature was checked next to the system case with an electronic thermometer with 0.1 °C precision that allows hourly monitoring of the temperature changes over the past 6 hours. The room temperature during our test session varied between 24.8-25.4°C.
The noise level of each cooler was measured between 1:00 and 3:00 AM in a closed room about 20 m2 big using CENTER-321 electronic noise meter. The noise level for each cooler was tested outside the system case when the only noise sources in the lab were the cooler and its fan. The noise meter was installed on a tripod and was always at a 150 mm distance from the cooler fan rotor. The tested cooling systems were placed at the edge of the desk on a sheet of polyurethane foam. The lowest noise reading our noise meter device can register is 29.8 dBA and the subjectively comfortable noise level in these testing conditions was around 36 dBA (do not mix it up with low noise level). The fan(s) rotation speed was adjusted in the entire supported range using our in-house controller by changing the voltage with 0.5 V increment.
We are going to compare our today’s hero, Thermaltake Frio Advanced, against the leader in the sub-$45 segment – Thermalright TRUE Spirit 140 with one default TY-140 fan:
Frio Advanced was also tested with two alternative fans – Thermalright TR-FDB-2000 in their entire rotation speed range with 200 RPM increments. However, we didn’t detect any difference in the cooling efficiency compared with the default 130 mm fans that is why we didn’t include these results into the final charts and diagrams. I would also like to add that the rotation speed of all fans was controlled using the same special controller I mentioned above with ±10 RPM precision.
Noise Level
We measured the noise level of our coolers throughout the entire speed range of their fans. Here are the results:
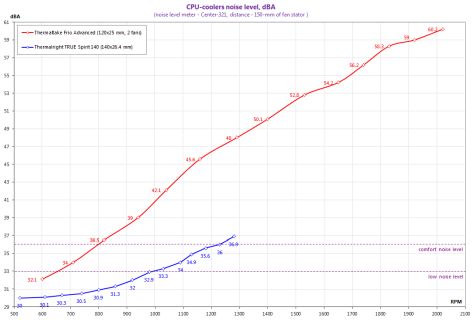
Unfortunately, the Frio Advanced couldn’t impress us with its noise level, either. Its two 120mm fans turn out to be very noisy. They just can’t stand a comparison with the TY-140 of the Thermalright TRUE Spirit 140, for example. For the Frio Advanced to be more or less comfortable, its fans must be limited to the minimum specified speed of 800 RPM but they are only really quiet at speeds up to 650 RPM.
Conclusion
A fourth model in the Frio series, the Thermaltake Frio Advanced can offer neither superior performance nor low level of noise. It is just a good mainstream product, like a few dozen others available in the today’s market. However, its recommended price of $58.99 is hardly competitive. We really don’t know how Thermaltake Frio Advanced is going to win its market share. The compatibility with all existing platforms and the easy installation procedure with reliable fastening have already become pretty common feature among other coolers these days. Perhaps its attractive appearance and two bundled fans may entice someone, but we are not sure it will be enough to win big. As always, the choice is yours.