ASRock Fatal1ty Z77 Professional: The Most Feature-Rich LGA 1155 Mainboard

This mainboard based on the Intel Z77 Express chipset features numerous advantages including but not limited to high-quality electronic components, phenomenal functionality due to numerous onboard controllers, good performance and overclocking potential. As for the drawbacks, there are hardly any.
Thanks to our review of the Gigabyte G1.Sniper 3 mainboard from the G1-Killer series we are now familiar with Gigabyte’s vision of a gaming mainboard based on Intel Z77 Express. ASRock Company seems to have a different opinion on the matter and its own Fatal1ty gaming mainboard family, which was named after a famous competitive gamer Jonathan “Fatal1ty” Wendel. Actually, it is for the first time that they designed not one or two, but as many as three mainboards on the same chipset within the product family.

All previously reviewed mainboards on the Intel Z77 Express chipset allow building graphics sub-systems of at least two cards employing different AMD CrossFireX or Nvidia SLI configurations. It hardly makes sense to use the above mentioned Gigabyte G1.Sniper 3 mainboard with only one graphics card, because it is constructively designed for multi-card configurations. However, most users will stick to only one graphics card and they will be the primary target group for the new ASRock Fatal1ty Z77 Performance mainboard with a single PCI Express 3.0/2.0 x16 slot. The mainboard doesn’t support two-way Nvidia SLI graphics configurations, although it is possible to build a two-way AMD CrossFireX using the second PCI Express 2.0 x16 (x4) slot.
ASRock Fatal1ty Z77 Professional-M mainboard designed in microATX form-factor will allow you to build a powerful gaming system inside a compact system case.
However, the top of the line and the most feature-rich model of the three will be ASRock Fatal1ty Z77 Professional, which we are going to discuss in our today’s review.
Packaging and Accessories
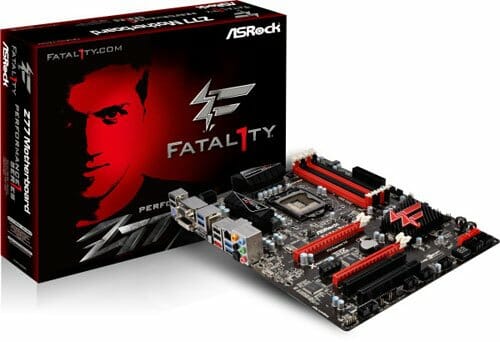
You may have already figured out from the previous pictures that all mainboards in this family come in identically designed packages. There is a portrait of Jonathan “Fatal1ty” Wendel gamer and the Fatal1ty logo in the center of the red and black box. ASRock Fatal1ty Z77 Professional comes in a vertical box with a plastic carry handle.
There is a photograph of the mainboard on the back of the box alongside with detailed information about a number of its features and peculiarities.
Starting recently ASRock mainboards come not only carefully wrapped into an anti-static bag. The thin protective pad has been replaced with a frame made of some porous material. Besides the actual mainboard, the box contains the following accessories:
- Six Serial ATA cables with metal connector locks, half with L-shaped locks and another half – with straight ones;
- Two power adapters for SATA devices;
- A bridge for Nvidia SLI graphics configurations;
- A bracket with two USB 3.0 ports plus a bracket for the back panel with a set of retention screws;
- I/O Shield for the back panel;
- A brochure about the functionality of mainboard BIOS and accompanying software;
- User manual in multiple languages;
- DVD disk with software and drivers.
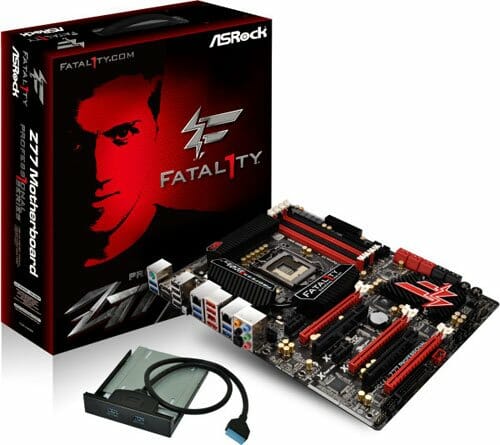
There is nothing unusual about these accessories. I would only like to point out that the mainboard comes with a very convenient universal module with two USB 3.0 ports. By default, it is intended to be installed into the free 3-inch bay and deliver two USB 3.0 ports to the front of the system case. However, if you have a new case that already comes with USB 3.0 ports on the front panel, or if you do not have an empty 3-inch bay in the front, then you can use an enclosed bracket and screws set to place these ports in the back of the system case. Besides ASRock mainboards, only some mainboards from Elitegroup come with the modules and brackets offering such extensive functionality. The only advantage the ECS modules have is that their cable is a little bit longer.
PCB Design and Functionality
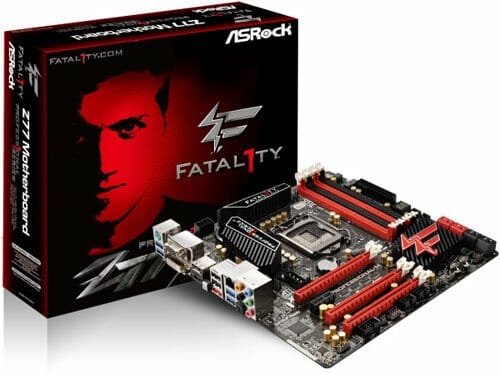
Black-and-red color scheme is a distinguishing feature of the Fatal1ty mainboards, which found its way not only onto the packaging but also into the ASRock Fatal1ty Z77 Professional mainboard. At first glance the mainboard may seem quite common, but the better you get to know it, the more impressed you get with the ASRock engineers’ skills and ability to load this mainboard with an unprecedented number of features.
The first thing we would like to point out is the digital processor voltage regulator circuitry designed as 16 + 8. The components of the regulator that tend to warm up during work are covered with two heatsinks, and the heatpipe connects them with the third additional heatsink in the middle of the board. This third heatsink doesn’t cool anything beneath, but serves as an expansion of the heat dissipating surface. All heatsinks including the fourth on top of the chipset are fastened with screws. There is a set of additional retention holes around the processor socket, which should allow using coolers originally designed for LGA 775 processors. This technology has a name of its own – ASRock Combo Cooler Option. There are six fan connectors onboard, two of which are dedicated to the CPU (one four-pin and one three-pin connector). This way the rotation speed of the processor fan can be adjusted in case of either connection type, which is a unique feature currently supported only by ASRock mainboards.
Four DIMM slots for DDR3 SDRAM can accommodate up to 32 GB of memory. The memory frequency range for Ivy Bridge processors stretches from 1066 to 2800 MHz. Note that the memory slots have single-sided latches. The latches on the graphics card slots are also very wide and convenient. The board has two PCI Express 3.0/2.0 x16 slots operating as 1×16 or 2×8. The third PCI Express 2.0 x16 slot works at x4 speed. The board supports AMD Quad CrossFireX, 3-Way CrossFireX, CrossFireX, NVIDIA Quad SLI and SLI graphics configurations. Besides three graphics card slots, there are two PCI Express 2.0 x1 and two PCI slots for expansion cards. Intel Z77 Express chipset equips the board with two SATA 6 Gbps ports and four SATA 3 Gbps ports, while two additional ASMedia ASM1061 controllers add another four SATA 6 Gbps ports. One of these additional connectors is combined with an eSATA 6 Gbps port on the back panel.
Overall, the back panel of ASRock Fatal1ty Z77 Professional has the following:
- Universal PS/2 connector for keyboard or mouse;
- Six USB 3.0 ports (blue connectors), four of which are implemented via EtronTech EJ188H controller, and another two ports and an onboard pin-connector are supported by the Intel Z77 Express chipset;
- HDMI and DisplayPort video outs;
- Six USB 2.0 ports, four more are laid out as two onboard pin-connectors;
- “Clear CMOS” button;
- Two local network ports (network adapters are built on Gigabit Broadcom BCM57781 network controllers);
- IEEE1394 (FireWire) port implemented with VIA VT6330 controller, a second port like that is available as an onboard pin-connector;
- One eSATA 6 Gbps port implemented via ASMedia ASM1061 controller and combined with one of the internal SATA 6 Gbps ports also implemented through the same controller;
- Optical S/PDIF and five analogue audio-jacks provided by eight-channel Realtek ALC898 codec.
The very top red USB 2.0 port is a special port called “Fatal1ty Mouse Port”. It differs from the other ports because it uses special software to raise the mouse polling rate and responsiveness in games. Note that the IEEE1394 (FireWire) interface is implemented via a combination VIA VT6330 controller, which also provides PATA support. Moreover, the board also has a few other legacy interfaces, such as a COM-port and a floppy connector. Intel Z77 Express chipset provides a limited number of PCI Express lanes, therefore there is a PLX PEX 8608 hub on the board, which provides eight more PCI-E 2.0 lanes thus allowing all numerous connectors and controllers to work simultaneously. We should also point out a POST-code indicator and glowing Power On and Reset buttons. The buttons are also unique: besides the “Power” and “Reset” words, they also bear “Fatal1ty” logo.
All technical specifications of the new ASRock Fatal1ty Z77 Professional mainboard are summed up in the table below:
I would like to specifically point out that the board PCB hasn’t been increased and fits into the ATX form-factor standards although the board features an unprecedented number of functions and additional controllers. However, the components are so densely packed onto the PCB that VIA VT6330 and EtronTech EJ188H controllers had to be relocated to the bottom of the PCB.
BIOS Functionality
When we reviewed ASRock Z77 Extreme4 and ASRock Z77 Extreme6 mainboards, we discussed their BIOS functionality in great detail. That is why today we are going to dwell only on the major BIOS sections and most important sub-sections. It turns out that the major difference between the BIOS of ASRock Fatal1ty Z77 Professional and the BIOS of the Z77 Extreme4 and Extreme6 boards is Fatal1ty’s typical black-and-red color of the interface rather than the variety of options and settings.
The first section we see upon accessing the BIOS is called “Main”, which reports the basic information about our system.
“System Browser” sub-section is designed as a pretty precise schematic layout of the board itself. By rolling the mouse pointer over any of the mainboard components on this layout you can get information about it. For example, we highlighted one of the memory modules on the layout and immediately learned not only its nominal settings, but also the extended information recorded in the X.M.P. profile.
ASRock OMG (Online Management Guard) function allows denying Internet access at preset times and days of the week in the BIOS.
Most of the overclocking and fine-tuning options are gathered in “OC Tweaker” section. The top part offers you options for automatic overclocking of the CPU and the graphics core integrated into it, or allows setting the parameters manually. At the bottom of the page there is an option that allows you to save up to three complete settings profiles and assign each of them a descriptive name. The voltages may be set above and below the nominal value. They may be set at specific values, or adjusted by adding an offset to the default setting. The digital voltage regulator circuitry allows selecting the Vdroop value.
As usual, some parameters have been relocated into individual sections to unload the main page a little bit. In particular, all the settings for memory timings configuring have been singled out onto a separate page.
We are already very well familiar with the functionality of the sub-sections in the “Advanced” section: their names speak for themselves. I would only like to point out a very convenient BIOS updating tool called “Instant Flash”. This utility will analyze the contents of the plugged in USB drive and provide you a list of compatible updates. All you need to do at this point is select the correct BIOS version. We also noticed a few changes in another even more convenient BIOS updating utility called “Internet Flash”: now we can select the server for downloading the BIOS at the most convenient geographical location.
The “CPU Configuration” sub-section contains basic information about the processor and offers to configure some processor technologies.
“H/W Monitor” section allows monitoring temperatures, voltages and fan rotation speeds. The rotation speeds of the two processor fans and a four-pin system fan may be set in dependence on the temperature or locked at a certain fixed value. The rotation speed of the remaining two system fans can only be lowered to the desired level. Only the “Power FAN” speed can be monitored but cannot be adjusted in any way. “Dehumidifier Function” will prevent boot-up failures caused by excessive humidity inside the system case. The humidity can be easily lowered from 70% to 40% in a very simple way: by powering the system on from time to time. This function allows setting the frequency of system power-ups, the length of the on-time and the rotation speed of the CPU cooler fan.
The “Boot” section allows choosing the startup system parameters. “Security” section will offer to create administrator and user passwords.
The last section called “Exit” allows you to apply all changes, cancel them or reset all settings to defaults.
Overall, the new UEFI BIOS from ASRock looks very solid and convenient to work with. It offers everything necessary for system overclocking and fine-tuning.
Proprietary Software Bundle
In our ASRock Z77 Extreme 4 and ASRock Z77 Extreme6 mainboard review we mentioned diverse utilities and tools bundled with the company’s mainboards. We could mention such goodies as a trial version of Cyberlink MediaEspresso 6.5, and a complete MAGIX Multimedia Suite. It includes “mufin player” audio player, Music Maker Silver program for audio editing a similar program for video editing called “Video easy SE”, as well as Photo Manager 10 for image editing. ASRock Fatal1ty Z77 Professional mainboard comes with all the same programs including “Instant Boot”, “XFast USB” and “XFast LAN” utilities. However, instead of a multi-functional “ASRock Extreme Tuning Utility”, they offer a very similar program called “F-Stream”.
The “Hardware Monitor” startup screen displays information about the system parameters. The next tab called “Fan Control” allows adjusting the rotation speed of the processor and case fans.
The “Overclocking” tab allows changing base clock frequency, processor clock multiplier and different voltages.
The only significant difference between “F-Stream” and “ASRock Extreme Tuning Utility”, besides the different color interface, is the missing “OC DNA” tab for saving and exchanging BIOS settings profiles. Instead, there is a “Fatal1ty Mouse Port” tab, where we can adjust the polling frequency for this special USB 2.0 port.
Enabling power-saving in the “Energy Saving” tab will lower the nominal processor Vcore, however, you should be very careful, because we also may enable “Power Saving Mode” in the BIOS and it will lower the Vcore by 0.1 V. But this tab will also confirm that the dynamic adjustment of the number of active phases in the processor voltage regulator circuitry works even during overclocking.
“XFast RAM” tab allows creating a virtual RAM-drive and taking advantage of its functionality.
Testbed Configuration
We performed all our tests on a testbed built with the following components:
- Mainboard: ASRock Z77 Fatal1ty Professional (LGA 1155, Intel Z77 Express, BIOS version P1.20);
- Intel Core i5-3570K CPU (3.6-3.8 GHz, 4 cores, Ivy Bridge rev.E1, 22nm, 77 W, 1.05 V, LGA 1155);
- 2 x 4 GB DDR3 SDRAM Corsair Vengeance CMZ16GX3M4X1866C9R (1866 MHz, 9-10-9-27 timings, 1.5 V voltage);
- Gigabyte GV-T797OC-3GD (AMD Radeon HD 7970, Tahiti, 28 nm, 1000/5500 MHz, 384-bit GDDR5 3072 MB);
- Crucial m4 SSD (CT256M4SSD2, 256 GB, SATA 6 Gbps);
- Scythe Mugen 3 Revision B (SCMG-3100) CPU cooler;
- ARCTIC MX-2 thermal interface;
- CoolerMaster RealPower M850 PSU (RS-850-ESBA);
- Open testbed built using Antec Skeleton system case.
We used Microsoft Windows 7 Ultimate SP1 64 bit (Microsoft Windows, Version 6.1, Build 7601: Service Pack 1) operating system, Intel Chipset Software Installation Utility version 9.3.0.1020, AMD Catalyst graphics card driver version 12.4.
Operational and Overclocking Specifics
Despite numerous additional features, which the developers managed to fit onto the standard ATX form-factor mainboard, ASRock Fatal1ty Z77 Professional has pretty convenient layout and we didn’t have any problems during the system assembly. When the system is on we see a startup logo with the mention of all active hot keys.
You may turn off the start-up image. In overclocked mode the processor clock frequency will be displayed correctly, which most mainboards from other manufacturers cannot do. However, as for the memory, the board will only display its size, but not the frequency.
I can admit that the initial startup and rebooting take very little time. We didn’t experience any problems in the nominal mode, besides the imperfect algorithms for the adjustment of the processor fan speed depending on the CPU temperature. The fan rotation speed adjustment feature is disabled by default on ASRock boards, which seems to be not quite the right thing. It can be easily enabled, but in this case both processor fans will be set to Level 9, which is way too high, because in this mode the rotation speed will barely ever drop. Previously when we tested ASRock mainboards, we would set it to Level 4 or Level 6 and it was more than enough. This time, however, we had to use the lowest Level 1 and 2 to ensure that the noise lowered in an acoustically comfortable manner. And it could be the end of it, but it turned out that the board was not sensitive enough to the changes in the CPU temperature. The CPU was fully utilized, but the rotation speed of its cooling fan was just starting to slowly rise. The opposite was also true: when the CPU switched to idle mode and its Vcore, as well as its frequency and temperature dropped, the processor cooling fan still continued spinning at its maximum speed.
However, these are all minor things, and the real challenges awaited us during overclocking, because we had really hard time trying to get our CPU to work at 4.6 GHz. We overclocked our test processor on ASRock Z77 Extreme4 and ASRock Z77 Extreme6 mainboards with slightly different settings in order to introduce some diversity into our tests and have the opportunity to study the mainboards’ functionality to the fullest. On one board we set Vdroop a little higher, but didn’t raise the CPU Vcore that much, and on the other we did everything the other way around. The results were identical in both cases. With ASRock Fatal1ty Z77 Professional we tried to use the same tested settings, disabled Load-Line Calibration completely and pushed the CPU Vcore to the limits, set Vdroop to its maximum and didn’t even touch the Vcore, checked out a variety of other settings combinations, but all in vain. Moreover, unlike the previously tested mainboards, which were obviously unable to overclock the processor to 4.6 GHz, we could clearly feel that we were almost there. The system passed the tests, but there was no stability in the results, the errors popped up occasionally. We couldn’t increase the CPU Vcore even a little more. In this case its temperature rapidly, almost spasmodically rose to 100 degrees or higher, so that we either terminated the tests ourselves, or the anti-overheating mechanism kicked in and the board shut down on its own. We even reinstalled the CPU cooler just in case, but it obviously wasn’t the source of the problem, because the thermal paste imprint was perfect and after we reinstalled it nothing really changed.
Since the board quickly and easily overclocked our CPU to 4.5 GHz without any stability issues, we were about to settle for this number and continue with the performance and power consumption tests, when we uncovered the stumbling stone preventing us from overclocking higher. It was the ambient room temperature! We were running the tests on an extremely hot day when the old AC unit was struggling with the heat wave from the outside and the room temperature varied between 26 and 29°C. However, as soon as we lowered the room temp to a more comfortable (for everyone) 22-25°C, all errors vanished, the CPU thermal mode got to normal, the temperature stopped snowballing and the we successfully hit 4.6 GHz increasing the memory frequency to 1867 MHz at the same time.
I have to remind you that we are always very careful about what we report in our reviews and pay particular attention to overclocking results. The so-called “screenshot overclocking” has absolutely no practical value. We, however, always achieve stable results and sometimes even take a step back from the maximum numbers to be able to provide the results that anyone can achieve. And during the series of tests of the new Z77 Express based platform we increased the frequency of our Core i5-3570K processor tested on Asus P8Z77-V Deluxe to 4.7 GHz and the system did pass all stability tests successfully. However, we perform our tests in an open testbed and it was obvious that once the same system is installed into a system case or the room temperature increases a little more, the maximum CPU temperature will be reached, which will trigger protective mechanisms and the overclocking success will backfire causing a performance drop instead of an increase. As a result, we had to stop at 4.6 GHz. Unfortunately, hot summer weather proved that the measures we took weren’t sufficient and this frequency was still too higher for our processor. So, we have to conclude that the guaranteed stability for our specific processor sample can only be achieved at 4.5 GHz.
We have to apologize that we may have misled you and set the expectations a little too high when we promised stability at 4.6 GHz CPU clock. At the same time, it is also important to pay attention to the other side of the picture. If we had stopped at 4.5 GHz clock right from the beginning, we would have found absolutely no difference in performance of the tested mainboards. Almost all of them are capable of overclocking the processor to 4.5 GHz and the 4.6 GHz bar is still unattainable for many of them. So, our mistake did a lot of good after all: it revealed the differences in the mainboards’ overclocking potential. By the way, the last mainboard we reviewed, Asus Sabertooth Z77, could only hit 4.4 GHz during our overclocking experiments, which is the lowest result of all the tested mainboards so far. But could the temperature have so negatively affected the overclocking results back then, too? Could this board have done better in more favorable thermal conditions? Possible. However, when I tested Asus Sabertooth Z77 the heat hadn’t really set in yet. I spent a lot of time trying to hit 4.5 GHz, but had to roll back to 4.4 GHz after all. However, ASRock Fatal1ty Z77 Professional passed all tests even in the peak of daytime heat, but easily maintained 4.5 GHz frequency and faced some problems only at 4.6 GHz. The difference is obvious, isn’t it?
Now I just have to remind you that we always overclock mainboards in such a way that they could be used permanently in this mode. Therefore we do not try to make our life easier by disabling any of the mainboard’s features, e.g. onboard controllers, and try to keep the CPU’s power-saving features up and running. This time we did exactly the same thing. All Intel power-saving technologies remained up and running and automatically lowered the processor Vcore as well as clock frequency multiplier in idle mode.
By the way, once all testing was completed and I was working on the ASRock Fatal1ty Z77 Professional review itself, the company released new BIOS version 1.30 update. We decided not to rerun all the benchmarks, because the board did very well anyway. Besides, we are using an Intel Core i5-3570K processor with an unlocked frequency multiplier. However, one of the major innovations in the new BIOS is the “No-K OC” function, which allows overclocking regular processors that do not have the “K” index in their model name by simply pressing one button in the BIOS.
Performance Comparison
As usual, we are going to compare the mainboards speeds in two different modes: in nominal mode and during CPU and memory overclocking. The first mode is interesting because it shows how well the mainboards work with their default settings. It is a known fact that most users do not fine-tune their systems, they simply choose the optimal BIOS settings and do nothing else. That is why we run a round of tests almost without interfering in any way with the default mainboard settings. For comparison purposes we also included the results of the previously reviewed ASRock Z77 Extreme4 and ASRock Z77 Extreme6, Asus P8Z77-V Deluxe, Asus Sabertooth Z77, Gigabyte G1.Sniper 3, Intel DZ77GA-70K and Intel DZ77RE-75K, and MSI Z77A-GD65 mainboards. The results on the diagrams are sorted out in descending order.
Nominal Mode
We used Cinebench 11.5. All tests were run five times and the average result of the five runs was taken for the performance charts.
We have been using Fritz Chess Benchmark utility for a long time already and it proved very illustrative. It generated repeated results, the performance in it is scales perfectly depending on the number of involved computational threads.
A small video in x264 HD Benchmark 4.0 is encoded in two passes and then the entire process is repeated four times. The average results of the second pass are displayed on the following diagram:
We measured the performance in Adobe Photoshop using our own benchmark made from Retouch Artists Photoshop Speed Test that has been creatively modified. It includes typical editing of four 10-megapixel images from a digital photo camera.
In the archiving test a 1 GB file is compressed using LZMA2 algorithms, while other compression settings remain at defaults.
Like in the data compression test, the faster 16 million of Pi digits are calculated, the better. This is the only benchmark where the number of processor cores doesn’t really matter, because it creates single-threaded load.
Since we do not overclock graphics in our mainboard reviews, the next diagram shows only CPU tests from the 3DMark11 – Physics Score. This score is obtained in a special physics test that emulates the behavior of a complex gaming system working with numerous objects:
We use FC2 Benchmark Tool to go over Ranch Small map ten times in 1920×1080 resolution with high image quality settings in DirectX 10.
Resident Evil 5 game also has a built-in performance test. Its peculiarity is that it can really take advantage of multi-core processor architecture. The tests were run in DirectX 10 in 1920×1080 resolution with high image quality settings. The average of five test runs was taken for further analysis:
Batman: Arkham City game also reacts eagerly to any changes in the CPU clock frequency, but it uses DirectX 11. We ran game’s integrated benchmark five times with high image quality settings and then take the average of the five runs for the diagrams.
ASRock Fatal1ty Z77 Professional performs as expected in the nominal mode and is always in the center of the pack on the diagrams.
Overclocked Mode
Overall, things do not change during overclocking, although there appear minor changes. The table below shows the results of our overclocking experiments:
Since ASRock Fatal1ty Z77 Professional managed to overclock our test processor and memory to their maximum, it is part of the leading group with the same overclocking results on the diagrams. However, in most cases, it comes the third or the fourth of the boards that hit 4.6 GHz clock.
However, things change dramatically in games and ASRock Fatal1ty Z77 Professional take the absolute lead. The difference between our hero and the other mainboards that managed to succeed in CPU and memory overclocking is still minimal, but it is obvious and undeniable.
Power Consumption
We performed our power consumption measurements using an Extech Power Analyzer 380803. This device is connected before the PSU and measures the power draw of the entire system (without the monitor), including the power loss that occurs in the PSU itself. In the idle mode we start the system up and wait until it stops accessing the hard disk. Then we use LinX to load the CPU. For a more illustrative picture there are graphs that show how the computer power consumption grows up depending on the number of active execution threads in LinX (both at the default and overclocked system settings).
Unfortunately, numerous onboard controllers do affect the power consumption of the ASRock Fatal1ty Z77 Professional mainboard. It is obviously higher than average, even closer to the maximum, but it is still lower than the power consumption of the Gigabyte board, which has a power-hungry PCI-E hub. All processor power-saving technologies work absolutely correctly on the ASRock mainboard right from the start, but you can only noticeably reduce the power consumption under any type of workload or in idle mode if you enable “Power Saving Mode” in the mainboard BIOS.
During overclocking the situation with power consumption doesn’t change. ASRock Fatal1ty Z77 Professional is among the other boards that consume more power than average, like Asus P8Z77-V Deluxe and Gigabyte G1.Sniper 3.
Conclusion
ASRock Fatal1ty Z77 Professional mainboard made a great overall impression. It has very convenient thought-though layout, is built with high-quality components, features powerful multi-phase digital processor voltage regulator circuitry. Intel Z77 Express chipset comes with a pretty extensive feature set, but in this case we see an unprecedented functionality expansion using numerous onboard controllers. Two ASMedia ASM1061 controllers provide additional SATA and eSATA 6 Gbps ports, there is a four-port USB 3.0 EtronTech EJ188H controller, two Broadcom BCM57781 Gigabit network adapters, the VIA VT6330 controller provides support for the IEEE1394 (FireWire) as well as IDE drives, there is a COM-ports and even a floppy connector! To ensure that all this will work flawlessly together with the expansion card slots, they added an eight-port PLX PEX 8608 hub. It is really hard to find an interface or port that ASRock Fatal1ty Z77 Professional doesn’t support. The only legacy interface we could come up with is LPT, and in terms of contemporary ones – Wi-Fi and the fancy Thunderbolt.
We didn’t list all the advantages of the ASRock Fatal1ty Z77 Professional mainboard here. We should also mention a very convenient BIOS with all necessary functions for proper system configuring and fine-tuning, special Fatal1ty Mouse Port, ability to accommodate LGA 775 processor coolers, ability to adjust the rotation speed of any type of processor fans, easy DIMM and PCI-E x16 slot latches, glowing Power On, Reset and Clear CMOS buttons as well as a POST-code indicator. The board overclocks processors beautifully. As for the drawbacks, we could only point out slightly higher power consumption, which isn’t a surprise considering how loaded the board is and somewhat confusing algorithms for fan rotation speed adjustment. However, we could argue whether the latter is that much of a drawback, really. Gradual and smooth adjustment of the fan rotation speed allows avoiding rapid RPM increase or drop, which might cause some acoustic discomfort. Besides, we only tried changing the actual fan speed setting, while we could have also played around with the second setting for the desired CPU temp. so, it all comes down to ASRock Fatal1ty Z77 Professional mainboard boasting a ton of advantages, and hardly any drawbacks that is why it receives our ultimate recommendation and Editor’s Choice title: