Asus Maximus IV Extreme: LGA1155 Mainboard for Three Graphics Cards

The board is based on the new B3 revision of Intel P67 Express chipset, but unlike other similar mainboards it boasts a tremendous number of functions, features and technologies. We have already come across some of them on Asus mainboards, or those from other vendors, but we could never imagine that they could all be fit into a one single model at the same time.
It is only early this year that Gigabyte began producing a special gamer-oriented mainboard series under the G1-Killer brand and later, in spring, announced an overclocker-friendly product. You can learn about the capabilities of Gigabyte’s special mainboards from our review Gigabyte G1.Sniper and GA-X58A-OC: LGA1366 Mainboards for Gamers and Enthusiasts. Recently we’ve covered the LGA1155 G1.Sniper 2 as well. Meanwhile, ASUSTeK has long been producing its Republic of Gamers series which includes products for both gamers and overclockers. ROG mainboards are not separated into two product lines for the two mentioned categories of users. Instead, they split up in two subseries depending on the CPU maker: Maximus for Intel CPUs and Crosshair for AMD CPUs. We reviewed one such mainboard (it was the ASUS Maximus III Formula) about two years ago, so it’s time for us to check out what’s new in the Republic of Gamers. We’ll do this by testing a Maximus IV Extreme mainboard which is based on the B3 revision of the Intel P67 Express chipset and supports newest LGA1155 processors. It stands out among ordinary products with a colossal number of various features, technologies and innovations. We’ve seen some of them in other mainboards from ASUS and other brands but we could never imagine that it is possible to implement all of them in a single product.
Packaging and Accessories
The box with ASUS Maximus IV Extreme is designed in the unmistakable Republic of Gamers style. The face panel can be flipped back, allowing you to take a look at the mainboard through a window. Descriptions of some of the product features can be found all over the box.
Besides the mainboard, the box contains a lot of accessories in its numerous compartments:
- Eight SATA cables with metal connector locks, half with L-shaped locks and another half with straight ones. Two pairs are specifically designed for SATA 6 Gbps devices (have white inserts on the connectors);
- “12-in-1 ROG Cable Label” a sheet with twelve paper tags that can be used to mark all SATA cables;
- Rear panel bracket with two USB 2.0 ports;
- A flexible bridge for two-way Nvidia SLI graphics configurations;
- A hard bridge for 3-way Nvidia SLI graphics configurations;
- “Asus Q-Connector” set including adapters for easy connection of the system case front panel buttons and indicators and a USB 2.0 port;
- ROG Connect Cable – a cable with two USBs to connect to other PCs;
- RC Bluetooth module;
- I/O Shield for the back panel;
- A couple of plastic ties for cable management;
- Probelt cable for convenient voltage measuring with a voltmeter;
- Three cables with additional thermal diodes;
- ROG Theme Label – a large sticker with a Republic of Gamers image like the one in the lower right corner of the mainboard package;
- “Powered by Republic of Gamers” sticker;
- User manual;
- DVD disk with software and drivers (including 3DMark Vantage Advanced Edition and a one-year Kaspersky license).
Although the accessories are exceptionally gorgeous, we don’t see a USB 3.0 module here that might be used to output USB 3.0 ports to the front panel of the system case. This is also the first mainboard we’ve ever seen to come with SATA cables that have only L-shaped connectors. Straight connectors can be handier in some situations, so there are usually two types of SATA cables included with other mainboards.
BIOS Setup
We’ve already seen ASUS EFI BIOS, a very successful implementation of the UEFI standard (Unified Extensible Firmware Interface), in our previous reviews of ASUS mainboards. The new BIOS interface may seem unusual but its structure and setup options are quite recognizable as those of ASUS’s older BIOS. The most eye-catching difference is the Republic of Gamers color scheme, but there are also quite a lot of extra options inside. This EFI BIOS opens in Advanced Mode rather than the simplified EZ Mode. Most of the overclocking-related options are collected in the first section called Ai Tweaker.
Some of the setup options are available in individual subsections in order not to clutter the main section. One such subsection contains memory timings, for example.
The new GPU.DIMM Post subsection contains basic graphics card and memory module parameters.
ASUS mainboards can automatically adjust to the user-defined settings and increase the allowable CPU power consumption range.
CPU, memory and chipset power management options can all be found on an individual page.
Next goes the familiar Main section which doesn’t contain anything new.
Most of the pages in the Advanced section are also familiar and have self-descriptive names, but there are some of them which are peculiar to the ROG series. The iROG Configuration subsection helps you monitor the current and total system uptime. The ROG Connect feature can be disabled in the namesake subsection. You can also specify the way the boot-up process is indicated: as text or POST codes. The mainboard having a lot of LEDs (highlighted buttons and ROG badge, multicolor Voltiminder LEDs), it is handy that the BIOS offers the opportunity to turn that illumination off partially or completely (on the LED Control page).
The CPU Configuration subsection reports you basic information about the CPU and allows to control some CPU-related technologies.
The pages of the Monitor section are where you can check out the current temperatures, voltages and fan speeds.
The CPU and system fans can be regulated automatically (by choosing one of the three modes: Standard, Silent or Turbo) or manually. The PWR fan can be set to a certain speed whereas the speed of the three OPT fans can be set to change depending on the additional sensors.
System startup options can be found in the Boot section.
Next goes the Tools section.
The integrated BIOS update tool called EZ Flash 2 is perhaps the handiest and most functional among the utilities of its kind. It has changed with the transition to EFI BIOS. For example, the current firmware version is saved into the root directory of the connected drive by default.
Like on mainboards from many other brands, we can now see the information written into the memory modules’ SPD unit.
ASUS mainboards allow you to store and load up to eight profiles with full BIOS settings. Each profile can be given a descriptive name. Considering that there are two BIOS chips on the Maximus IV Extreme, the number of profiles is doubled to 16.z
Having saved certain base clock, CPU multiplier and voltage values in the Go Button File subsection, you can instantly overclock your computer by pressing the Go button.
You don’t have to use the onboard button to switch between the two BIOS chips. The BIOS FlashBack page allows doing that, too. You can also copy the contents of one BIOS chip into another here.The Exit section goes last. It allows you to save your changes, load default BIOS settings, or switch to EZ Mode.
EZ Mode gives you a lot of information but offers almost no user-defined options. You can only choose one of three power-saving modes and define the boot device order by dragging the icons with your mouse.ASUS EFI BIOS is an excellent example of how the capabilities of the old BIOS can be expanded without making it harder to use. We guess the biggest problem that this BIOS presents is the sheer abundance of settings. However, the mainboard sets most of them at optimal values by default, so you can leave everything as it is and have your system running smoothly.
Testbed Configuration
All performance tests were run on the following test platform:
- Mainboard: Asus Maximus IV Extreme rev. 1.02 (LGA1155, Intel P67 Express, BIOS version 1850);
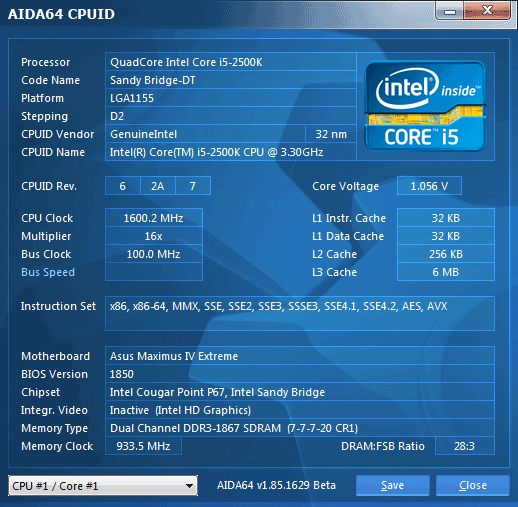
- Intel Core i5-2500K CPU (3.3 GHz, Sandy Bridge, LGA1155);
- 2 x 2048 MB DDR3 SDRAM Patriot Extreme Performance Viper II Sector 5 Series PC3-16000, PVV34G2000LLKB (2000 MHz, 8-8-8-24 timings, 1.65 V voltage);
- MSI N570GTX-M2D12D5/OC graphics card (Nvidia GeForce GTX 570, GF110, 40 nm, 786/4200 MHz, 320-bit GDDR5 1280 MB);
- Kingston SSD Now V+ Series (SNVP325-S2, 128 GB);
- Cooling system: Scythe Mugen 2 Revision B (SCMG-2100) CPU cooler and an additional 80×80 mm fan for cooling of the area around the CPU socket during overclocking experiments;
- ARCTIC MX-2 thermal interface;
- CoolerMaster RealPower M850 PSU (RS-850-ESBA);
- Open testbed built using Antec Skeleton system case.
We used Microsoft Windows 7 Ultimate SP1 64 bit (Microsoft Windows, Version 6.1, Build 7601: Service Pack 1) operating system, Intel Chipset Software Installation Utility version 9.2.0.1030, Nvidia GeForce Driver 280.26 graphics card driver.
Operational and Overclocking Specifics
As opposed to the ASUS P8P67 Deluxe and P8Z68 Deluxe mainboards with which we had some problems installing our Scythe Mugen 2 cooler, the Maximus IV Extreme didn’t present any such difficulties. We only had to look up in the user manual what SATA 6 Gbit/s connectors belonged to the chipset rather than to the onboard controller because all of the four SATA 6 Gbit/s ports are the same color of red.
Having assembled our test configuration, we were surprised to find that the mainboard wasn’t working right in its default mode. Our Intel Core i5-2500K processor with a default clock rate of 3.3 GHz is supposed to have a frequency multiplier of x34 at full load but can be clocked at 3.7 GHz at low loads (when only one of its four cores is in use). However, the Maximus IV Extreme would increase the clock rate of our CPU to 3.7 GHz irrespective of load, even when all of the CPU cores were in use.
It’s good to have some more speed, but we guess that nonstandard operation modes should be left for the user to select rather than enabled automatically. As a matter of fact, we still have bad memories of a mainboard that would set the CPU multiplier at x37 irrespective of load. That was a Zotac Z68-ITX WiFi and it not only broke down itself but also burned our CPU. Zotac has the excuse of having tried to bring that mainboard to market as soon as possible without polishing its BIOS off (or maybe we were just not lucky and had a defective sample) whereas the Maximus IV Extreme has been around for a long time already and its firmware has been updated a few times. So, we don’t like the incorrect operation of the mainboard in its default mode.
Fortunately, as opposed to the Zotac, the Maximus IV Extreme can be made to work normally. It is clear that the problem is in Turbo technology increasing the CPU multiplier to x37. When selecting optimal values in the BIOS, the mainboard sets Turbo Ratio at All Cores Mode. Oddly enough, this increases the CPU clock rate at 3.7 GHz at any load even though the Maximum Turbo Ratio Setting is set at Auto.
Now what if we set Turbo Ratio at “By Number of Active Cores Mode” without changing anything else? Well, this only makes things worse. The CPU multiplier is now always x37, even if there is no CPU load at all. The CPU voltage is also increased always, indicating that the CPU’s power-saving technologies have turned off.
Let’s try to set the Turbo Ratio at Auto, just like it should be by default. The mainboard starts up but cannot boot the OS and goes for a reboot automatically. It’s only after a few unsuccessful restarts that the mainboard returns to the truly normal default mode. From this moment on, it will work correctly until you load the optimal settings into its BIOS again.
Thus, the Maximus IV Extreme can be made to work normally but it doesn’t do that by default. Now what about overclocking? Unfortunately, this model lacks the handy OC Tuner Utility available in the BIOS of some LGA1156 products from ASUS. When selected, this utility can increase the base clock rate step by step, restarting the mainboard after each increase. LGA1155 processors are overclocked by increasing the frequency multiplier rather than the base clock rate and ASUS may just have not found an algorithm to implement this. Instead, you can use the CPU Level Up feature which increases the CPU clock rate to 4.2 or 4.6 GHz. This way of overclocking, typical of MSI mainboards, is not optimal, though. The CPU multiplier and voltage are increased but the power-saving technologies get disabled, so the CPU just works at the set frequency without lowering it and the voltage when idle.
In our recent review of the Gigabyte G1.Sniper 2 mainboard we praised its automatic overclocking feature called O.C.Button. When the button is pressed again or the system is rebooted, the mainboard returns to its default settings, which means that you don’t have to keep your computer overclocked all the time but can get a performance boost only when you really need it.
ASUS mainboards have long had a Go button which serves the same purpose. Moreover, with Gigabyte mainboards you have to use automatically selected parameters whereas ASUS ones allow you to specify what parameters are going to be used when you press Go. On the other hand, Gigabyte makes the O.C.Button easily accessible via a control panel you can insert into a 5.25-inch bay. ASUS’s Go button is only easy to use on an open testbed. We don’t think anyone uses it on a regular basis.
Well, you shouldn’t be disappointed at the lack of adequate automatic overclocking features with the Maximus IV Extreme because the mainboard behaves very well when overclocked manually. It could easily overclock our CPU to its maximum 4.7 GHz and we didn’t even have to increase the CPU voltage as much as on other mainboards. Besides, our memory modules were perfectly stable at 1866 MHz.

We always overclock mainboards in such a way that they could be used permanently in such mode. Therefore we do not disable any features, e.g. onboard controllers, and try to keep the CPU’s power-saving features up and running. The Maximus IV Extreme was overclocked in this manner, too. When idle, it lowered the CPU’s voltage and frequency multiplier to save power.
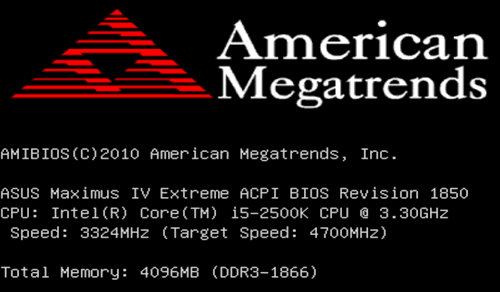
In our recent reviews we noted that it was only Gigabyte mainboards that could correctly report the frequency of an overclocked LGA1155 CPU when starting up. Other mainboards only report the correct memory frequency and the default CPU clock rate. The Maximus IV Extreme can also tell you the exact frequency of an overclocked CPU.
Our description of the mainboard’s features wouldn’t be complete if we didn’t tell you about the software bundle included into its box. The DVD contains 3DMark Vantage Advanced Edition and Kaspersky antivirus with a 1-year license. The Maximus IV Extreme is also compatible with a number of exclusive tools which have been covered in our reviews of other ASUS products (they only differ with their special Republic of Gamers interfaces). There is only one significant difference due to the Maximus IV Extreme having a Bluetooth module. So, besides using the ROG Connect feature and a special cable for controlling the mainboard from another computer, you can do this wirelessly from a mobile device. The RC Bluetooth utility allows connecting to the mainboard from an Android, Symbian or Windows Mobile smartphone. If you’ve got an iPhone or iPad, you can use the ROG iDirect tool for the same purpose.
Performance Comparison
As usual, we are going to compare the mainboards speeds in two different modes: in nominal mode and during CPU and memory overclocking. The first mode is interesting because it shows how well the mainboards work with their default settings. It is a known fact that most users do not fine-tune their systems, they simply choose the optimal BIOS settings and do nothing else. That is why we run a round of tests almost without interfering in any way with the default mainboard settings. Since Asus Maximus IV Extreme mainboard doesn’t work correctly with the default settings, we had to adjust the parameters manually, to get it to work in the true nominal mode. For comparison purposes we are going to also include the results of Asus P8Z68 Deluxe, P8Z68-V Pro and Asus P8Z68-V as well as Gigabyte G1.Sniper 2 and Gigabyte GA-Z68XP-UD3-iSSD mainboard. The results are sorted out in descending order on the diagrams and those for Asus Maximus IV Extreme are marked with darker color.
We used Cinebench 11.5. All tests were run five times and the average result of the five runs was taken for the performance charts.
We have been using Fritz Chess Benchmark utility for a long time already and it proved very illustrative. It generated repeated results, the performance in it is scales perfectly depending on the number of involved computational threads.
A small video in x264 HD Benchmark 4.0 is encoded in two passes and then the entire process is repeated four times. The average results of the second pass are displayed on the following diagram:
We measured the performance in Adobe Photoshop using our own benchmark made from Retouch Artists Photoshop Speed Test that has been creatively modified. It includes typical editing of four 10-megapixel images from a digital photo camera.
In the archiving test a 1 GB file is compressed using LZMA2 algorithms, while other compression settings remain at defaults.
Like in the data compression test, the faster 16 million of Pi digits are calculated, the better. This is the only benchmark where the number of processor cores doesn’t really matter, because it creates single-threaded load.
There are good and bad things about complex performance tests. However, Futuremark benchmarking software has become extremely popular and is used for comparisons a lot. To estimate the average performance of our test platform PCMark 7 quite measures the performance in common algorithms that are frequently used on an everyday basis. The diagram shows the average of three test runs:
3DMark11 suite measures the graphics sub-system performance in the first place. The diagram below shows the average results after three test runs in 3DMark11 Performance mode with default settings.
Since we do not overclock graphics in our mainboard reviews, the next diagram shows only CPU tests from the 3DMark11 – Physics Score. This score is obtained in a special physics test that emulates the behavior of a complex gaming system working with numerous objects:
We use FC2 Benchmark Tool to go over Ranch Small map ten times in 1920×1080 resolution with high image quality settings in DirectX 10.
Resident Evil 5 game also has a built-in performance test. Its peculiarity is that it can really take advantage of multi-core processor architecture. The tests were run in DirectX 10 in 1920×1080 resolution with high image quality settings. The average of five test runs was taken for further analysis.
Quite expectedly, there is no difference between the mainboards in performance in most applications. Although the Maximus IV Extreme is last in PCMark 7, for example, it is a mere 1% slower than the leader P8Z68 Deluxe, which is not a big deal at all.
Now let’s run the same tests with the CPU and memory overclocked. The settings of the mainboards are summed up in the following table:
The Maximus IV Extreme takes its deserved place among the fastest mainboards which, like itself, could make the memory modules stable at 1866 MHz.
Power Consumption
We performed our power consumption measurements using an Extech Power Analyzer 380803. This device is connected before the PSU and measures the power draw of the entire system (without the monitor), including the power loss that occurs in the PSU itself. In the idle mode we start the system up and wait until it stops accessing the hard disk. Then we use LinX to load the CPU. For a more illustrative picture there are graphs that show how the computer’s power consumption grows up depending on the number of active execution threads in LinX. The mainboards are sorted in alphabetical order on the diagrams.
Alas, the Maximus IV Extreme needs a lot of power to run in the default mode. It is not because ASUS mainboards generally have somewhat higher power draw compared to others and not because this one has an Nvidia NF200 controller. The controller does contribute to the mainboard’s overall power consumption but it does so in every mode whereas we only see a big difference from the other mainboards at maximum load. This may be due to the mainboard’s not working correctly in its default mode. As you can see in the next diagram, which shows the power consumption data for the same mainboards in overclocked mode, the Maximus IV Extreme doesn’t differ from the others then, and the small difference can indeed be attributed to the additional Nvidia NF200 controller.
Conclusion
As we wrote in the Introduction, the Maximus IV Extreme has lots of features, technologies and innovations. Not all of them are invented by ASUS but we are really impressed to see them all packed into a single device and implemented perfectly. You can take the two BIOS chips as an example. Gigabyte mainboards have long had the dual BIOS feature but users didn’t benefit much from it. On the contrary, a mainboard could occasionally decide that the main BIOS chip was damaged and rewrite it. The two BIOS chips work the same way on MSI mainboards. As opposed to them, the Maximus IV Extreme offers two full-featured independent BIOS chips, each with its own settings, even with different BIOS code versions. You can easily synchronize their data and switch between them using a button or a corresponding software option. So, we’ve finally got what we’ve missed in Gigabyte’s Dual BIOS feature.
It would take a lot of time to enumerate all the advantages of the Maximus IV Extreme, starting with its super-secure packaging and extraordinarily rich accessories and finishing with its handy PCB design and user-friendly EFI BIOS. It is indeed that good, but we’ve mentioned most of its advantages throughout our review already, so now it is time to point out some of its drawbacks here.
We were rather surprised that, for all the abundance of accessories, there was no USB 3.0 module for the front panel of the system case among them. The internal USB 3.0 connector is placed rather inconveniently, right next to the back-panel connectors. We weren’t happy that the mainboard didn’t work correctly in default mode and had high power consumption. On the other hand, such products are usually bought for overclocking, and its overclocking features and functionality have been implemented perfectly. Moreover, its power consumption is quite normal when it’s overclocked.
So, we can certainly recommend the Maximus IV Extreme for enthusiasts but you must be aware that you can only make full use of its graphics potential if you have three graphics cards. The mainboard allows using one or two graphics cards as well, but the additional Nvidia NF200 controller is not utilized in this case.