Gigabyte GA-990FXA-UD5 Socket AM3+ Mainboard Review

We will discuss the package, accessories, PCB layout and features of this Socket AM3+ mainboard from Gigabyte. We will check out its BIOS functionality, operational and overclocking specifics, performance and power consumption in nominal and overclocked mode.
In the very first review of Socket AM3+ mainboards where we compared flagship products from Asus, Gigabyte and Micro-Star, we discovered that only Asus Crosshair V Formula was capable of overclocking the new AMD Bulldozer processor to the maximum. Therefore, we focused on the feature and functionality of Asus mainboards and reviewed Asus Sabertooth 990FX and then two other Asus mainboards – M5A990X EVO and M5A970 EVO. This way we not only introduced to you the top-of-the-line Asus mainboards based on the highest-end AMD 990FX modification for the new processors, but also compared their functionality against that of the products on lower-end AMD 990X and AMD 970 chipsets. Theoretically, we could continue reviewing Asus mainboards, but to be honest it wouldn’t be too exciting any more. I don’t think we could uncover anything unique, because all other models are very similar to what we have already seen. In fact, it is much more interesting to check out the features and functionality of other manufacturers’ mainboards. We were not particularly impressed with Biostar TA990FXE, but today it is time for a product from another large mainboard manufacturer – Gigabyte Company. We are going to discuss Gigabyte GA-990FXA-UD5 mainboard, check out its design and functionality, BIOS features, operational peculiarities, performance and power consumption in nominal mode and during CPU and memory overclocking. But we are going to start with its package and accessories, as usual.
Package and Accessories
Gigabyte GA-990FXA-UD5 is packages just like any other high-end Gigabyte mainboard. There is a decorative colorful slip-cover made of thin cardboard on the outside. The front has a mainboard photo, its model name and numerous logotypes. The back has another mainboard photo and logotypes combined with diagrams, charts and graphs illustrating the mainboard’s operational specifics and supported technologies. Beneath the thin slip-cover we see a thick cardboard box protecting its contents against possible forces of nature.

Inside the box you find the mainboard, of course, and the following accessories:
- Four SATA cables with metal connector locks, two with L-shaped locks and another two with straight ones;
- A flexible bridge for two-way Nvidia SLI graphics configurations;
- A hard bridge for 3-way Nvidia SLI graphics configurations;
- I/O Shield for the back panel;
- User manual;
- Brief installation guide in 17 different languages;
- DVD disk with software and drivers;
- “Dolby Home Theater” and “Gigabyte” logo stickers for the system case.

PCB Design and Functionality
Once Gigabyte switched to black PCBs with black connectors, their products lost some of the exterior appeal and became a little less informative to the eye. Before you could easily grasp which memory slots belonged to which memory channel, which graphics card slots were the primary ones and which operated at lower speeds. Now you should better consult the manual, because black connectors are visually lost against the background of the dark PCB textolite and are hard to distinguish.
Just like on the top GA-990FXA-UD7 model, the processor voltage regulator circuitry on this one works as 8+2 and uses only highly-integrated components, where two MOSFETs and a control unit are combined into what is known as a single Driver MOSFET chip. Flagship AMD processors even in non-overclocked mode consume quite a bit of power that is why all voltage regulator components that tend to warm up a lot are topped with an additional heatsink. It is connected to a heatsink on the chipset North Bridge with a heatpipe. All three heatsinks in the system including the one on the chipset South Bridge are fastened using reliable screw-on retention. Four DDR3 DIMM slots support dual-channel memory organization and allow installing up to 32 GB of RAM. Unlike Asus mainboards that allow setting the memory frequency to 2133 MHz and even 2400 MHz, the maximum frequency Gigabyte GA-990FXA-UD5 supports is 1866 MHz. You can only achieve higher memory frequencies during overclocking by raising the base clock.
The expansion cards will go into PCI, PCI Express 2.0 x1 and five PCI Express 2.0 x16 slots. Although there are only three of these five slots are capable of supporting AMD CrossFireX or Nvidia SLI graphics card configurations. You can install one or two graphics cards that will be working at full speed, or three graphics cards, which will work as x16/x8/x8.The remaining two slots work as PCI-E x4, but they will be blocked if the graphics cards have large coolers. Besides 6 SATA 6 Gbps ports provided by the AMD SB950 South Bridge, the mainboard has two additional SATA 6 Gbps ports implemented using an additional Marvell 88SE9172 controller. A second controller like that provides support for eSATA and Power eSATA ports on the back panel.
The back panel on GA-990FXA-UD5 has the following ports and connectors on it:
- PS/2 connector for keyboard or mouse;
- Eight USB 2.0 ports, six more are laid out as three onboard pin-connectors;
- Optical S/PDIF and five analogue audio-jacks provided by eight-channel Realtek ALC889 audio codec;
- IEEE1394 (FireWire) port implemented via VIA VT6308P controller, the second port is available as onboard pin-connector;
- Two eSATA 6 Gbps ports implemented via Marvell 88SE9172 controller – one of them is Power eSATA (blue connector), another controller like that adds two internal SATA ports;
- Two USB 3.0 ports (blue connectors) implemented via EtronTech EJ168 controller, second controller like that provided an additional internal pin-connector for two more USB 3.0 ports;
- A local network port (network adapter is built around Gigabit Realtek RTL8111E network controller).
As for the unique peculiarities of Gigabyte GA-990FXA-UD5 mainboard, we should definitely mention two BIOS chips, a special USB ON/OFF Charge port that serves for charging mobile devices. As always they use very convenient color coding for the front panel ports and connectors. All connectors are marked not only on the textolite next to them, but also inside the actual connector. As for the drawbacks, I should say that the board has only four fan connectors, only two of which are four-pin ones and allow adjusting the fan rotation speed.
We summed up all the major mainboard specifications in the following table for your convenience:
BIOS Functionality
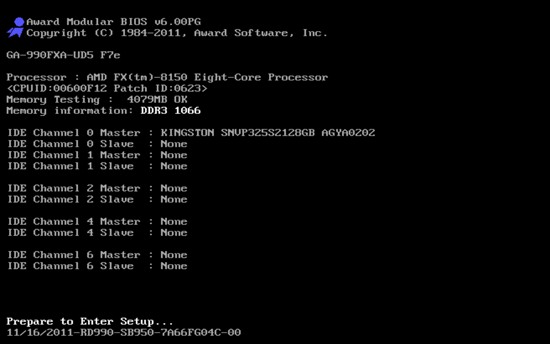
Unlike many other mainboards that switched to the UEFI BIOS, Gigabyte still uses the so-called Hybrid EFI. It implies the use of the same well-familiar BIOS based on Award microcode, where only the support for hard disk drives with over 3 TB storage capacity is implemented with EFI technologies. When we discussed the functionality of Gigabyte BIOS for LGA 1155 processors, the first thing we did was show you the startup screen, because only Gigabyte mainboards (and later on we learned that Asus ROG mainboards, too) were capable of displaying the actual frequency of the overclocked processor. All other mainboards displayed only the nominal CPU frequency, no matter which operation mode it was in. This time we will also start with a startup screen, because the situation turned out to be just the absolute opposite of what we experienced before: Gigabyte AM3+ mainboards are about the only ones out there that are unable to display the current CPU frequency, while all other mainboards we have tested so far can do it just fine.
Just in case let me remind you that on Gigabyte mainboards we can get access to a complete set of BIOS options only if we press “Ctrl-F1” in the main BIOS window.
It is convenient that “MB Intelligent Tweaker (M.I.T.)” section with all overclocking and fine-tuning parameters is the first on the list. This section contains most of the necessary settings, but not all, and as we will see later on, some of them got abandoned in the “Advanced BIOS Features” section.
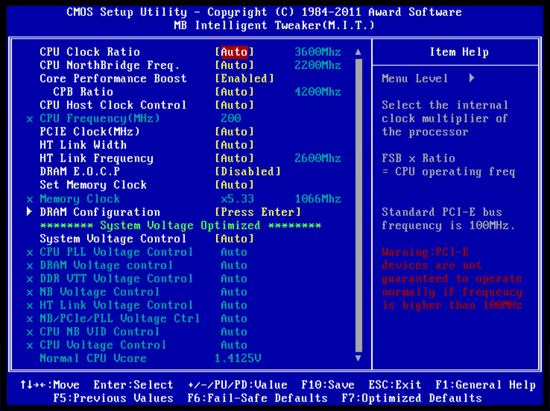
Compared with the BIOS of Gigabyte GA-990FXA-UD7 BIOS, we noticed that the “Turbo CPB” parameter was missing, although it wasn’t working anyway. Other than that, everything remained just as organized, convenient and informative as before. However, the moment you actually get to work with the BIOS, you immediately find certain issues with it. Take, for example, the adjustment of the memory voltage setting. It may be set above the nominal for overclocker memory modules, as well as below the nominal for low-voltage modules. The supported range goes from1.025 V to 2.135 V, dangerous values are highlighted with color and blink, the increment is extremely low – only 0.005 V.
There is no real harm from having such a small adjustment increment, but there is no real good either. In my opinion, it would be much more convenient to have a 0.01 V increment, because it allows changing the voltage with sufficient precision but in fewer clicks. The processor core voltage can also be set not only above but also below the nominal value, though its adjustment increment is way too big for contemporary CPUs – 0.025 V. I can’t even remember anymore when I came across a large increment like that. Most contemporary mainboards have an adjustment increment of half the size, and Asus mainboards have a four times smaller one!
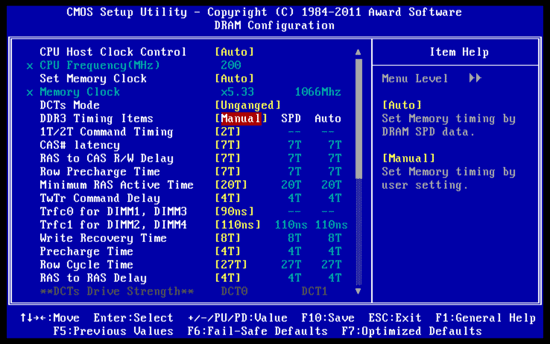
There is only one sub-section in the “MB Intelligent Tweaker (M.I.T.)” section and it contains options for the memory timings configuring. Everything seems to be very convenient and informative, you see all current timings and their values from the modules SPD. However, if we do not go with the automatic configuration mode, you will have to set each and every timing manually. You can’t adjust only a few selected parameters and leave all others in Auto.
“Standard CMOS Features” section is as standard as its name:
“Advanced BIOS Features” section allows us to modify the boot-up devices order on system startup and a few other parameters. Namely, there is an entire block of options in the beginning of this section connected with the processor that for some reason didn’t get included into the “MB Intelligent Tweaker (M.I.T.)” section.
The extensive list of parameters in the “Integrated Peripherals” section allows configuring the South Bridge and additional controllers.
“Power Management Setup” section has a regular set of parameters:
“PC Health Status” section shows us the current voltages, temperatures and fan rotation speeds. Gigabyte mainboards retained their ability to adjust the rotation speed of three-pin processor fans, which is a definite advantage. However, the BIOS for Intel platforms already allows user adjustment, while this BIOS doesn’t allow it yet and all adjustment modes are selected automatically, which is a definite disadvantage. It is obviously a plus to be able to adjust the rotation speed of the system case fans, however, the only three- or four-pin fan you can control is the one connected to the four-pin “System FAN1” connector. The rotation speed of the “System FAN2” and Power FAN” cannot be changed, which is a minus.
You can use some functional keys in the main menu of the Gigabyte mainboards BIOS to gain access to certain additional features. Pressing F9 will display system information on your screen.
You may also press F11 to save one of the eight full BIOS settings profiles. You can give each profile a detailed descriptive name and you will be warned when trying to overwrite an existing profile. You can load the profiles from the menu that pops up after pressing the F12 key. Besides the profiles you save manually, the system will also automatically save all configurations after a successful POST pass, so you will be able to restore them as well. In addition to system memory, you can use external media to save and load profiles.
By pressing F8 you will launch the integrated BIOS reflashing tool – Q-Flash Utility.
The BIOS of Gigabyte mainboards is pretty convenient to work with and has everything necessary for successful overclocking and system performance optimization. However, it looks better when you just glance over it, because as soon as you actually start working with it, you uncover a lot of little issues that may be pretty annoying. Moreover, the BIOS has been long lacking the options for configuring proprietary power-saving technologies, such as dynamic change of the number of active voltage regulator phases depending on the CPU utilization, for example. Most mainboard makers have already implemented features like that in their mainboards, but with Gigabyte you still have to install “Dynamic Energy Saver” utility. Overall, Gigabyte mainboards have already started to yield to the products from other makers, who have already implemented UEFI BIOS and mouse support. And unfortunately, Gigabyte mainboards for AMD CPUs are an additional half a step behind in their progress compared with the mainboards for the Intel platform.
Testbed Configuration
We carried out our tests on a testbed that included the following components:
- Mainboard: Gigabyte GA-990FXA-UD5 rev.1.0 (BIOS version F7e);
- AMD FX-8150 CPU (3.6 GHz, Zambezi (Bulldozer), AM3+);
- 2 x 2048 MB DDR3 SDRAM Patriot Extreme Performance Viper II Sector 5 Series PC3-16000, PVV34G2000LLKB (2000 MHz, 8-8-8-24 timings, 1.65 V voltage);
- MSI N570GTX-M2D12D5/OC graphics card (Nvidia GeForce GTX 570, GF110, 40 nm, 786/4200 MHz, 320-bit GDDR5 1280 MB);
- Kingston SSD Now V+ Series (SNVP325-S2, 128 GB);
- Scythe Mugen 2 Revision B (SCMG-2100) CPU cooler and an additional 80×80 mm fan for cooling of the area around the CPU socket during overclocking experiments;
- ARCTIC MX-2 thermal interface;
- CoolerMaster RealPower M850 PSU (RS-850-ESBA);
- Open testbed built using Antec Skeleton system case.
We used Microsoft Windows 7 Ultimate SP1 64 bit (Microsoft Windows, Version 6.1, Build 7601: Service Pack 1) operating system, Nvidia GeForce Driver 280.26 graphics card driver.
Operational and Overclocking Specifics
We didn’t experience any difficulties with the assembly of the Gigabyte GA-990FXA-UD5 based system. Unlike some other mainboards, for example, the same flagship GA-990FXA-UD7, there won’t be any problems during the system disassembly as well: the first PCI Express 2.0 x16 slot is far enough from the processor socket and the graphics card can be put in and taken out easily. The system worked fine in nominal mode, all power-saving technologies were up and running and lowered the processor clock frequency multiplier and core voltage in idle mode reducing the system power consumption. Turbo technology (CPB – Core Performance Boost) also worked fine and increased the CPU frequency in case of partial and even full core utilization. However, just like the top model this board set the memory timings to 7-7-7-20-2T instead of 7-7-7-20-1T, as it was supposed to. You can see from the BIOS screenshots that by default the mainboard has the “Native IDE” mode on. The same happens on Gigabyte mainboards for Intel processors, although they offer you a convenient way to automatically switch the drives into a more advanced AHCI mode during the first system boot-up. We didn’t see anything like that on the Socket AM3+ mainboard. It was frustrating that Clearing CMOS also reset the date and time. Moreover, the mainboard occasionally refused to let us access the BIOS ignoring my vigorous attacks on the Del key during startup. Although I have to admit that it occurred much rarer than on the flagship mainboard.
I couldn’t locate the “HPC Mode” parameter in the mainboard BIOS, which is supposed to prevent the CPU frequency from dropping to 3.3 GHz under heavy load. However, the beta versions of the F7 BIOS have an “AMD APM Master Mode” parameter in the “Advanced BIOS Features” section, which can serve the same purpose. If you disable it, Turbo technology will stop working, so it doesn’t suit too well for prevention of the frequency drop in the nominal mode, unlike the “HPC Mode” option. But it will do just fine during overclocking, because in this case we disable the Turbo technology anyway. Unfortunately, we couldn’t overclock our processor to its maximum of 4.5 GHz. We could maintain system stability even at 4.4 GHz, so we had to stop at 4.3 GHz. However, there is also good news: it is for the first time that a Gigabyte mainboard let our memory modules work at 1867 MHz frequency instead of lowering it to 1600 MHz as we would normally have to do. The board raises the back clock quite noticeably, so all other frequencies connected with it also were a little higher than normal, such as the CPU clock, HyperTransport and memory frequencies.
We always overclock mainboards in such a way that they could be used permanently in this mode. We do not try to make our life easier by disabling any of the mainboard features, such as onboard controllers, for example. We also try to keep the CPU’s power-saving features up and running normally. And this time all power-saving technologies remained up and running even in overclocked mode lowering the CPU voltage and frequency multiplier in idle state.
CPUID window of the AIDA64 suite doesn’t display one more system parameter, which also affects the performance level – the North Bridge frequency. Until today all mainboards allowed us to increase this frequency during overclocking from the nominal 2200 MHz to 2400 MHz without any special effort on our part, even without any voltage increase. Unfortunately, Gigabyte GA-990FXA-UD5 mainboard is the first one to have failed this task, so we had to leave the North Bridge frequency at its default value.
I have to say that we were paying more attention to Asus mainboards not only because they overclocked Bulldozer processors best of all, but also because most of the other manufacturers’ products were simply not ready for overclocking these new processor at all. BY the time new Socket AM3+ processors launched, only the BIOS of Asus and Micro-Star mainboards contained the “HPC Mode” parameter preventing the processor clock frequency from dropping under heavy load. A month later, there were still no BIOS updates from other mainboard makers. That is why we had to specifically request an update from Biostar for our TA990FXE review, we also had to request an update from Gigabyte in order to complete our GA-990FXA-UD5 testing. As a result, we got the opportunity to testdrive an F7e BIOS version and we performed all tests with it. However at the time we were writing this review, which was about a month and a half after the official CPU launch, Gigabyte updated their Socket AM3+ mainboard BIOSes and released F7d version, which was a few days younger than the F7e version we tested with. Of course, we couldn’t resist the temptation to check it out, too.
We didn’t uncover any serious differences between the version F7e and F7d. The board was still unable to overclock our processor to 4.5 GHz or at least to 4.4 GHz; it still set the default memory timings to 7-7-7-20-2T. The only noticeable difference was the persistent denial of the BIOS access, which drove me nuts during the earlier tests of the flagship mainboard. I had to reboot multiple times, because the board ignored my banging on the Del key and wouldn’t let me access the BIOS. Since the obtained results were practically identical with both versions, we didn’t rerun the performance and power consumption tests.
Performance Comparison
As usual, we are going to compare the mainboards speeds in two different modes: in nominal mode and during CPU and memory overclocking. The first mode is interesting because it shows how well the mainboards work with their default settings. It is a known fact that most users do not fine-tune their systems, they simply choose the optimal BIOS settings and do nothing else. That is why we run a round of tests almost without interfering in any way with the default mainboard settings. For comparison purposes we also included the results of Asus Crosshair V Formula, Asus M5A990X EVO ? Asus M5A970 EVO, Asus Sabertooth 990FX, Gigabyte GA-990FXA-UD7, Biostar TA990FXE and MSI 990FXA-GD80. The mainboards worked in identical conditions and only three of them had different memory timings: Asus Crosshair V Formula mainboard by default set the memory timings at 9-9-9-24-1T, and Gigabyte mainboards – at 7-7-7-20-2T. All other mainboards displayed the correct timings from the memory modules SPD – 7-7-7-20-1T.
The results on the diagrams are sorted out in descending order and the numbers for Gigabyte GA-990FXA-UD5 are marked with a darker color for your convenience.
We used Cinebench 11.5. All tests were run five times and the average result of the five runs was taken for the performance charts.
We have been using Fritz Chess Benchmark utility for a long time already and it proved very illustrative. It generated repeated results, the performance in it is scales perfectly depending on the number of involved computational threads.
A small video in x264 HD Benchmark 4.0 is encoded in two passes and then the entire process is repeated four times. The average results of the second pass are displayed on the following diagram:
We measured the performance in Adobe Photoshop using our own benchmark made from Retouch Artists Photoshop Speed Test that has been creatively modified. It includes typical editing of four 10-megapixel images from a digital photo camera.
In the archiving test a 1 GB file is compressed using LZMA2 algorithms, while other compression settings remain at defaults.
Like in the data compression test, the faster 16 million of Pi digits are calculated, the better. This is the only benchmark where the number of processor cores doesn’t really matter, because it creates single-threaded load.
Since we do not overclock graphics in our mainboard reviews, the next diagram shows only CPU tests from the 3DMark11 – Physics Score. This score is obtained in a special physics test that emulates the behavior of a complex gaming system working with numerous objects:
We use FC2 Benchmark Tool to go over Ranch Small map ten times in 1920×1080 resolution with high image quality settings in DirectX 10.
Resident Evil 5 game also has a built-in performance test. Its peculiarity is that it can really take advantage of multi-core processor architecture. The tests were run in DirectX 10 in 1920×1080 resolution with high image quality settings. The average of five test runs was taken for further analysis:
As you see, increased memory timings do not prevent Gigabyte GA-990FXA-UD5 from taking an occasional lead in nominal mode. Note that in most cases the results of two Gigabyte mainboards are so close that they appear right next to one another on the diagrams. Even if they are sometimes apart, the actual difference between them and other mainboards is usually minimal. We see clearly that there is hardly any performance difference between related mainboards working in identical conditions.
Now let’s run the same tests with the CPU and memory overclocked. You can see the difference in the system parameters in the following table:
Since Gigabyte mainboard managed to overclock our test processor only to 4.3 GHz, which is 200 MHz less than the overclocking on most Asus mainboards, it is noticeably behind them in performance tests. Depending on the application, the performance difference varies between 2.3 and 5.3% staying on average at around 4%. If we compare the performance of Gigabyte GA-990FXA-UD5 against that of Asus M5A970 EVO and MSI 990FXA-GD80, which also failed to hit the maximum overclocking, the performance will be virtually identical. Even lower North Bridge frequency didn’t make things worse for Gigabyte mainboard. This aspect, as well as the memory sub-system settings doesn’t cast too much influence over the overall system performance.
Power Consumption
We performed our power consumption measurements using an Extech Power Analyzer 380803. This device is connected before the PSU and measures the power draw of the entire system (without the monitor), including the power loss that occurs in the PSU itself. In the idle mode we start the system up and wait until it stops accessing the hard disk. Then we use LinX to load the CPU. For a more illustrative picture there are graphs that show how the computer’s power consumption grows up depending on the number of active execution threads in LinX (both at the default and overclocked system settings). The mainboards are sorted in alphabetical order on the diagrams.
We often point out that on many mainboards certain power-saving technologies are disabled by default. This time we decided to illustrate our discontent with this issue with numbers. We measured the power consumption of test systems in idle mode with default settings and then with all power-saving technologies manually enabled.
We have already mentioned that all power-saving technologies work correctly right from the start on Gigabyte GA-990FXA-UD5 that is why forcing them to “Enabled” and switching the “AMD C1E Support” from Auto to Enabled didn’t affect the system power consumption readings in any way. This is a definite advantage of this mainboard, but there are drawbacks, as well. We mentioned that the BIOS of Gigabyte mainboards lacks functionality for proper configuring of the proprietary power-saving technologies, such as dynamic change in the number of active voltage regulator phases depending on the CPU utilization, for example. Most mainboard makers have already implemented features like that in their products, while there is nothing like that on Gigabyte boards yet. Therefore, you won’t be able to additionally lower the power consumption in any way.
Speaking of the power consumption in nominal mode under heavy load, we uncovered one strange defect in our Gigabyte GA-990FXA-UD5: its power consumption under only half the load of 4 threads turned out higher than under full 8-thread load.
We repeated the tests twice to eliminate the possibility of a random fluke, but the results remained consistent. At the same time you can notice that there is nothing like that with the top model – Gigabyte GA-990FXA-UD7. There must be a problem with the Turbo technology that increases the processor frequency and core voltage.
When we compared the consumption rate of our Gigabyte GA-990FXA-UD5 against the competitors in the overclocked mode, it looked better not only because it couldn’t overclock the CPU to its maximum and therefore the processor Vcore was lower. It makes more sense to compare it against Asus M5A970 EVO and MSI 990FXA-GD80, which also hit only 4.3 GHz. In idle mode and under minimal load Gigabyte board consumes about the same amount of power as the other two boards, yielding a tiny bit to the MSI product. However, under maximum load it is significantly more energy-efficient.
Conclusion
Time has come to sum up everything we know about the Gigabyte GA-990FXA-UD5 mainboard. However, at this point there is really nothing else we could say about it. It is a common and very standard board. It does have certain advantages, but doesn’t boast anything unique and distinguishing, or at least simply interesting. There is nothing that could make it stand out among all other products, and all the advantages it has are available on other manufacturers’ products in certain form or shape. Gigabyte has every right to be proud that this mainboard belongs to the Ultra Durable 3 series, but other makers also use high-quality electronic components for their products. We have come across Driver MOSFET on MSI mainboards for many years already, and Asus not only promises long life of their components but even includes a 5-year warranty for their TUF (The Ultimate Force) series mainboards. Having two BIOS chips onboard could be an advantage, but it sometimes causes additional problems, when the board suddenly decides that one chip has been damaged and overwrites it. Only Asus Maximus IV Extreme gave us full control over two fully-functional independently operating BIOS chips. What else? On/Off Charge technology is not unique, similar solutions are available on other mainboards, too. Easy Energy Saver is also not so new anymore, as most mainboards allow enabling proprietary power-saving technologies right from the BIOS without installing any additional utilities.
All the features of Gigabyte GA-990FXA-UD5 are currently available on the mainboards from other makers, and in some cases they are even better implemented. However, the board is not completely fault-free and also has a few drawbacks. It has only four fan connectors and only two of them allow adjusting the fan rotation speed and only in automatic mode. The BIOS doesn’t support mouse controls. The feature preventing the processor clock frequency from dropping under heavy operational load is still in the beta stage: it can be used during overclocking, but it not in the nominal mode, because in this case the Turbo technology will shut down. The increment for the processor core voltage is way too big. The board failed to overclock our test Bulldozer CPU to its maximum and it was for the first time that we didn’t increase the chipset North bridge frequency at all. Inability to access the BIOS settings seems like a trifle, but it is extremely frustrating and annoying. You have to continuously reboot and sometimes are about to lose it when a simple operation like that keeps failing on you over and over…
You probably would like to know my personal opinion about Gigabyte GA-990FXA-UD5? This is probably one of those products that I will never even remember I ever tested…