Intel DX79SI: Super Energy-Efficient LGA 2011 Mainboard

The flagship mainboard from the microprocessor giant doesn’t strike you with unique design, specific features or functionality. However, it is phenomenally energy-efficient in its category, of course.
There is quite a large group of people including system administrators from all sorts of companies as well as regular users, who sincerely believe that Intel processors work best in mainboards from the same maker. Since Intel mainboards started to allow CPU and memory overclocking, some enthusiasts also joined this group. However, they are relatively few, because Intel mainboards often have unusual layout, and their BIOS is not very handy for intensive work and is not well fit for frequent settings adjustments. With all due respect to Intel processors that hold the leading positions in very different segments, I personally had very mixed feelings about Intel mainboards until I met Intel DX58SO2. It is an excellent product, which in my opinion is still one of the best platforms for LGA 1366. It has accumulated so many advantages, that a few small drawbacks get totally lost against their background. However, this mainboard has become pretty obsolete by now, just like the entire platform, and Intel DP67BG model for LGA 1155 processors didn’t really impress us that much. Let’s get acquainted with the new flagship Intel DX79SI mainboard from the Extreme Series designed for LGA 2011 processor and see how good it actually is.
Packaging and Accessories
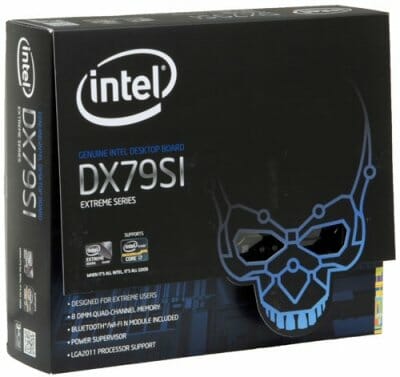
The box with Intel DX79SI mainboard is beautifully designed and looks very impressive. The skull traditional for all Extreme series products is almost a 3D image due to a flip cover, and its eye sockets are shimmering because the mainboard itself partially shows through the clear plastic window beneath the cover.
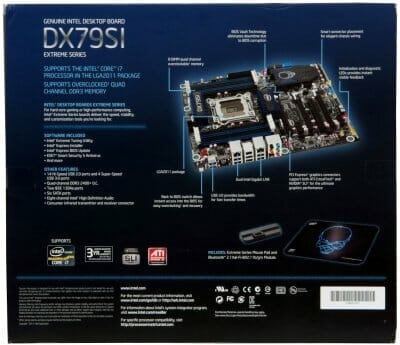
You can find the photo of the board on the back of the box with a few major features pointed out right there alongside with the brief list of bundled software and technical specifications:
Unfortunately, the board we received obviously didn’t have all the accessories present:
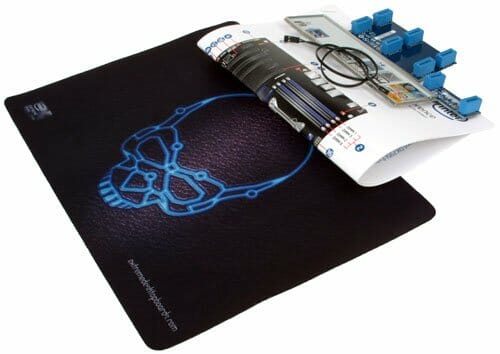
Therefore, I was originally going to avoid this matter in my review, but then I accidentally stumbled across this information on the Intel web-site. I have to say that last year many companies updated their web-site design and became more contemporary and attractive. However, sometimes it is still very hard to find what you are looking for easily. You can spend hours searching and end up with nothing or suddenly find it but not where you were expecting to. Knowing that there is detailed information about the accessories bundle, I failed to locate it the second time I was there and only the previously saved screenshot reminded me that it was “What’s in the box” page. So, now we know that the mainboard is supposed to come with the following accessories:
- Four SATA cables;
- A hard bridge for two-way Nvidia SLI graphics configurations;
- A hard bridge for three-way Nvidia SLI graphics configurations;
- Wi-Fi 802.11 b/g/n and /Bluetooth module;
- Additional thermal diode;
- I/O Shield for the back panel;
- Configuration Label – a sticker with the connector layout for the inside of the system case;
- A card with descriptions of POST-codes abbreviations;
- Colorful poster with brief assembly instructions;
- A mouse pad;
- DVD disk with software and drivers.
PCB Design and Functionality
From the aesthetics perspective, Intel DX79SI mainboard looks a little flashy, there is no unifying style and there are a lot of different colors that don’t go very well together. However, the appearance is secondary, and after all it is the functionality that matters the most. And the layout of this mainboard is perfectly fine, without any extraordinary details that used to be a distinguishing feature of many other mainboards from the same makes.
I would like to make a few comments to the marketing people once again. We get the impression that all the information about the competitive advantages of the new products is being carefully hidden, instead of being placed proudly up front and center. Only when I flipped the decorative front cover, on the back of it I learned a number of very interesting details. Namely, that the board is manufactured using 3-layer PCB with 3D Copper Layers inside (I still do not know what exactly it is: is it similar to the 2 oz copper technology from Gigabyte?). That the processor voltage regulator circuitry is built with Driver-MOSFET, where two where two MOSFETs and a control unit are combined into a single chip. You can see even without hints that the board uses solid-state capacitors, but there was absolutely no mention of tantalum capacitors anywhere and I noticed them myself while taking a close look at the PCB. The flip cover also tells us that there are also contact spots for manual voltage measurements, which took me a while to locate: they were right next to the POST-code indicator. Among the bonus features we could also mention the glowing Power On and Reset buttons and a row of “Board Status LED’s” right next to them. They will light up successively once the mainboard is powered on indicating successful passing of the startup procedures, just like the Q-Led diodes on Asus mainboards do. Moreover, there is storage drives activity indicator and a pair of LEDs that will indicate overheating of the CPU itself or processor voltage regulator circuitry.
The mainboard has rich functionality – the courtesy of Intel X79 Express chipset. It supports LGA 2011 processors, has eight DIMM slots that can accommodate up to 64 GB of DDR SDRAM with quad-channel access protocol. For expansion cards there are three PCI Express 3.0/2.0 x16 slots with the third slot electrically designed to support PCI Express 3.0/2.0 x8 speed, two PCI Express 2.0 x1 slots and one regular PCI slot. Besides two SATA 6 Gbps and four SATA 3 Gbps ports provided by the chipset there are no other drive controllers onboard. The following ports and connectors can be found on the mainboard back panel:
- “Back to BIOS” button, similar to “Clear CMOS”;
- Two USB 3.0 ports (blue connectors) implemented via Renesas (NEC) D720200AF1 controller, second controller like that provides an additional internal pin-connector for two more USB 3.0 ports;
- Six USB 2.0 ports, eight more are laid out as four onboard pin-connectors;
- IEEE1394 (FireWire) port implemented with VIA VT6315N controller, a second port is available as onboard pin-connector;
- Two local network ports (network adapters are built around Gigabit Intel 82579LM and Intel 82574L network controllers);
- Optical S/PDIF and five analogue audio-jacks provided by eight-channel Realtek ALC892 audio codec.
If we sum up all the major technical specifications in a single table, it will look as follows. There is nothing very unusual about Intel DX79SI mainboard. The only thing we could probably point out in this respect is the connector for the additional thermal diode included with the bundled accessories. As for the differences between Intel DX79SI and the previously reviewed Asus P9X79 Deluxe and Gigabyte GA-X79-UD7, the Intel board has a PCI slot and an additional IEEE1394 (FireWire) controller, and lacks eSATA ports and any additional drive controllers. Among the indisputable advantages we should point out its standard dimensions, while Asus mainboard exceeds the ATX specification in width, and the Gigabyte board – in two dimensions (width and length). There are only four four-pin fan connectors onboard and all of them (except for the processor one) are capable of adjusting the rotation speed of the three-pin fans.
BIOS Functionality
When the board is powered on, you will see a startup image for a short period of time. It makes absolutely no sense to try and disable it, because there won’t be any useful information there anyway. It is pretty convenient to have a list of hot keys right in front of you, because you can access the BIOS by pressing F2 instead of the traditional Del key. The startup “Main” screen serves mostly informational purposes reporting different basic data about the system.
If you move on to the “Configuration” section you will see a list of sub-sections in it.
Let’s dwell on the functionality and features of the section called “Fan Control & Real-Time Monitoring”. First of all I would like to point out that besides a standard set including the CPU and system temperatures, the mainboard also allows monitoring a number of additional temperatures. There are no diodes in the memory modules that we use in our testbed that is why the memory temperature is calculated approximately. Moreover, this parameter is pretty useless because DDR3 memory gets barely warm. However, it is sometimes vitally important to know how high the processor voltage regulator temperature is.
Moreover, absolutely all monitoring parameters can be adjusted. For example, we can change the fan function (processor, intake, exhaust, etc.), minimal allowed rotation speed rate in rotations per minute, min and max fan rotation speed in percents. The monitored temperatures can also be adjusted with the same precision and detail. We can set maximum temperature when a warning will be issued, a temperature when the fan will speed up to its maximum, fan sensitivity and response time to temperature changes.
For user convenience the developers try to keep all overclocking-related settings in one specific section. In the BIOS of Intel mainboards they are all scattered over several section, but most of them can be found in the “Performance” page. Using three-column layout we get the nominal parameter values, the current ones and the expected ones after the changes apply.
There is a new parameter called “Overclocking Assistant”, which does help a lot during processor and memory overclocking. At first we set it to “1.00x Profiles” or “1.25x Profiles”. In the latter case we will be overclocking with the base clock frequency increased from 100 to 125 MHz. After that we select the desired processor and memory frequencies from the list and the board will automatically adjust all other settings necessary to have the system run in desired conditions.
A significant advantage of this approach compared with the automatic overclocking systems on other manufacturers’ mainboards is its flexibility. This overclocking is, in fact, semi-automatic: we are not forced to stay within certain limits set by someone else, but select the necessary settings on our own, and can do this for the CPU as well as memory. Moreover, “Overclocking Assistant” is not just a list of preset overclocking profiles, but indeed an assistant. It gives you hints about the best option settings, but it also can be disabled at any time leaving all adjusted parameters where they are. After that you can manually fine-tune your system to your liking.
However, there are also a few not so successful changes. Now you can only enable the counteraction to the processor Vcore drop under heavy load only if the processor core voltage is at a fixed value. If we intend to add a little bit t the nominal Vcore setting to keep all power-saving technologies up and running, this setting won’t be available to us.
Work with the memory sub-system is arranged in a very similar manner. We can use the preset X.M.P. profiles if the modules support them, and then make the necessary corrections manually. The biggest problem with this approach is that you will have to set absolutely all parameters on your own if you select the “Manual” mode: even if you had to adjust only the voltage, frequency or one of the timings.
“Security” section now allows you to set a password for the hard drive. To prevent unauthorized access the board will ask for your password every time you boot the OS.
Some changes have also been made to the “Power” section: it now has “Processor Power Efficiency Policy” parameter that allows selecting one of the three possible operation modes. Unfortunately, we didn’t manage to detect any difference in power consumption between “High Performance” and “Balanced” modes.
The only BIOS section on Intel mainboards that we have never had any problems with is “Boot”. On the contrary, it has always been known for extensive functionality in configuring the system start-up settings.
The “Exit” section allows saving up to five BIOS settings profiles. Each may be assigned a memorable descriptive name. You can also erase the unwanted profiles – a useful option, which is often omitted by other mainboard makers.
It is a paradox, but Intel mainboards designed by the initiator of the transition to UEFI BIOS are the only ones from a large mainboard maker that still don’t have a convenient graphics interface as well as mouse support. We do notice some definite improvements: extended functionality in the “Fan Control & Real-Time Monitoring” section, new and very convenient “Overclocking Assistant” parameter, but all these innovations arrive very slowly. BIOS interface still remains one of the weaknesses of the Intel mainboards. All overclocking and fine-tuning options are formally there, but the BIOS is very inconvenient to work with, because all key settings are spread out over multiple sections and require a lot of additional and unnecessary actions from the user.
Testbed Configuration
We carried out our tests on a testbed that included the following components:
- Intel DX79SI mainboard (BIOS version 0380);
- Intel Core i7-3960X Extreme Edition CPU (3.3-3.9 GHz, Sandy Bridge-E rev.C0, 32nm, 130 W, LGA 2011);
- 4 x 4 GB DDR3 SDRAM Corsair Vengeance CMZ16GX3M4X1866C9R (16 GB, 1866 MHz, 9-10-9-27 timings, 1.5 V voltage);
- MSI N570GTX-M2D12D5/OC graphics card (Nvidia GeForce GTX 570, GF110, 40 nm, 786/4200 MHz, 320-bit GDDR5 1280 MB);
- Crucial m4 SSD (CT256M4SSD2, 256 GB, SATA 6 Gbps);
- Zalman CNPS12X CPU cooler;
- ARCTIC MX-2 thermal interface;
- CoolerMaster RealPower M850 PSU (RS-850-ESBA);
- Open testbed built using Antec Skeleton system case.
We used Microsoft Windows 7 Ultimate SP1 64 bit (Microsoft Windows, Version 6.1, Build 7601: Service Pack 1) operating system, Intel Chipset Software Installation Utility version 9.2.3.1022, Nvidia GeForce Driver 285.62 graphics card driver.
Operational and Overclocking Specifics
We didn’t have any [problems during the testbed assembly on Intel DX79SI mainboard, the system fired up just fine, too. The mainboard worked impeccably in nominal mode: all power-saving technologies and Intel Turbo Boost technology worked correctly and changed the processor clock frequency multiplier and core voltage depending on the current operational load, the memory timings and frequency were also set to correct values. The onboard PC-speaker, which couldn’t be turned off, was a little annoying, as well as the use of F2 key for entering the BIOS. In fact, this is a standard peculiarity of all Intel mainboards, but before they also allowed using the “Del” key for that purpose. Unfortunately, Intel DX79SI mainboard doesn’t support this feature any more for some reason, so when you forget about it and go for the Del key you miss the window for accessing the BIOS and need to reboot again.
We were a little disappointed that the mainboard was unable to adjust the rotation speed of a three-pin processor fan. I have to remind you that the majority of contemporary mainboards for some reason lost this useful feature a while ago. We mentioned multiple times in our reviews that only Gigabyte mainboards were currently capable of doing so, but now that they have completed the migration to UEFI BIOS, this is no longer the case. In the comments to one of our latest articles one of our readers insisted that Intel mainboards could do it perfectly fine, so we hoped it would be the case. However, our hopes didn’t come true. Even extended fan configuring functionality didn’t help. You can connect the CPU fan to a different connector, you can assign a fan a “processor fan” status in the BIOS. All three fan connectors, except for the standard CPU fan connector, will lower the rotation speed of a three-pin CPU fan. However, they can’t adjust the rotation speed depending on the temperature and the fan won’t speed up even if the CPU utilization and temperature will go up.
However, all these are little things and the more serious problems surfaced only during processor overclocking, because we uncovered a very strange dependency between the processor Vcore and memory frequency. To guarantee that our processor will work stably when overclocked to 4.4 GHz, we had to add at least 320 mV to its default core voltage. However, it turned out that in this case we couldn’t increase the memory frequency: when we raised it to 1866 MHz or even 1600 MHz the OS refused to boot. Once we lowered the desired core voltage increase to 300 mV or less, everything loaded fine, but the system failed to pass the tests – it would only pass the tests at the nominal 1333 MHz memory frequency setting. As a result, we had to stop at 4.3 GHz CPU frequency accompanied by a corresponding increase in the memory clock.
We always overclock mainboards in such a way that they could be used for a prolonged period of time in this mode. We do not try to make our life easier by disabling any of the mainboard features, such as onboard controllers, for example. We also try to keep the CPU’s power-saving technologies up and running normally to the best of our ability. And this time all power-saving technologies remained up and running even in overclocked mode lowering the CPU voltage and frequency multiplier in idle mode.
I have to say that our CPU sample wasn’t the best one in terms of overclockability and it could only go as high as 4.4 GHz. This is an engineering sample with C0 processor stepping, while the mass production units have C1 processor stepping, and we even came across a few ones with C2 processor stepping in retail channels. We will most likely replace this CPU with another unit, but we didn’t believe that there will be a mainboard out there unable to overclock our CPU to this relatively low frequency of 4.4 GHz. Therefore, we were even questioning whether we chose the overclocking mode correctly. Maybe we should have sacrificed higher memory clocks to ensure that the CPU overclocks better. However, all our doubts vanished after a series of performance tests.
Performance Comparison
As usual, we are going to compare the mainboards speeds in two different modes: in nominal mode and during CPU and memory overclocking. The first mode is interesting because it shows how well the mainboards work with their default settings. It is a known fact that most users do not fine-tune their systems, they simply choose the optimal BIOS settings and do nothing else. That is why we run a round of tests almost without interfering in any way with the default mainboard settings. For comparison purposes we will also include the results of the previously reviewed Asus P9X79 Deluxe and Gigabyte GA-X79-UD7 mainboards. The results on the diagrams are sorted in descending order.
We used Cinebench 11.5. All tests were run five times and the average result of the five runs was taken for the performance charts.
We have been using Fritz Chess Benchmark utility for a long time already and it proved very illustrative. It generated repeated results, the performance in it is scales perfectly depending on the number of involved computational threads.
A small video in x264 HD Benchmark 4.0 is encoded in two passes and then the entire process is repeated four times. The average results of the second pass are displayed on the following diagram:
We measured the performance in Adobe Photoshop using our own benchmark made from Retouch Artists Photoshop Speed Test that has been creatively modified. It includes typical editing of four 10-megapixel images from a digital photo camera.
In the archiving test a 1 GB file is compressed using LZMA2 algorithms, while other compression settings remain at defaults.
Like in the data compression test, the faster 16 million of Pi digits are calculated, the better. This is the only benchmark where the number of processor cores doesn’t really matter, because it creates single-threaded load.
Since we do not overclock graphics in our mainboard reviews, the next diagram shows only CPU tests from the 3DMark11 – Physics Score. This score is obtained in a special physics test that emulates the behavior of a complex gaming system working with numerous objects
We use FC2 Benchmark Tool to go over Ranch Small map ten times in 1920×1080 resolution with high image quality settings in DirectX 10.
Resident Evil 5 game also has a built-in performance test. Its peculiarity is that it can really take advantage of multi-core processor architecture. The tests were run in DirectX 10 in 1920×1080 resolution with high image quality settings. The average of five test runs was taken for further analysis.
The obtained results are very discouraging. We have always said that related mainboards working in identical testing conditions demonstrate about the same level of performance, but unfortunately Intel DX79SI mainboard doesn’t agree with this rule. Only in the first three tests with mostly computational type of load this board is a little behind the competitors: the performance difference between the boards is around 1%. However, as on we go the performance difference increases and ranges anywhere from at least 2% and beyond 7% in some tasks! This is a very serious lag that is why once we got these numbers we were no longer worried about having selected the proper overclocking mode. It doesn’t matter which of the two we will sacrifice: the CPU or memory frequency. Intel mainboard will anyway be slower than the others, because it is not only unable to fully overclock the system, but is unacceptably slow even in identical testing conditions.
Since the CPU frequency in the Intel mainboard is significantly lower during overclocking, the performance difference between the systems tested in overclocked mode increases even more and approaches 10%. These results could force us to recommend avoiding this mainboard altogether, but let’s not draw any hasty conclusions and check out its power consumption first.
Power Consumption
We performed our power consumption measurements using an Extech Power Analyzer 380803. This device is connected before the PSU and measures the power draw of the entire system (without the monitor), including the power loss that occurs in the PSU itself. In the idle mode we start the system up and wait until it stops accessing the hard disk. Then we use LinX to load the CPU. For a more illustrative picture there are graphs that show how the computer power consumption grows up depending on the number of active execution threads in LinX (both at the default and overclocked system settings). The mainboards on the diagrams are sorted out in alphabetical order.
We often point out that on many mainboards certain power-saving technologies are disabled by default. Therefore, besides power consumption in nominal mode with all default settings, we also measured the power consumption of test systems with all power-saving technologies manually enabled. The difference is usually very noticeable. Here is what it looks like for Asus P9X79 Deluxe, for example.
You can clearly see that if we enable all processor power-saving technologies as well as Asus’ proprietary power-saving tools, the power consumption will drop significantly in all modes. However, we didn’t detect any difference on Gigabyte GA-X79-UD7 and Intel DX79SI mainboards. Therefore, we should definitely give due credit to Gigabyte and Intel for implementing all Intel processor power-saving technologies correctly, so that their manual enabling doesn’t have any effect on the system power consumption. This is a definite advantage of both mainboards, but there are also a few shortcomings. The BIOS of both Intel and Gigabyte boards has finally acquired an option that allows configuring proprietary power-saving technologies, in particular, Intel mainboard now offers intelligent dynamic adjustment of the number of active phases in the processor voltage regulator circuitry depending on the CPU utilization at a given moment. “Processor Power Efficiency Policy” parameter allows selecting one of the three possible modes, but unfortunately, we didn’t detect any difference between the “High Performance” and “Balanced” modes. Therefore, the “Balanced” mode doesn’t deliver any additional benefits in terms of power-saving, just like on Gigabyte’s mainboard.
As a result, if we compare the power consumption of the tested mainboards in the nominal mode, then Gigabyte’s mainboard will outperform Asus under any type of load, because it has all power-saving technologies up and running by default, unlike the Asus board.
The situation changes if we enable all power-saving technologies manually. Gigabyte mainboard remains the winner under low loads, while Asus mainboard takes over the leader under heavy loads, because besides Intel power-saving technologies, its own proprietary ones also kick in.
However, while Asus and Gigabyte are preoccupied with competition against each other, we get the impression that they are manufactured using a different production process than the Intel board, because its advantage over them is simply unprecedented. Of course, it is still there in overclocked mode, too, especially since Intel board doesn’t overclock too much.
I have to say that the energy-efficiency of the Intel DX79SI mainboard totally makes up for the low performance and low overclockability. The maximum performance difference between the boards is around 10%, but even the minimal difference in power consumption between them is way higher than that, and the maximum difference is as high as 30%!
Conclusion
When we started reviewing Intel DX79SI mainboard, we didn’t expect such an outcome. It looks fine, has pretty good set of features, which is not very much different from what we saw by other mainboards of the same class. It has a few advantages and a few drawbacks, just like everyone else. However, when tested in identical conditions the board demonstrated surprisingly low performance in nominal mode and even lower performance in overclocked mode, because it proved unable to fully overclock the CPU and memory at the same time. However, the board’s phenomenal energy-efficiency fully makes up for the not very high performance, although this is not quite what we would expect from a flagship product. When we are looking for energy-efficiency in the first place, we go with a platform that uses different type of processors, and an LGA 2011 platform is supposed to deliver maximum performance, which Intel DX79SI can’t do. I also have to say that BIOS updates from Intel often change not only the BIOS functionality but also its appearance. So, there is some hope that things will change. However, as of now we could only recommend Intel DX79SI to those users who care for energy-efficiency of their system more than speed.