MSI Big Bang-XPower II Mainboard Review

Extremely large size of this mainboard makes it incompatible with many system cases out there. However, it doesn’t really matter, because it is not intended for everyday work, but rather for extreme overclocking experiments and setting overclocking records, and in this case standard dimensions, nominal modes and power-saving technologies aren’t necessary.
By now we have discussed several flagship mainboards on Intel X79 Express chipset from very difference makers. This list includes products from ASRock, Asus, Gigabyte and Intel, but it is still missing one very important name – Micro-Star. This Taiwanese mainboard maker offers several different product models for LGA 2011 processors, so we will most likely have to go back to them at some point. However, today we would like to start with the top-of-the-line flagship mainboard from MSI’s Big Bang series. I have to say that “Big Bang” series targeted for computer enthusiasts and gamers has undergone certain changes and has been split into several sub-groups. The upcoming mainboards from this series for AMD processors will be marketed under the “Conqueror” brand name. The Big Bang mainboards based on high-performance Intel processors are now called “Marshal”. For example, MSI Big Bang-Marshal (B3) based on Intel P67 Express chipset. Big Bang mainboards based on Intel Extreme Series chipsets remained under the “XPower” brand. Last year we have already reviewed MSI Big Bang-XPower mainboard, designed for LGA 1366 processors. its successor for the new LGA 2011 platform is the MSI Big Bang-XPower II, which will be the main hero of our today’s review.z
Packaging and Accessories
MSI Big Bang-XPower II mainboard arrived in a large box with a carry handle. The front of the box is decorated with the “Big Bang” aftermath, which gave the name to this series.
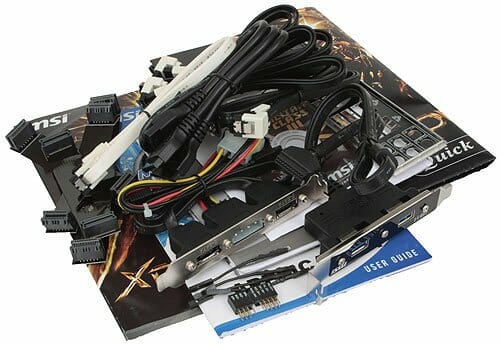
The package is designed in accordance with all contemporary standards. Its front flip-cover is attached with Velcro and if opened allows you to see part of the mainboard inside through a clear plastic window. The back of the package has a mainboard photograph and a brief list of its technical specifications. The mainboard inside sits in an individual box and so do the accessories. They are pretty numerous and include the following items:
- Eight SATA cables with metal connector locks, four with L-shaped locks and another four – with straight ones;
- A set including a bracket and cables for bringing additional two eSATA ports to the case back panel;
- Back panel bracket with two USB 3.0 ports;
- A bridge for AMD CrossFireX graphics configurations;
- Two short and one long bridge for Nvidia SLI graphics configurations;
- “V-Check Cable” adapter set for manual voltage monitoring with a voltmeter;
- “M-Connector” block including modules for easy connection of the system case front panel buttons, indicators and audio;
- I/O Shield for the back panel;
- A booklet on proprietary software;
- Two booklets with assembly instructions;
- A poster with overclocking recommendations;
- User manual;
- Reliability certificate listing all component testing methods;
- DVD disk with software and drivers.
I would like to point out a few things here. As we will see later on, the board doesn’t have any eSATA ports, but this shortcoming is fully resolved by an additional back panel bracket with two eSATA ports and a set of cables for them. At the same time it is surprising that only Micro-Star’s mainboards still do not come with such an important accessory as the front panel bracket with additional USB 3.0 ports. Instead they offer a bracket for the back panel, where the board already has four USB 3.0 ports. Of course, it won’t hurt to have two more ports there, but they could be much more useful in the front.
PCB Design and Functionality
Almost completely black MSI Big Bang-XPower II mainboard looks just as dark as contemporary mainboards from Gigabyte. Only an orange sticker indicating chipset SATA connectors and a heatsink on the chipset designed in the shape of a machine-gun cartridge-belt brighten up the picture a little bit.
Of course, powerful processor voltage regulator circuitry on MSI Big Bang-XPower II is its indisputable advantage. It has 22-phase structure and is built with high-quality Military Class III electronic components that have been tested in extreme conditions. The CPU may be powered via two eight-pin ATX12V connectors. The board is equipped with eight memory DIMM slots with quad-channel access, which should theoretically be able to accommodate up to 128 GB of memory. They also mention 8 mm Superpipe heatpipes as another great feature of MSI Big Bang-XPower II, which in my opinion is an arguable advantage. The thing is that the only wide heatpipe is between the chipset heatsink and an additional central heatsink. However, Intel X79 Express consumes only 7.8 W of power, has insignificant heat dissipation, so there is really not that much practical value in an 8 mm heatpipe and an additional heatsink in this case. However, all voltage regulator components that do heat up noticeably during work use a regular 6 mm heatpipe. They are hidden under a relatively large heatsink, but only half of it actually works effectively: the part designed as a cartridge-belt doesn’t really warm up, since the heatpipe doesn’t go to it. To be fair I have to say that all heatsinks use very reliable screw-on retention.
Besides two SATA 6 Gbps and four DATA 3 Gbps ports provided by the chipset, two onboard ASMedia ASM1061 controllers add another four SATA 6 Gbps ports. It is remarkable that the board has as many as seven PCI Express x16 slots, although only four of them are working at their full potential speed, and the remaining three can only work as PCI Express 2.0 x1, so it is not exactly clear why they have been made so long in this case. As for the PCI Express 3.0/2.0 x16 slots, they work according to the same formula as we have just seen with ASRock Fatal1ty X79 Professional and Asus Rampage IV Formula. No matter how many graphics cards are installed in the system, the first slot will always work at its full speed. Here is a list of all possible configurations for your reference:
- x16
- x16/x16
- x16/x8/x16
- x16/x8/x8/x8
The mainboard back panel has the following ports and connectors on it:
- PS/2 connector for keyboard or mouse;
- Six USB 2.0 ports, four more USB ports are available as two onboard pin-connectors;
- Clear CMOS button;
- Coaxial and optical S/PDIF, and six analogue audio-jacks provided by eight-channel Realtek ALC898 codec;
- IEEE1394 (FireWire) port implemented via VIA VT6315N controller, the second port is available as an onboard pin-connector;
- Four USB 3.0 ports (blue connectors) implemented via two NEC D720200 controllers, the third controller like that provides support for two more USB 3.0 ports;
- Two local network ports (network adapters are built on Gigabit Intel 8257V and 82574L controllers).
A unique peculiarity of this mainboard is the three BIOS chips. You can use a special switch to move between the first two and the third one is activated with a button. The peculiar thing about the third BIOS chip is that it can be removed. The mainboard has a “Low Temperature Booting” switch, which will help to start the system even at low temperatures in systems with liquid nitrogen cooling, and a “PCI-E Switch”, which will allow disconnecting the PCI Express 3.0/2.0 x16 slots. Besides the Clear CMOS button on the back panel and a special button for activating the third BIOS chip, there are also Power On and Reset buttons, “OC Genie” button for automatic overclocking and “Direct OC” button for adjusting the base clock frequency “on the fly”. There is a row of “V-Check Points” that can be used to manually measure the system voltages and a “V-Check Cable” set. A POST-code indicator will help monitor the startup process. The mainboard is equipped with six four-pin fan connectors.
There are a lot of bright-blue LEDs scattered over the mainboard PCB. Luckily, they can be turned off in the BIOS.
We summed up all technical characteristics of this mainboard in the following table
MSI Big Bang-XPower II mainboard has one very serious drawback, which you don’t really notice right away. The mainboard features eight memory DIMM slots. Powerful processor voltage regulator circuitry also takes up quite a bit of space, so the CPU Socket had to be moved down a bit, but there is enough room between the DIMM slots and the first graphics card slot even though there are as many as seven expansion slots on this mainboard. The thing is that this mainboard is not only 2 cm wider than the ATX standard, it is also 4 cm longer! Because of these significantly increased dimensions, there are in fact very few system cases that this board will fit in.
BIOS Functionality
In our previous MSI mainboard reviews we have already discussed MSI Click BIOS II, which represents a pretty convenient implementation of the UEFI (Unified Extensible Firmware Interface) standard. The top of the screen performs not only informational functions but also allows changing the order of boot-up devices by simply dragging and dropping them with a mouse pointer. The currently active devices will be highlighted.
The center of the screen is allocated for displaying the BIOS settings, with the main section icons on the -left and right-hand sides. Let’s get to the first section called “Settings”, which also contains a few sub-sections.
“System Status” sub-section is, in fact, the same startup screen, which we saw when we entered the regular traditional BIOS. It reports the major system info.
The variety of settings in the “Advanced” section is no surprise to us, as they have migrated from the regular BIOS almost without any modifications.
Now let’s check out the “Hardware Monitor” section where you can enable automatic adjustment of the CPU fan rotation speed depending on the current processor temperature. The rotation speed of all other five fans cannot be adjusted automatically, but can only be set at a certain constant value. The adjustment works only for four-pin fans. All three-pin fans will rotate at their full speed.
“Boot” sub-section will allow you to set the boot-up devices order and a number of other things used during system startup.
The functionality of the “Save & Exit” sub-section is obvious and doesn’t need an explanation.
“OC” section is one of the largest in terms of available settings. It contains almost all options necessary for successful configuring and overclocking. It also has a number of informational parameters that report the current system status.
In order to make it easier to work in this feature-rich section, some parameters have been moved to individual pages. Namely, the memory timings have all been isolated in an individual sub-section. They may be identical for each memory channel, or set individually for each of them.
The mainboard can save only six full BIOS settings profiles, it allows saving and loading settings profiles from external media. One minor inconvenience is that you can’t tell which profiles have been used by looking at the list.
However, the actual work with the profiles is absolutely problem-free. The date and time of the profile creation as well as the BIOS version it belongs to are saved automatically for each profile. You can assign each profile a memorable descriptive name, or erase a profile from memory if necessary.
The next two sub-sections called “CPU Specifications” and “Memory-Z” perform purely informational functions. The first one tells us all the basic info about our CPU:
You can dig deeper, if you like, and check out the lost of supported processor technologies.
The “Memory-Z” sub-section is organized in a similar manner. The first thing you see, if the information recorded in the memory modules SPD. The mainboard will use these particular settings by default.
However, the actual potential of the memory modules can only be found in the “X.M.P.” profile, which you can also access through here.
In the “CPU Features” sub-section we can configure processor clock frequency multipliers, acceptable power consumption range and various processor technologies. This very important sub-section for some reason was the last in the list, but it is still very easy to access it, because all parameters in the “OC” section are looped. You don’t have to keep pressing the “down” key endless number of times to get the last sub-sections or settings. Just press the “up” key once and you will get there in no time.
“ECO” section is what used to be “Green Power” before. Here we can work with some power-saving parameters and can control the current values of the most important voltages in the system.
“Browser” icon on the right-hand side will let you browse the Internet, check your e-mail, use some office or IM apps, but only if you have previously installed Winki 3 Linux-based operating system from the included DVD disk. The same is true for HDD Backup and Live Update utilities, which are hidden behind the “Utilities” icon.
In the “M-Flash” sub-section we can try and boot using a BIOS image on the flash-drive, can save the current BIOS version or update it. It is somewhat inconvenient that the images are not only saved in the drive root folder, they should also be there for a successful update. There is no file manager of any sort, the NTFS file system is not supported, and the flash drive must be formatted as FAT or FAT32.
In the “Security” section you will be able to set passwords for system access, which is what other boards also allow. There is an interesting MSI’s own proprietary feature that will let you make a common flash drive into an access key.
Overall, MSI Click BIOS II looks very easy to work with and illustrative. Our biggest concern here is very low brightness of the font, which is used for informational parameters. Check out the previous image, as an example: you can barely see the first three lines of text and they are very hard to read. A year ago we mentioned that since the new Micro-Star BIOS interface had just come out, there was hope that as time went on, it would improve. However, it hasn’t undergone any significant changes over this past year.
Testbed Configuration
We carried out our tests on a testbed that included the following components:
- MSI Big Bang-XPower II, MS-7737 ver. 1.1 mainboard (BIOS version 1.2);
- Intel Core i7-3930K CPU (3.2-3.8 GHz, Sandy Bridge-E rev.C2, 32nm, 130 W, LGA 2011);
- 4 x 4 GB DDR3 SDRAM Corsair Vengeance CMZ16GX3M4X1866C9R (16 GB, 1866 MHz, 9-10-9-27 timings, 1.5 V voltage);
- MSI N570GTX-M2D12D5/OC graphics card (Nvidia GeForce GTX 570, GF110, 40 nm, 786/4200 MHz, 320-bit GDDR5 1280 MB);
- Crucial m4 SSD (CT256M4SSD2, 256 GB, SATA 6 Gbps);
- Noctua NH-D14 CPU cooler;
- ARCTIC MX-2 thermal interface;
- CoolerMaster RealPower M850 PSU (RS-850-ESBA);
- Open testbed built using Antec Skeleton system case.
We used Microsoft Windows 7 Ultimate SP1 64 bit (Microsoft Windows, Version 6.1, Build 7601: Service Pack 1) operating system, Intel Chipset Software Installation Utility version 9.3.0.1019, Nvidia GeForce Driver 285.62 graphics card driver.
Operational and Overclocking Specifics
We have already mentioned that the biggest and unfixable disadvantage of the MSI Big Bang-XPower II mainboard is its unnaturally large size. Even in order to fit this mainboard onto our open testbed we had to use additional stands, otherwise, it simply wouldn’t fit. Other than that we didn’t experience any problems during the system assembly and it booted perfectly fine.
You can disable the startup image and in this case the board will display some basic information including the actual CPU and memory frequencies instead.
Once we loaded the operating system, it turned out that the mainboard didn’t maintain the nominal settings for our Intel Core i7-3930K processor, its clock frequency multiplier was jumping to the maximum of 38x under any type of load, although it was supposed to vary in the interval from 35x to 38x. We strongly disapprove of any deviations from the default system settings, although in this case there were some mitigating circumstances. There is a parameter called “Enhanced Turbo” in the mainboard BIOS. If you disable it, the CPU will return back to its original default settings, though we assume it would be better to have it disabled by default and give the user an option of enabling it if necessary. Unfortunately, when we turned off the “Enhanced Turbo” parameter, all MSI’s proprietary power-saving technologies also got disabled, including the dynamic change in the number of active phases in the voltage regulator circuitry for the CPU, memory and chipset depending on the load level. there is no way to turn them back on, you can only turn them off, as you can only select “Auto” or “Disabled”. For some reason, they got turned off on their own in the “Auto” mode. Moreover, when we disabled “Enhanced Turbo”, we were unable to activate the ECO-mode: pressing the corresponding button in the BIOS didn’t do anything and the mainboard continued working in standard mode.
It is somewhat inconvenient that there is no hot key in the BIOS that would allow you to get back to original settings. Other manufacturers’ products have a key like that and sometimes it comes in very handy.
Like other contemporary mainboards, MSI Big Bang-XPower II allows to adjust the intensity of counteraction to the processor Vcore drop under heavy load. However, we didn’t find any explanations about the way this technology works not in the BIOS, nor in the user manual included with the board. At first we assumed that “Level 0” indicates no counteraction, and “Level 7” will ensure maximum increase, but in reality things turned out just the opposite.
The last uncovered issue was the mainboard’s inability to save settings profiles in even slots. The profiles were saved fine in slots 1, 3 and 5, and the profiles in slots 2 and 4 were lost.
Speaking of overclocking, Micro-Star mainboards yield to the products from other manufacturers in this aspect, because they are unable to increase the processor core voltage in Offset mode by adding a necessary value to the nominal setting. MSI mainboards had this features for a short period of time and then it was gone. Previously it meant that it was simply impossible to overclock processors on MSI mainboards with all the Intel processor power-saving technologies intact. Even if we didn’t increase the processor Vcore, the boards would do it on their own if we overclocked by raising the base frequency. In this case all power-saving technologies were blocked, the voltage was locked at a certain value and didn’t get reduced in idle mode. Luckily, the launch of LGA 1155 and LGA 2011 processors changed this situation and made it more convenient to overclock using clock frequency multipliers. In this case, MSI mainboards do not increase the processor Vcore that is why all processor power-saving technologies remain up and running, unless you adjust the CPU Vcore manually.
We always overclock mainboards in such a way that they could be used for a prolonged period of time in this mode. We do not try to make our life easier by disabling any of the mainboard features, such as onboard controllers, for example. We also try to keep the CPU’s power-saving technologies up and running normally to the best of our ability. And this time all power-saving technologies remained up and running even in overclocked mode lowering the CPU voltage and frequency multiplier in idle mode.
Performance Comparison
As usual, we are going to compare the mainboards speeds in two different modes: in nominal mode and during CPU and memory overclocking. The first mode is interesting because it shows how well the mainboards work with their default settings. It is a known fact that most users do not fine-tune their systems, they simply choose the optimal BIOS settings and do nothing else. That is why we run a round of tests almost without interfering in any way with the default mainboard settings. For comparison purposes we will also include the results of the previously reviewed ASRock Fatal1ty X79 Professional, Asus Rampage IV Formula and Intel DX79SI mainboard. The results on the diagrams are sorted out in descending order.
We used Cinebench 11.5. All tests were run five times and the average result of the five runs was taken for the performance charts.
We have been using Fritz Chess Benchmark utility for a long time already and it proved very illustrative. It generated repeated results, the performance in it is scales perfectly depending on the number of involved computational threads.
A small video in x264 HD Benchmark 4.0 is encoded in two passes and then the entire process is repeated four times. The average results of the second pass are displayed on the following diagram:
We measured the performance in Adobe Photoshop using our own benchmark made from Retouch Artists Photoshop Speed Test that has been creatively modified. It includes typical editing of four 10-megapixel images from a digital photo camera.
In the archiving test a 1 GB file is compressed using LZMA2 algorithms, while other compression settings remain at defaults.
Like in the data compression test, the faster 16 million of Pi digits are calculated, the better. This is the only benchmark where the number of processor cores doesn’t really matter, because it creates single-threaded load.
Since we do not overclock graphics in our mainboard reviews, the next diagram shows only CPU tests from the 3DMark11 – Physics Score. This score is obtained in a special physics test that emulates the behavior of a complex gaming system working with numerous objects:
We use FC2 Benchmark Tool to go over Ranch Small map ten times in 1920×1080 resolution with high image quality settings in DirectX 10.
Resident Evil 5 game also has a built-in performance test. Its peculiarity is that it can really take advantage of multi-core processor architecture. The tests were run in DirectX 10 in 1920×1080 resolution with high image quality settings. The average of five test runs was taken for further analysis:
We see a great illustration of the known fact that related mainboards working in identical testing conditions demonstrate about the same performance.
Unfortunately, we do not see the same close results in the overclocked mode because all mainboards overclocked the processor differently. The following table sums up our overclocking results:
A 100 MHZ difference in resulting processor frequency produces about 2% performance difference. So, 6.2-6.3% performance difference between Asus Rampage IV Formula and MSI Big Bang-XPower II is quite normal, although a lot depends on the test application, of course. The difference is greater in Adobe Photoshop CS5 and 7-Zip 9.20, but there is hardly any performance difference in gaming applications, where not only CPU, but also the graphics card contribute to the overall performance.
Power Consumption
We performed our power consumption measurements using an Extech Power Analyzer 380803. This device is connected before the PSU and measures the power draw of the entire system (without the monitor), including the power loss that occurs in the PSU itself. In the idle mode we start the system up and wait until it stops accessing the hard disk. Then we use LinX to load the CPU. For a more illustrative picture there are graphs that show how the computer power consumption grows up depending on the number of active execution threads in LinX (both at the default and overclocked system settings). The mainboards on the diagrams are sorted out in alphabetical order.
We often point out that on many mainboards certain power-saving technologies are disabled by default. Therefore, besides power consumption in nominal mode with all default settings, we also measured the power consumption of test systems with all power-saving technologies (including the proprietary ones) manually enabled. The difference between these two tests is usually quite obvious, but in case of MSI Big Bang-XPower II we detected a very slight lowering of the power consumption in idle mode. As we have already mentioned, the CPU works with non-nominal settings in the default mode, but if we reset it to all standard defaults, then Micro-Star’s proprietary power-saving technologies will get disabled. In fact, the board could have been more energy-efficient, but unfortunately, it is unable to show its best because of some BIOS issues.
The following numbers can confirm the point made above: our measurements showed that the board consumed around 95 W in idle mode with default settings and around 92 W with all power-saving technologies manually enabled, although these numbers could be 88 and 85 W respectively. As a result, if we compare the power consumption of our testing participants in idle mode, then MSI Big Bang-XPower II won’t differ that much from all the others, except for uniquely energy-efficient Intel board.
If we turn on all power-saving features, then the power consumption of all mainboards drops, but it practically doesn’t change for MSI Big Bang-XPower II and this is where it starts looking worse than the rest of the competitors, though the difference is not dramatic.
We were forced to overclock the CPU on MSI Big Bang-XPower II mainboard without any changes in the processor Vcore, the obtained results were the lowest, so it is no surprise that its power consumption in this mode is relatively low. However, look how significant the difference is between MSI and ASRock, which overclocked the processor 100 MHz higher? The difference in power consumption is enormous. Obviously, overclocking without changing the CPU Vcore does have its benefits in those cases when low power consumption is key. In fact, a few years ago we dedicated an entire article to the power consumption of overclocked processors, in order to investigate this matter in detail.
Conclusion
All manufacturers try to present their products in the best way. Therefore, you will never come across any mention of the fact that MSI mainboards are the only ones out there that are unable to change the processor Vcore in Offset mode. Therefore, no one will ever tell you that MSI Big Bang-XPower II is so huge that there are very few cases out there that can actually accommodate it. However, it looks like no one really thought about possible incompatibility when they designed MSI Big Bang-XPower II. And that is because this mainboard wasn’t intended for common everyday work inside a system case. It is a platform for extreme overclocking experiments and breaking records, and therefore there is no need for normal dimensions, nominal settings or power-saving modes. In fact, I think this line from one of the recent press-release could be a good illustration of the situation today: “ASRock, one of the three largest mainboard makers…” That’s it: ASRock has already become No.3, and it looks like MSI lost its positions in the top-three category. Of course, there are many ways to attract attention in the overclocker and enthusiast world, but unfortunately, it is becoming increasingly difficult to overlook the fact that despite multiple advantages, the sales of MSI mainboards continue to drop and the company has really hard time maintaining its position in the market. Does it mean that something is wrong with MSI mainboards after all?