How to Test RAM?
RAM or random-access memory is the memory used for storing temporary files and processes on your computer. In other words, RAM is used for storing data and information needed for tasks running in real-time on your PC. It’s like the short-term memory in our brain, while the storage (HDDs and SSDs) is more like long-term memory where we keep our memories. Since it’s used for storing the data needed for the PC to function in real-time, faulty RAM sticks can prevent you from using your PC. Fortunately, performing a RAM test is very easy.
The BSOD (blue screen of death) is a common consequence of having faulty RAM, and if you encounter the infamous screen on a regular basis, you should test your RAM. Reasons for RAM sticks not being stable are aplenty. Overclocked RAM, physical malfunction, motherboard incompatibility, etc.
Today, we’ll explain how to test RAM and which apps you can use. Every method mentioned here is free with one method requiring a USB stick. Let’s begin with a tool found on every Windows machine, the Windows Memory Diagnostic tool.
How to Test RAM With Windows Memory Diagnostic
Windows Memory Diagnostic is an excellent RAM checker tool and the best thing about it is that every PC running Windows has access to it. To launch it, simply type “Windows Memory Diagnostic” in the taskbar search box or just open the Start menu and start typing the phrase.
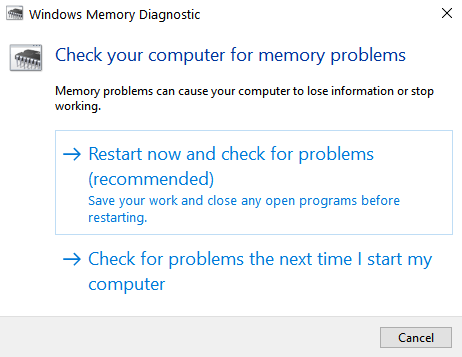
Once the tool launches, just click on the “Restart now and check for problems” button and wait for the PC to reboot and finish with the test. Once the test runs its course, it will stop and the PC will restart again.
Wait for the process to finish (it may take a while), and once the results are in, check for error reports. If there are no errors, great. If there are, you have a faulty RAM stick. Now, let’s cover the process of testing RAM with probably the most popular RAM tester tool, Memtest86.
Testing RAM with PassMark Memtest86
This tool, from PassMark, is pretty old but still the best way to test your RAM stick(s) in detail. The good thing about Memtest86 is that the tool can test RAM on both Windows and Linux machines.
First of all, you have to download the Memtest86 tool. Next, extract the provided zip package in a separate folder. Once finished, get a USB stick and run the imageUSB.exe file, found in the Memtest86 folder.
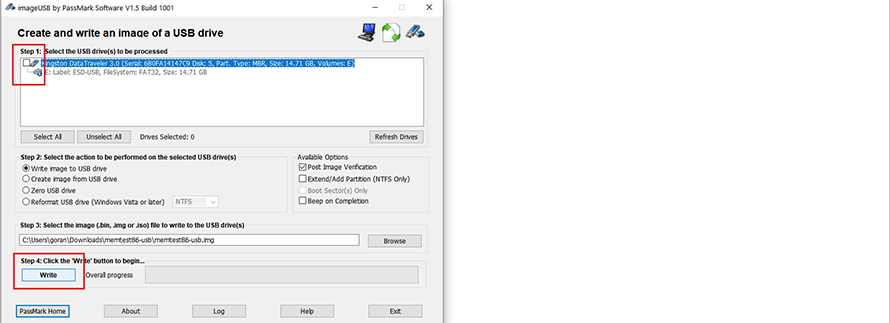
Next, select the USB stick and click on the “Write” button. The process will format your USB stick so make sure it’s empty. Now that you have a USB stick with Memtest86 on it, reboot your computer. Once the computer restarts, launch the BIOS menu or boot order menu by pressing the appropriate button (Del, F12, F2, F8, F10, or some other key, depending on your motherboard).
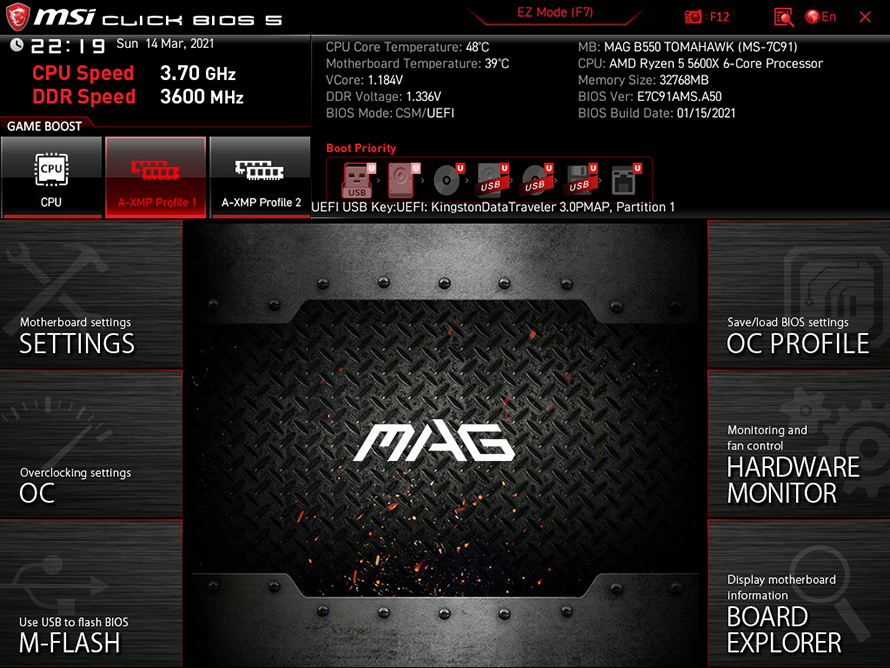
Once inside the BIOS, or inside the boot order menu, select the USB as the primary boot device. Save and exit BIOS and wait for the tool to launch. Once it launches, you’ll see the “config” icon on the Memtest86 boot screen. Click on it, and then click on the “Start Test” button.
Now, you wait. Either for the test to finish or until it shows even a single error. If that happens, your RAM isn’t stable. If the test finishes with zero errors detected, you’re good, at least when it comes to the RAM sticks.
Other Tools For Testing RAM (Prime95; MemTest)
There are other tools for testing RAM, of course, and below you can find how to test RAM with Prime95 and MemTest. The good thing about these apps is that you don’t have to reboot your computer, both can work while the OS is running.
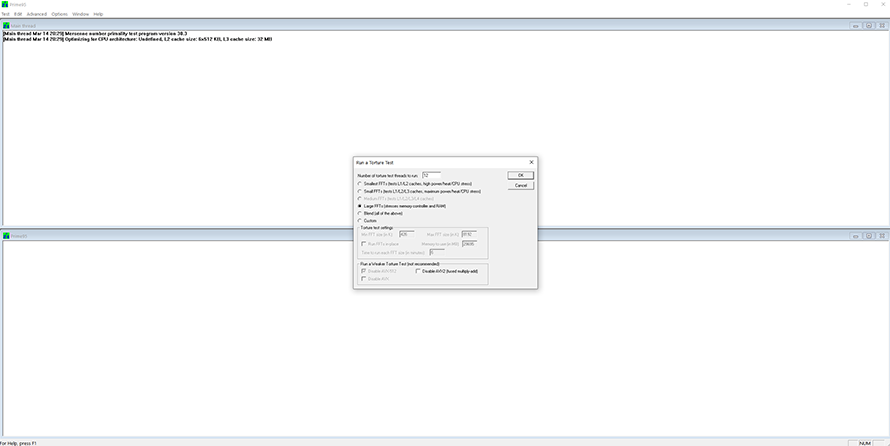
With Prime95, just select Large FFTs test and let the app run through the night or at least for a couple of hours. If you get zero errors, your RAM is fine. If you have an overclocked CPU and RAM, you could also select the “blend” option to test the CPU and RAM at the same time. Just make sure to close all apps before starting the test so that the tool can use all available RAM in your system.
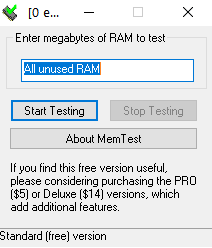
Next, we have MemTest from HCI Design. Just download the app, run the executable, and then click on the “Start Testing” button. The tool uses all available RAM by default so it’s highly recommended to close all apps before the testing commences. Again, it’s best to run the tool overnight. If, for some reason, you can’t do that you should let the test run for at least a couple of hours.
What Causes RAM To Become Unstable?
The most common reason for RAM sticks to become unstable and cause BSODs is applying a too aggressive overclock. Going above safe voltages and frequencies can make a mess out of memory stability. Even the best RAM for gaming, which should easily be overclocked beyond its default XMP profile, could refuse to run at frequencies higher than its XMP profile.
Next, boards that support both DDR3 and DDR4 memory can be quite picky when it comes to RAM sticks. Some will work like a charm, others will cause a BSOD momentarily, or even prevent the PC to boot.
Next, there’s a chance for a memory stick to not work properly on its default XMP profile. In that case, you might consider lowering the XMP frequency and then testing the memory again.
Finally, in some cases, maybe a RAM stick has a physical malfunction.